
Dedicated to the Promotion and Preservation of American Muscle Cars, Dealer built Supercars and COPO cars. |
|
|||||||
| Register | Album Gallery | Thread Gallery | FAQ | Community | Calendar | Become a Paid Member | Today's Posts | Search |


|
|
|
Thread Tools | Display Modes |
|
|
|
#1
 08-27-2008, 09:19 AM
|
||||
|
||||
|
Hey Denis-good to hear from you. All the snow melted
  !!! !!!That's one fast Z your sportin' in your signature block  !! !!
__________________
Sam...  

|
|
#2
09-04-2008, 12:52 AM
|
||||
|
||||
|
A few progress shots of the rear window filler panel getting massaged into place. It's kind of a tricky piece since it forms the bottom of the rear window channel. It's a big water leaker if you get it wrong. It's also impossible to remove without cracking the rear window glass once the glass is installed.
 
|
|
#3
09-20-2008, 03:04 AM
|
||||
|
||||
|
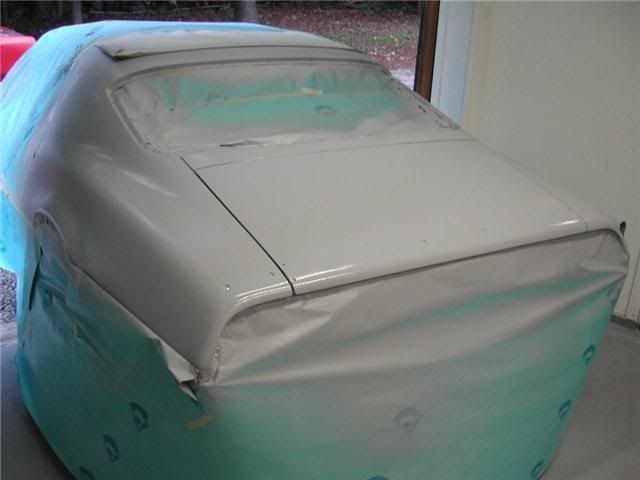
Went out to PA to the bodyshop today to bring the trunk weatherstrip for final height fitting of the lid. Here are the latest shots of the block sanding marathon. Hopefully it will be in total primer in the next week or so.
     
|
|
#5
10-02-2008, 12:24 AM
|
||||
|
||||
|
More work on the tail end. Here is the final fitting of the rear spoiler pieces. They have spent a great deal of time fitting them. The fit at the top edges of the endcaps in relation to the center section always seem to be askew on most 2nd gen F-body cars.
 
|
|
#6
10-02-2008, 12:29 AM
|
||||
|
||||
|
The fitting of the tail lights and fiberglass center section. This is the center piece that people always break because they forget there are two little studs on the thin end sections that run under the taillights. The panel will self-destruct if you try to pry them off without removing the sheetmetal nuts first. This one is an NOS piece I found on ebay.
She looks like an actual car! ...Almost. 
|
|
#7
10-02-2008, 12:35 AM
|
||||
|
||||
|
Rear window trim fitting. Here is the before shot showing the difference in the original aluminum trim piece as compared to the factory squared-off angle of the window frame.
 And the in-progress shot of building up the edge up so it's at least partially resembling the curve of the original trim piece, without the big gap. 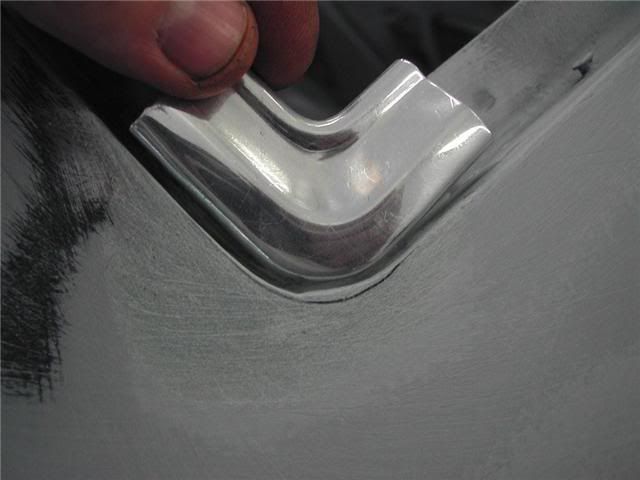
|
|
#10
12-27-2008, 05:01 PM
|
|||
|
|||
|
[ QUOTE ]
A few progress shots of the rear window filler panel getting massaged into place. It's kind of a tricky piece since it forms the bottom of the rear window channel. It's a big water leaker if you get it wrong. It's also impossible to remove without cracking the rear window glass once the glass is installed. [/ QUOTE ] I have been mulling over this statement ever since you posted it 3 months ago, do you mean that your rear window sits on top of the small flange that sticks out of the filler panel that covers the trunk hinge springs?
__________________
 72 SS 350 4spd Camaro 74 Z28 Automatic 80 Z28 4spd 94 Z28 Automatic
|
|
|
|


 Hybrid Mode
