
Dedicated to the Promotion and Preservation of American Muscle Cars, Dealer built Supercars and COPO cars. |
|
|||||||
| Register | Album Gallery | Thread Gallery | FAQ | Community | Calendar | Become a Paid Member | Today's Posts | Search |


|
|
|
Thread Tools | Display Modes |
|
|
|
#1
 06-21-2008, 07:15 AM
|
||||
|
||||
|
heh-heh, heh-heh, Schultzie's got the kung-fu grip... heh-heh!
__________________
Sam...  

|
|
#2
06-24-2008, 03:37 AM
|
||||
|
||||
|
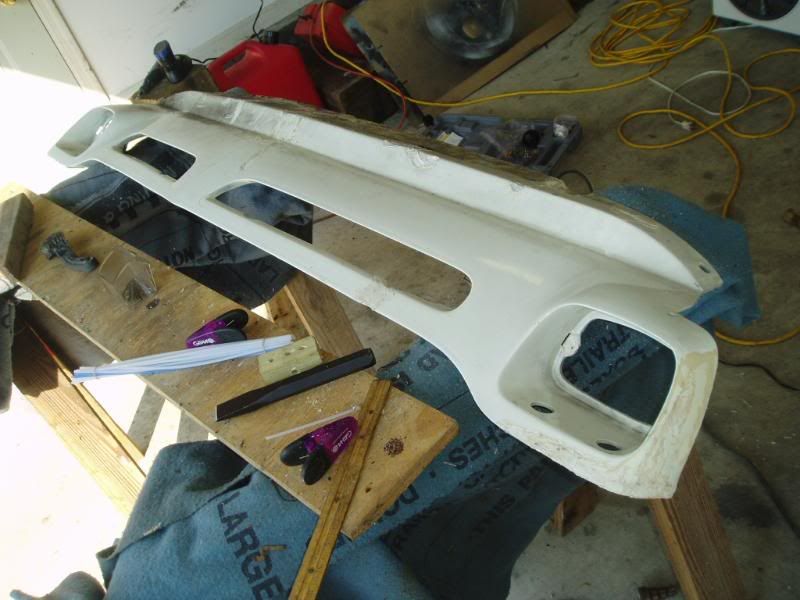
So now that the body is back at the bodyshop and I have nothing left to do, I decided to tackle the destroyed, allegedly unrepairable, original white polyethylene valance from the car.
All of the mounting points were not only broken but completely blown out and missing. If that wasn't enough, the upper support bar was broken and the center section was cracked in half with only about two inches still connecting the two halves together. Oh, and the parts that weren't broken were melted and warped from catching fire during the previous owners carb fire/flambe/barbeque fest. Here it is:  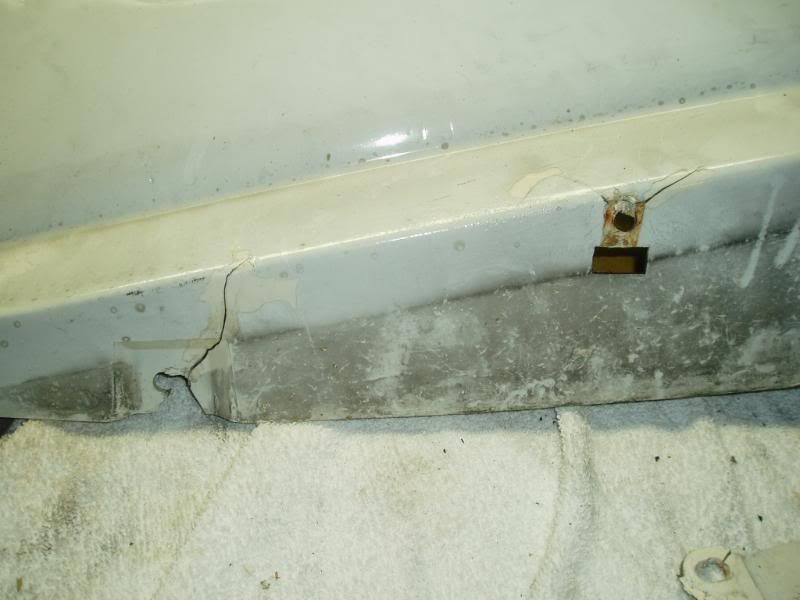 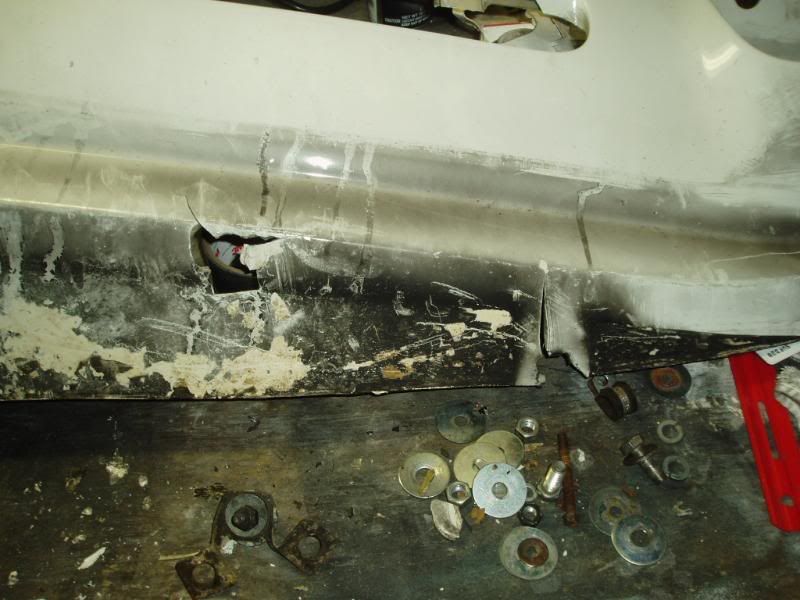  
|
|
#3
06-24-2008, 03:43 AM
|
||||
|
||||
|
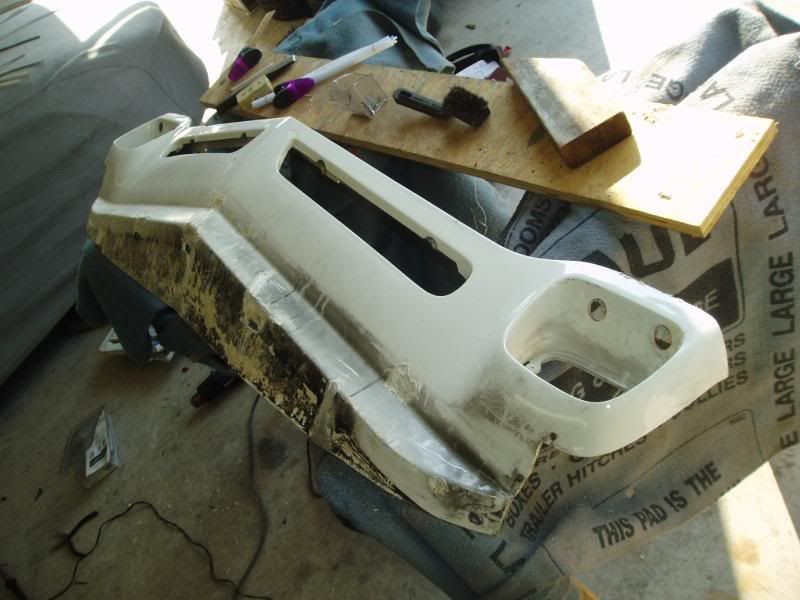
Like a triage attempt on a car crash victim, I had to stabilize the patient before I could even move it out of the emergency room (the basement) to surgery (the garage).
I got out the trusty plastic welder and did a fast, rough melt to get to main fracture and the upper support bar stabilized. By the time I got the welding done there was only one inch of plastic still holding the two sides together: By the way, most of the black area is not paint, but soot and fire damage from the original burning plastic! Only the upper portion had some flat black spraybomb paint on it.    
|
|
#4
06-24-2008, 05:11 AM
|
||||
|
||||
|
Once the rough repair was done so that the valance could be moved without cracking further, I moved it to the garage and started the Franken-Valance process.
Here I used some white polyethylene welding rods to fill in the missing areas in the center fracture. I just kept melting and massaging in more polyethylene rods till the area was filled. 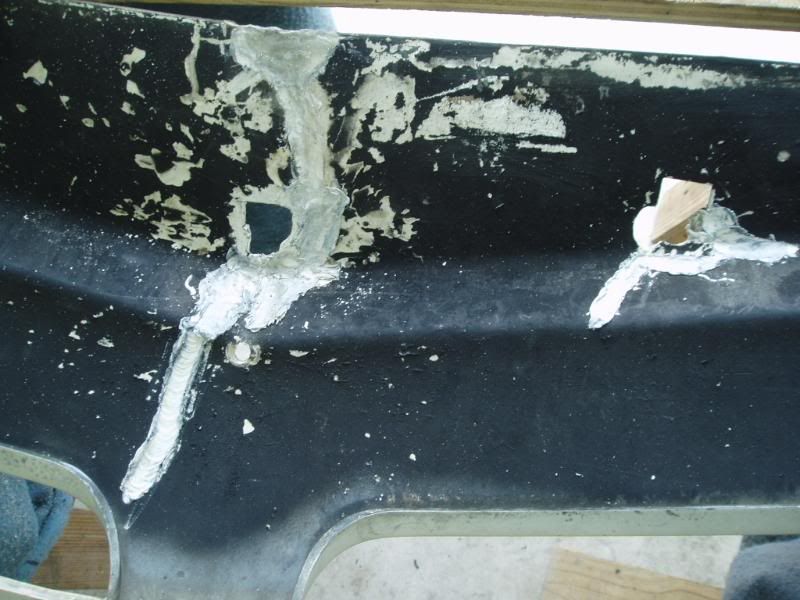 
|
|
#5
06-24-2008, 05:18 AM
|
||||
|
||||
|
Here is the right mounting flange area. It was shattered completely. I had some of the parts so I used a Dremel tool and ground the edges clean and beveled them so I could get some good weld/heat penetration.
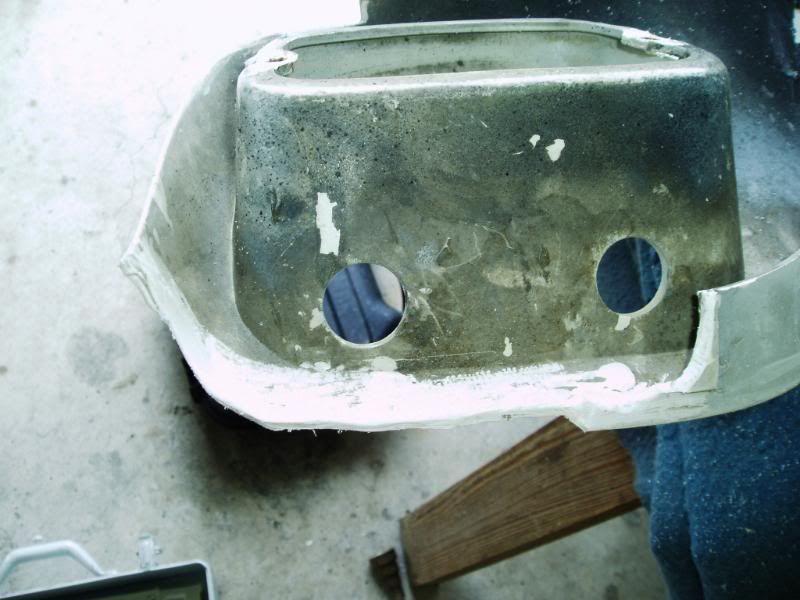 And here it is after welding and filling in extra material to make a rough estimation of the second mounting lug. Later sanding and heating will get the shape more accurately finished.  And here is the left side, during and after  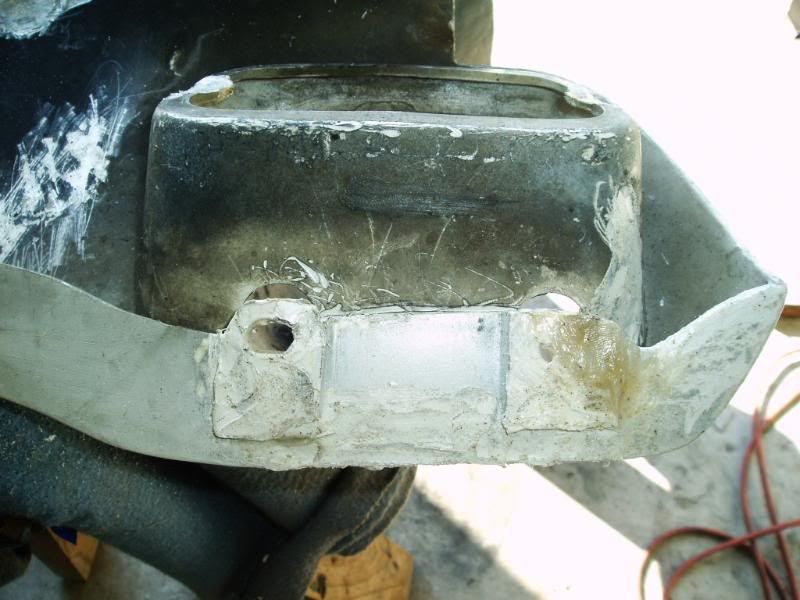
|
|
#7
06-24-2008, 06:41 AM
|
||||
|
||||
|
Steve MacGyver
 great work !! 
|
|
|
|


 Hybrid Mode
