
Dedicated to the Promotion and Preservation of American Muscle Cars, Dealer built Supercars and COPO cars. |
|
|||||||
| Register | Album Gallery | Thread Gallery | FAQ | Community | Calendar | Become a Paid Member | Today's Posts | Search |


|
|
|
Thread Tools | Display Modes |
|
#501
 12-30-2007, 08:46 PM
|
||||
|
||||
|
One of the front flares was actually melted and burned from the prior owner's carb fire that got out of control. You can see how warped the edge was.
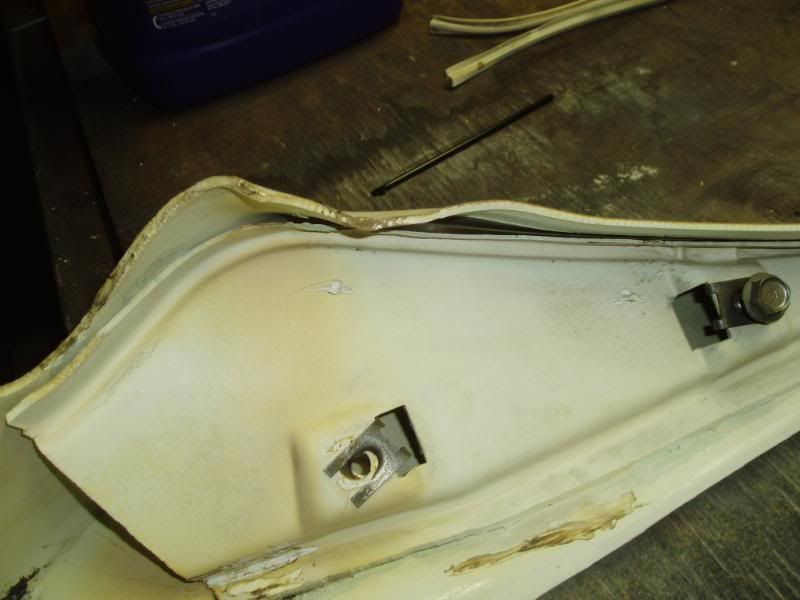 For that repair I used a heat gun and heated the area up til it was soft and then squeezed the area between two wooden rulers to straighten it until it cooled.  It took a few tries but eventually flattened out.  
|
|
#502
12-30-2007, 08:50 PM
|
||||
|
||||
|
This is another use for the heat gun: you can weld plastic with it. This is the attachment for plastic welding. You can insert the plastic welding rod into the hole at the top of the tip or you can use it without the rod as in this photo and just melt the pieces together. It looks like this flare was repaired once before since it has a 1973 red inner brace glued to it. Their glue didnt hold very well so I welded it to the flare and later followed up with a liberal smearing of 2-part epoxy.

|
|
#503
12-30-2007, 08:57 PM
|
||||
|
||||
|
Here is the formerly melted front flare:
 An here it is compared to it's twin:  I also used the heat gun to reinforce cracked areas on the lower part of the melted front flare. Once that was done I used the 2-part epoxy to glue the back section back to the flare where it separated from the fire. I used my patented "flare rentention fixture" to get the pieces in the right position so the epoxy could harden overnight. 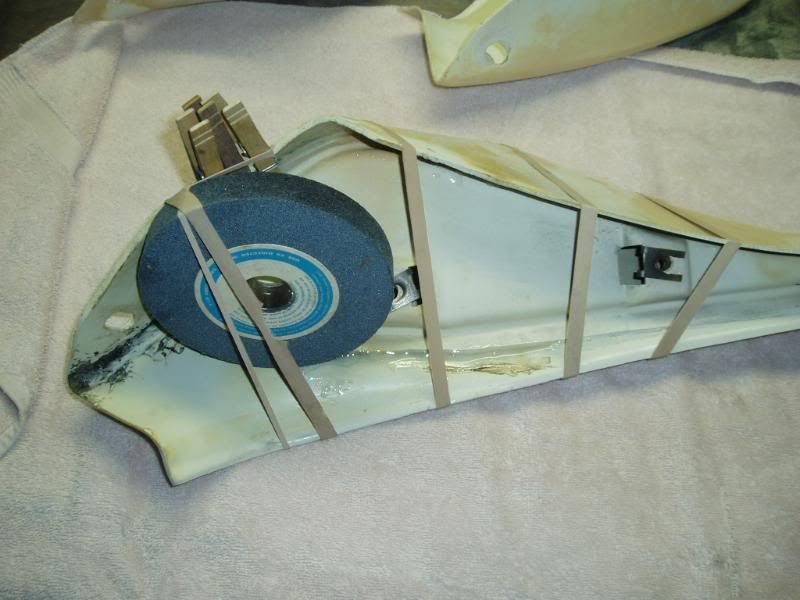
|
|
#505
12-30-2007, 09:15 PM
|
||||
|
||||
|
And here are the finished rear flares. They were in a little better shape with just some cracks near the upper and lower mounting screw positions.
  I used the 2-part paintable/sandable epoxy to reinforce the lower mounting areas as well as the front and back sides of all of the upper mounting positions on all four flares. It sands very easily once it hardens overnight. This stuff really helps with the rigidity of the flares and should prevent future cracks from starting at the screw holes. I used a liberal slathering of it at all of the originally glued areas on the back sides as well, since the factory glue probably wasn't up to the task of holding the parts together after 35 years.  
|
|
#506
12-30-2007, 09:42 PM
|
||||
|
||||
|
Nice job Mac. Your tutorial is inspirational.

__________________
Sam...  
|
|
#507
12-30-2007, 11:02 PM
|
||||
|
||||
|
Has to be the best step by step restoration thread this site has ever seen.
 Just brilliant!
__________________
1969 Z28 1972 Corvette
|
|
#508
12-30-2007, 11:05 PM
|
||||
|
||||
|
Thanks for the moral support!
 And here's the remnants of that original spoiler. It looks like it took the brunt of the flames as the gas poured out the air cleaner snorkel down the radiator shroud and onto the radiator support. Here's the original "crime scene" photo: 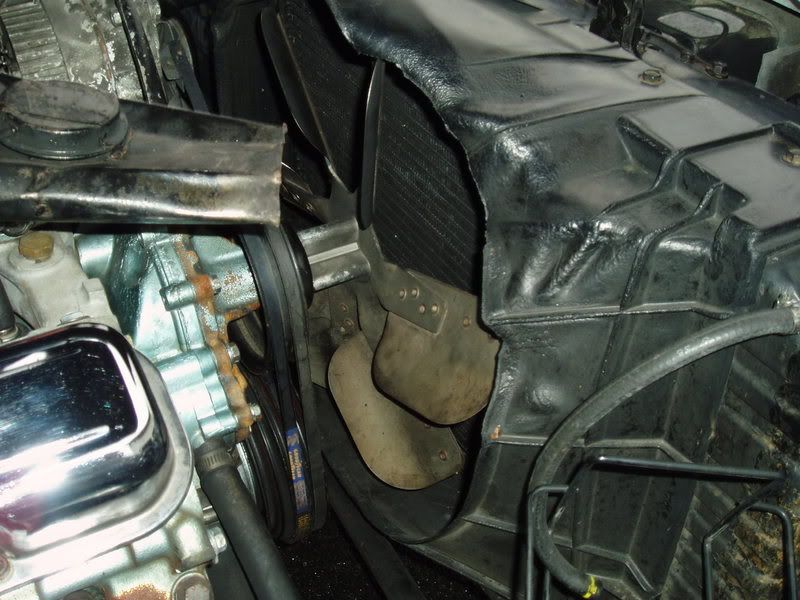 and here's the spoiler. It's just a little too far gone for me. I can always put it on ebay as a "nearly NOS piece."  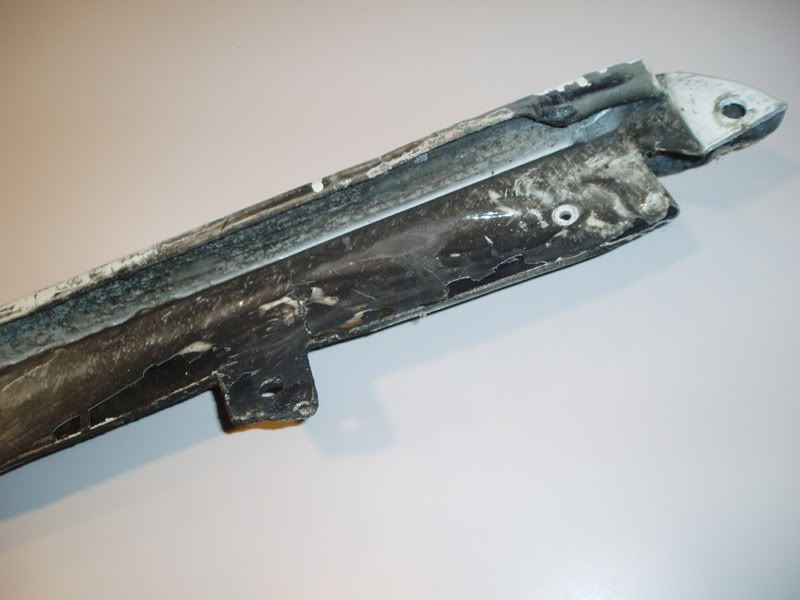 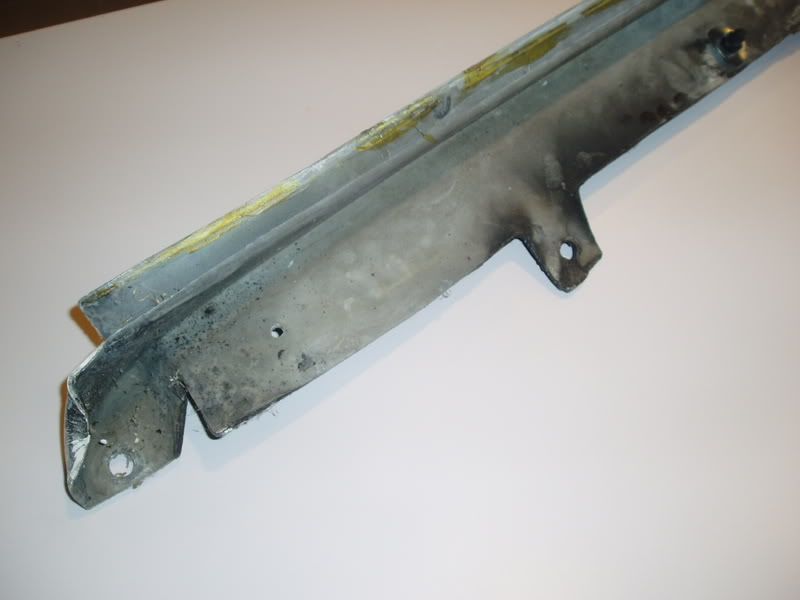 
|
|
#510
01-04-2008, 01:13 AM
|
||||
|
||||
|
I have been wondering what to do about the scratched up anodized aluminum window trim on the front and back windows. I figured I have no problem with polishing them if I could get the old scratched anodized finish off somehow. So, I did a little searching and found the following method worked pretty well. It seems that using Sodium Hydroxide (common household powdered lye/drain cleaner) is what most people recommend. I also stumbled across something that worked much better for the initial heavy stripping...what is it? Why the same old "Purple Stuff" of course! I happened to place a couple of trim pieces in the Purple Stuff just to clean them off and after a few minutes the anodizing started crusting up and bubbling off. So, I did what most people would then do: I read the ingredients on the Purple Stuff jug and low and behold it contains Sodium Hydroxide. It must be in some heavy concentration becuase it worked much faster than lye mixed in water.
Here is what I set up to do the larger pieces: a kiddy pool lined with heavy 6-ply plastic sheeting from Home Depot. I filled it with about 8 gallons of water and then added one can of powdered Drano. It takes about 2 hours before any progress is observed. 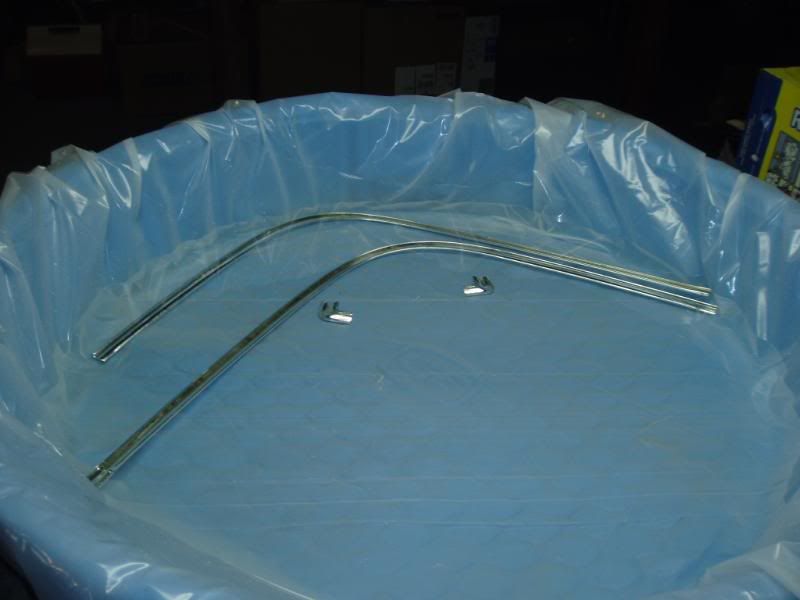
|
|
|
|


 Linear Mode

