
Dedicated to the Promotion and Preservation of American Muscle Cars, Dealer built Supercars and COPO cars. |
|
|||||||
| Register | Album Gallery | Thread Gallery | FAQ | Community | Calendar | Become a Paid Member | Today's Posts | Search |


|
|
|
Thread Tools | Display Modes |
|
|
|
#2
 12-28-2007, 05:59 AM
|
||||
|
||||
|
Yeah, I think that's a record or something: that is the first time I have actually used something for it's intended purpose, unintentionally of course.
 
|
|
#3
12-30-2007, 08:40 PM
|
||||
|
||||
|
It took several days of soaking to get all of the white paint off of the other flares. The purple stuff doesn't seem to touch primer-surfacer layers so that took a lot of 80 grit sandpaper and a Black&Decker Mouse sounder. That stuff is hard as rock. That is the reason the flares still have a yellowish tint to the white plastic. I had to get most of that layer off to see where the stress cracks were. I also found some more serious cracks from impact damage on one of the flares.
Here is a close up of one of the stress cracks in the lower front spoiler:  I ended up fixing these by using the plastic welder and smearing at across the cracks perpendicular to the direction of the crack. This melted the plastic back together. It took a while to get all the cracks welded up. The marks in the lower portion of the flare are from the stress crack remelting process.  The black spots are where I used black ABS plastic rod to weld the majpr impact damage cracks back to gether. Once it cools it is sanded down with 80 grit.
|
|
#4
12-30-2007, 08:46 PM
|
||||
|
||||
|
One of the front flares was actually melted and burned from the prior owner's carb fire that got out of control. You can see how warped the edge was.
 For that repair I used a heat gun and heated the area up til it was soft and then squeezed the area between two wooden rulers to straighten it until it cooled.  It took a few tries but eventually flattened out. 
|
|
#5
12-30-2007, 08:50 PM
|
||||
|
||||
|
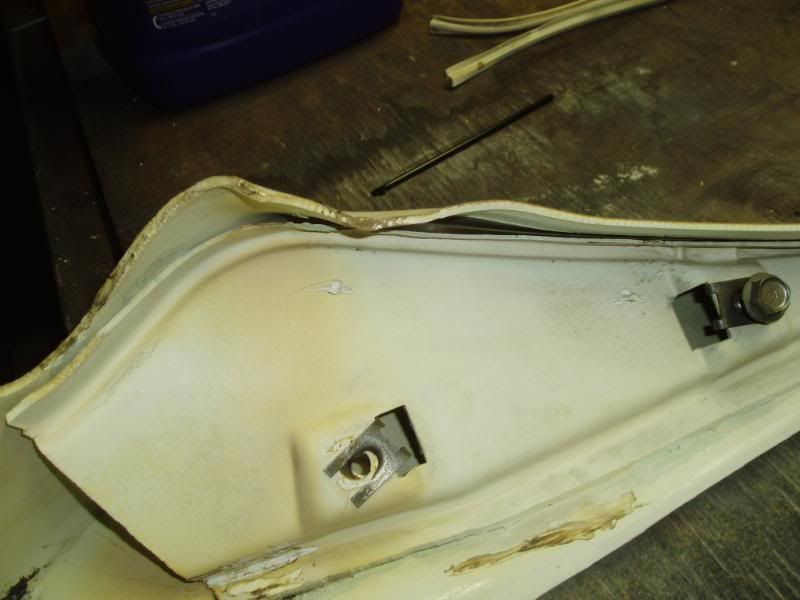
This is another use for the heat gun: you can weld plastic with it. This is the attachment for plastic welding. You can insert the plastic welding rod into the hole at the top of the tip or you can use it without the rod as in this photo and just melt the pieces together. It looks like this flare was repaired once before since it has a 1973 red inner brace glued to it. Their glue didnt hold very well so I welded it to the flare and later followed up with a liberal smearing of 2-part epoxy.

|
|
#6
12-30-2007, 08:57 PM
|
||||
|
||||
|
Here is the formerly melted front flare:
 An here it is compared to it's twin:  I also used the heat gun to reinforce cracked areas on the lower part of the melted front flare. Once that was done I used the 2-part epoxy to glue the back section back to the flare where it separated from the fire. I used my patented "flare rentention fixture" to get the pieces in the right position so the epoxy could harden overnight. 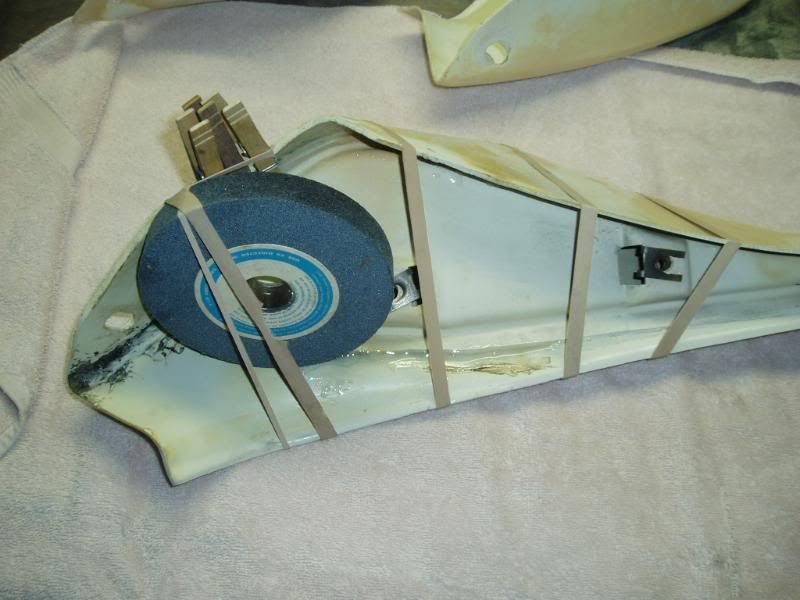
|
|
#8
12-30-2007, 09:15 PM
|
||||
|
||||
|
And here are the finished rear flares. They were in a little better shape with just some cracks near the upper and lower mounting screw positions.
  I used the 2-part paintable/sandable epoxy to reinforce the lower mounting areas as well as the front and back sides of all of the upper mounting positions on all four flares. It sands very easily once it hardens overnight. This stuff really helps with the rigidity of the flares and should prevent future cracks from starting at the screw holes. I used a liberal slathering of it at all of the originally glued areas on the back sides as well, since the factory glue probably wasn't up to the task of holding the parts together after 35 years.  
|
|
|
|


 Hybrid Mode
