
Dedicated to the Promotion and Preservation of American Muscle Cars, Dealer built Supercars and COPO cars. |
|
|||||||
| Register | Album Gallery | Thread Gallery | FAQ | Community | Calendar | Become a Paid Member | Today's Posts | Search |


|
|
|
Thread Tools | Display Modes |
|
|
|
#2
 08-30-2007, 05:47 AM
|
||||
|
||||
|
Here is the finished product. The wheel looks just like the original piece and is just as flexible and soft as when it came from the factory 35 years ago.
So here it is, after about a week of work and approximately $40 in materials, sitting on top of my wife's prized antique, ceramic sugar bowl:  With a little leather preservative applied (after this photo was taken), it brought the sheen up to what the original was supposed to look like. I'd rather have it too flat than too glossy, as the wheel surface will shine up with age and use. (That's another old modeler's trick: if you want to duplicate black leather upholstery on a model car, paint it flat black and then once dried, buff the area with your fingers to bring up the shine  ) )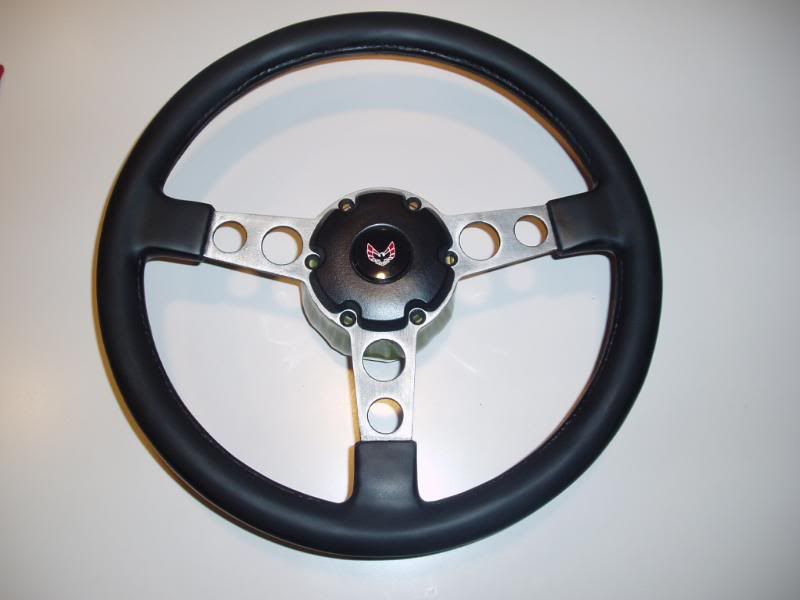  
|
|
#5
08-30-2007, 08:12 AM
|
||||
|
||||
|
That is awesome stuff Steve! A true inspiration for the do-it-yourself-er...

__________________
Follow me on Instagram: https://www.instagram.com/mbcgarage/
|
|
#6
08-30-2007, 09:04 AM
|
||||
|
||||
|
Holy Cow Mac
 !!!! You've done it again. Thanks for the inspiration. !!!! You've done it again. Thanks for the inspiration.
__________________
Sam...  
|
|
#8
08-31-2007, 07:28 AM
|
||||
|
||||
|
Since the guys over at the Performance Years website thought the spokes were a little too light when compared to some low mileage reference photos, I modified the washing technique a little, once again resorting to my old military modeler days. I employed another wash technique using my wife's black acrylic stenciling paint and water and the same foam brush over the prior enamel washing. I applied about 15 coats over the course of the afternoon and then, once it dried, sprayed some clear Rustoleum spray paint over it from about 3 feet away so it was almost dry when it hit the wheel rims.
The comparson photo used for color reference purposes was from a late 71 Formula.  
|
|
#9
09-01-2007, 08:24 PM
|
||||
|
||||
|
Being the tinkerer that I am, I decided that the finish on the rubber rim was a little too flat so I used a can of the black Plasti-Dip Rubber Coating Spray and sprayed several coats on the rim. That stuff is amazing. It leaves a nice rubbery semi-shiny finish on the surface that duplicates the original foam rubber finish perfectly, and I had no problems with spraying the coats immediately after one another even though the can says wait 30 minutes between coats. I think they mean if you stop spraying, and let it sit for more than a minute, it may craze the previous layer. So, I ended up just spraying continuously to fully cover all surfaces of the rim. I then just left it to sit overnight. Here is the result from this morning.
  
|
|
|
|


 Hybrid Mode
