
Dedicated to the Promotion and Preservation of American Muscle Cars, Dealer built Supercars and COPO cars. |
|
|||||||
| Register | Album Gallery | Thread Gallery | FAQ | Community | Calendar | Become a Paid Member | Today's Posts | Search |


|
|
|
Thread Tools | Display Modes |
|
|
|
#1
 08-30-2007, 05:24 AM
|
||||
|
||||
|
This is after about three days of reapplication, and resanding with 120 grit. I then sprayed it with several coats of flexible urethane primer and sanded some more with a mini-orbital sander and primed it some more. I also sanded the incorrect black paint off the spokes. This area should be anodized a gunmetal color, not painted (more on that later).
  
|
|
#2
08-30-2007, 05:27 AM
|
||||
|
||||
|
After I was satisfied with the smoothness and lack of flaws I used Duplicolor flat black vinyl paint and sprayed a bunch of coats on the wheel, hand wetsanding with 400 grit after each one to get the wheel perfectly round.
 
|
|
#3
08-30-2007, 05:38 AM
|
||||
|
||||
|
The big trick was trying to duplicate the original gunmetal anodized finish on the spokes. Since there is no way to reanodize the metal on the wheel I harkened back to my military modeling days as a kid when I used to build WWII armor dioramas for a local hobby shop and would "weather" the tanks and gear to make them look realistically "battle weary."
I used one of the old tricks of the trade, which is to do a light paint wash of the area. I sprayed a two second burst of flat black into a cup and then added a little enamel reducer. (Be very careful: as this stuff dripped on the foam wheel will ruin the finish). I used a foam brush and lightly washed the blackened reducer over the metal areas. As it dried I would daub it with a crumpled paper towel to get rid of any brush marks. I did this about 20 times. You have to be patient as each application removes about half of the previous application as the enamel reducer dissolves the earlier paint. This process worked very well as it brought out the original brushed finish in the metal. 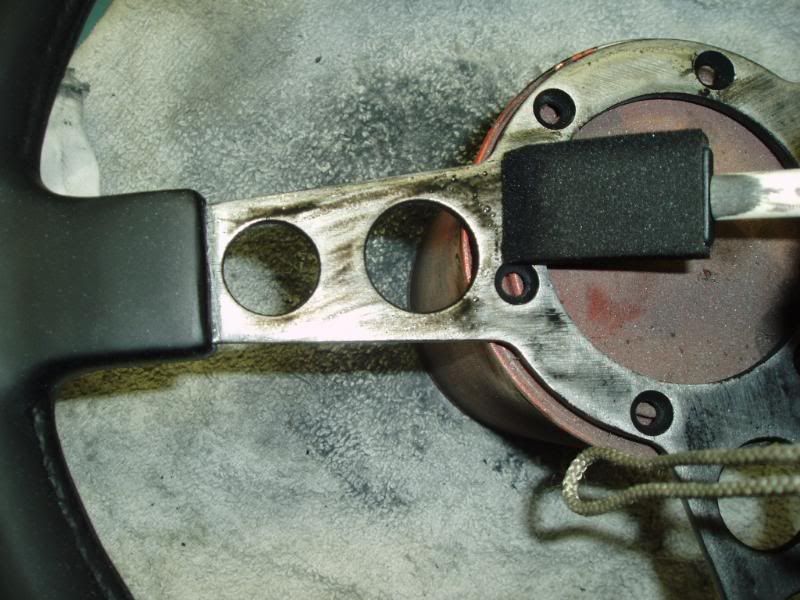 
|
|
#5
08-30-2007, 05:47 AM
|
||||
|
||||
|
Here is the finished product. The wheel looks just like the original piece and is just as flexible and soft as when it came from the factory 35 years ago.
So here it is, after about a week of work and approximately $40 in materials, sitting on top of my wife's prized antique, ceramic sugar bowl:  With a little leather preservative applied (after this photo was taken), it brought the sheen up to what the original was supposed to look like. I'd rather have it too flat than too glossy, as the wheel surface will shine up with age and use. (That's another old modeler's trick: if you want to duplicate black leather upholstery on a model car, paint it flat black and then once dried, buff the area with your fingers to bring up the shine  ) )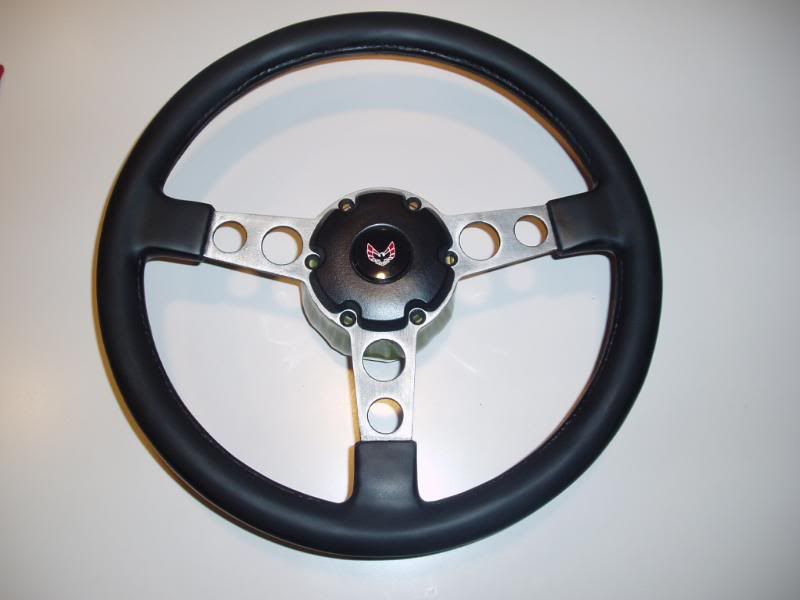 
|
|
#9
08-31-2007, 07:28 AM
|
||||
|
||||
|
Since the guys over at the Performance Years website thought the spokes were a little too light when compared to some low mileage reference photos, I modified the washing technique a little, once again resorting to my old military modeler days. I employed another wash technique using my wife's black acrylic stenciling paint and water and the same foam brush over the prior enamel washing. I applied about 15 coats over the course of the afternoon and then, once it dried, sprayed some clear Rustoleum spray paint over it from about 3 feet away so it was almost dry when it hit the wheel rims.
The comparson photo used for color reference purposes was from a late 71 Formula.  
|
|
|
|


 Hybrid Mode
