
Dedicated to the Promotion and Preservation of American Muscle Cars, Dealer built Supercars and COPO cars. |
|
|||||||
| Register | Album Gallery | Thread Gallery | FAQ | Community | Calendar | Become a Paid Member | Today's Posts | Search |


|
|
|
Thread Tools | Display Modes |
|
#381
 06-15-2007, 04:24 AM
|
||||
|
||||
|
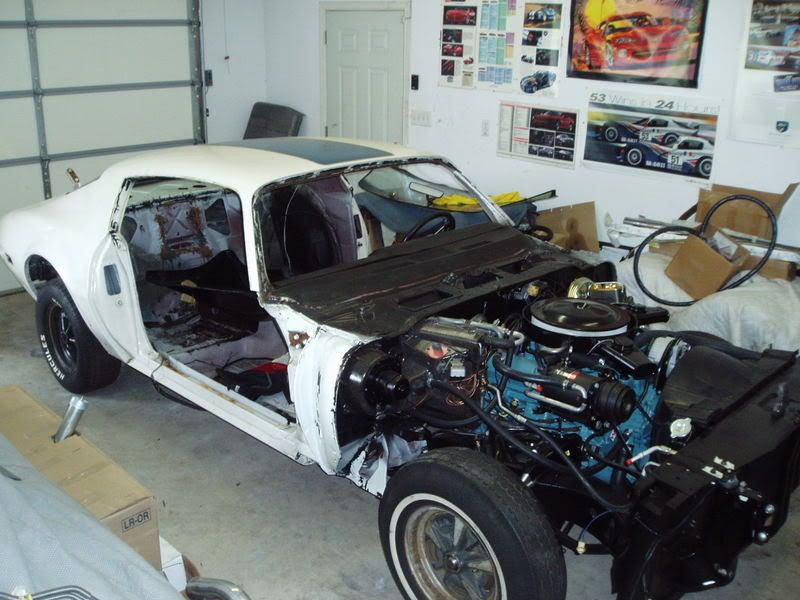
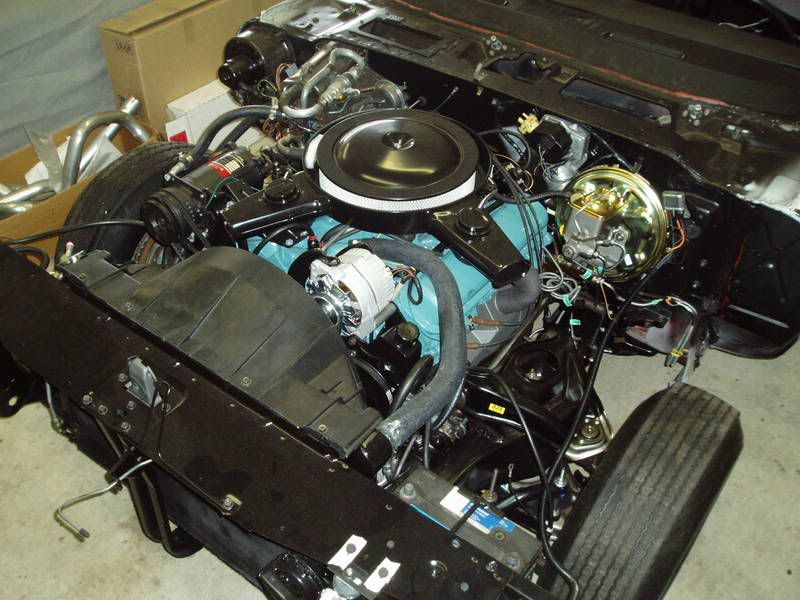
This is the current state of the rest of the car. She starts, runs, idles, etc, just waiting for the body man to finish the front clip and away she goes.
    With careful cleaning, I was even able to save the original stamp dates on the a/c POA valve. September 29 1971, for a 12A (first week December 1971) build date car. 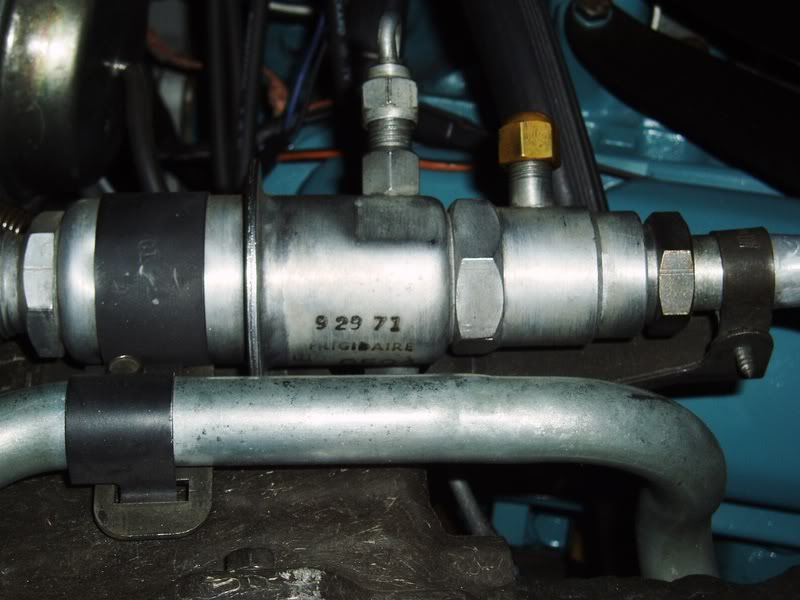 
|
|
#382
06-15-2007, 06:09 AM
|
|||
|
|||
|
Steve I have enjoyed this thread so much I have mixed emotions as the car nears completion. And I doubt it looked that good new.
I think you need another one.
__________________
Learning more and more about less and less...
|
|
#383
06-15-2007, 06:20 AM
|
||||
|
||||
|
I have the same feeling: I guess for everyone following this saga, it's like being an expectant father waiting for the birth of his first child. Boy, these damn labor pains are killin' me!
 I looked at the number of hits on this post and it's at 42,000 today. Is that a new record or something?
|
|
#384
06-15-2007, 06:25 AM
|
||||
|
||||
|
If not it's damn close! I, too Steve...have enjoyed every minute of your McGyver like approach to the restoration. Amazing what human ingenuity can do!
 
__________________
Bruce Choose Life-Donate!
|
|
#385
06-16-2007, 01:26 AM
|
||||
|
||||
|
I am new at this technology stuff, so here goes. This is 15 seconds of video from a phone, of the 455HO running (it's all stock, I promise
 ) )https://www.youtube.com/watch?v=ywG29qPDe-U https://www.youtube.com/watch?v=M3rv-KjgZO8
|
|
#386
06-16-2007, 05:26 PM
|
|||
|
|||
|
[ QUOTE ]
I am new at this technology stuff, so here goes. This is 15 seconds of video from a phone, of the 455HO running (it's all stock, I promise )https://www.youtube.com/watch?v=ywG29qPDe-U https://www.youtube.com/watch?v=M3rv-KjgZO8 [/ QUOTE ] The car sounds great, these HO's have a definate 'bark' to them when you goose the throttle. Steve, which cam did you use? Mike
|
|
#388
06-21-2007, 05:08 AM
|
||||
|
||||
|
Progress on the driver's side fender. While it was completely rust-free, it had a bizarre series of dents and stretches in the metal that were pretty darn near impossible to massage out without a great deal of body filler. ENOCH ended up cutting out the stretched, damaged metal and welding in a patch panel for that square section. Here is some of the initial work:
Before: 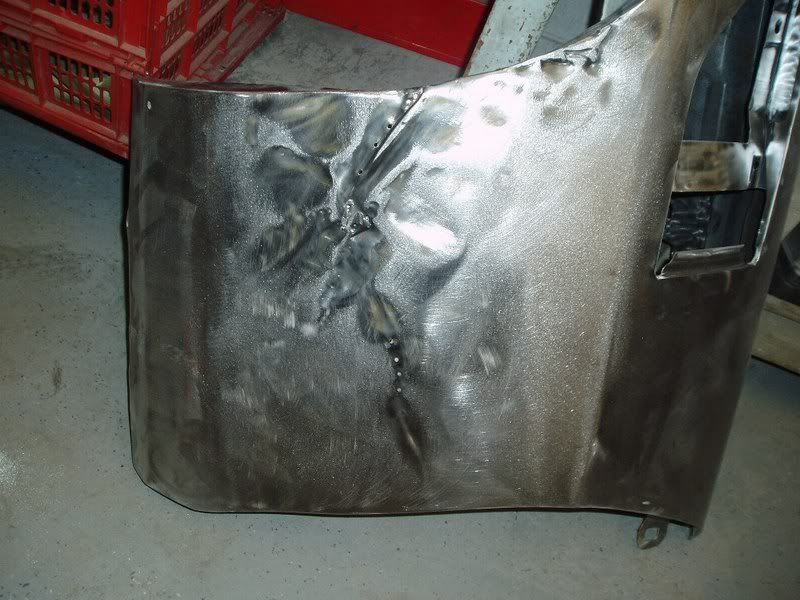 Cutting the patch panel:  Cutting out the mangled fender section:  The incredible visible fender. Note the condition of the internal bracing behind the cut. You'll never find that on an East Coast car!  Test fitting the patch panel:  Hey, maybe we can replace the patch panel area with one of those Motion Performance reverse Corvette fender gill setups.
|
|
#389
06-29-2007, 05:42 AM
|
||||
|
||||
|
Just got the rear bumper back from TriCity Plating. They did a really nice job on the rechroming. The finish on the outer surface is flawless: no scratches, dings, waves, peels, etc. I used them before for my Charger and was very pleased - I bought a Charger rear bumper from them at Carlisle back in 2004 that they had in stock. This time they didn't have any 70-73 Firebird bumpers so I brought them my core at Spring Carlisle and they did it in 8 weeks as promised. Price was reasonable at $300 including return shipping.
Here is the before shot. The inside of the bumper had been the victim of a very poor replating which had delaminated/peeled and the rusted. I removed all the brackets and stripped and repainted them while TriCity had the bumper.  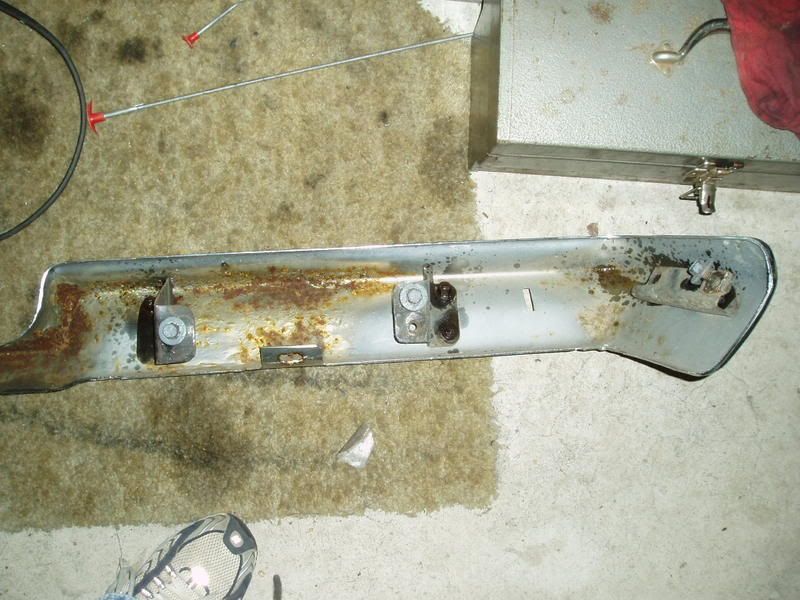 Here's the finished piece. The black smudges on the back are actually black RTV silcone sealer. I make it a habit of smearing a line of it around the perimeter of the back of the bumper. It really helps to prevent any future problems with the plating lifting on formerly rusted surfaces, especially the sharp edges, if you keep all moisture away from the area. Since the backside was heavily pitted from the previous bad prep and rust, this should hold it for the next 20 years or so.   Here's the outer surface. I dug through my old collection of bumper bolts and found 10 original flat capped bolts. I polished them up nicely and installed them on the bumper The bolts they sell today just aren't the same in terms of the way the caps "dome out". They should be nearly flat to be correct. (sorry about the glare and smudges -its nearly impossible to get a good photo of chrome) 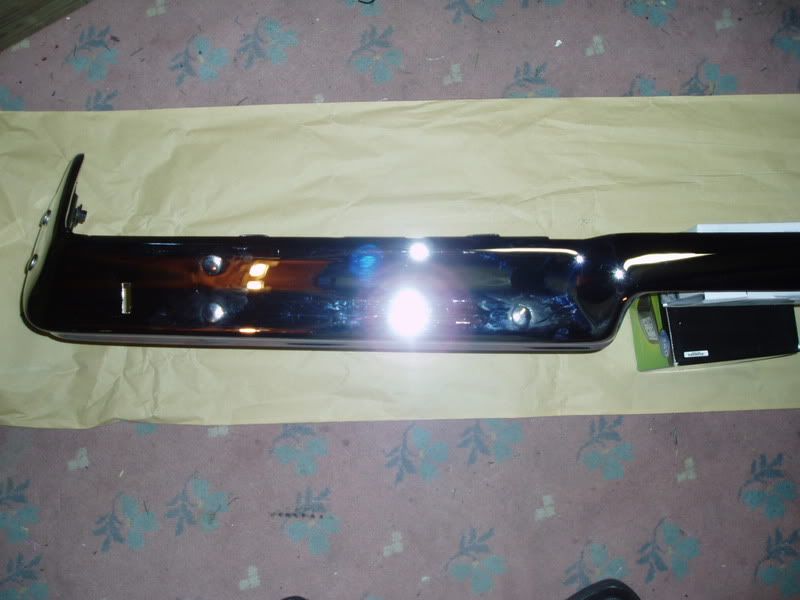 
|
|
#390
07-07-2007, 07:29 AM
|
||||
|
||||
|
I've been playing with the original console in the car. The four speed consoles are extremely rare. To add to that they were all made of this extremely fragile vinyl covered plastic that cracked in a million pieces the first time your girlfriend tried to sidle up to you in a romantic ferver. The one in this car seems to have been from a den of inequity judging by the dozens of fractures in it.
While it looks like hell from underneath, from the top it looks pretty good once I dyed it with the correct flat black vinyl dye. The secret to glueing these things is to use a 2-part plastic welding epoxy and a bracing material: either flat plastic stock or wooden paint stirrers. Actually, the paint stirrers worked great for the areas needing more structural intergrity. I just coated the area with the 2-part plastic epoxy and then clamped the wood in place and covered the repair in more of the epoxy. It's sturdy enough now to hold handle a Brittney and K-Fed, Smokey and The Bandit drive-in reunion date.  The repairs:  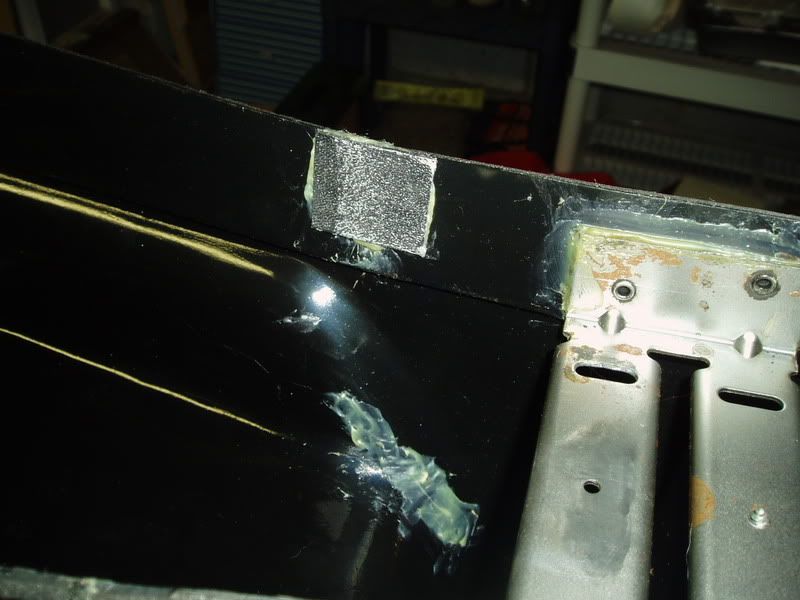
|
|
|
|


 Linear Mode

