
Dedicated to the Promotion and Preservation of American Muscle Cars, Dealer built Supercars and COPO cars. |
|
|||||||
| Register | Album Gallery | Thread Gallery | FAQ | Community | Calendar | Become a Paid Member | Today's Posts | Search |


|
|
|
Thread Tools | Display Modes |
|
|
|
#1
 05-01-2007, 05:54 AM
|
||||
|
||||
|
The stencil is more like a decal with cutouts in it. You clean the tank with lacquer thinner and carefully peel the front off of the decal and place it one the tank. Then use a squeegy and make sure it is firmly attached. You then carefully peel the backing off making sure all the centers of the letters stay on the tank.
 
|
|
#2
05-01-2007, 06:01 AM
|
||||
|
||||
|
The stencil was close but it did not have the cutout for the day, only the month and year. (They accidentally sent me the wrong year "72" instead of "71"). I ended up taking a photo of a ruler next to the decal and printing out the correct scale photo on my printer. I then used an exacto knife and cut out the "20" and the "71" from the photo. I then cut out a spot for the month in the center of the stencil and applied both sets of numbers.
 
|
|
#3
05-01-2007, 06:02 AM
|
||||
|
||||
|
Next, I masked off the tank and sprayed the stencil lightly with several coats of flat black.
The final result duplicated the original tank stencil perfectly.  
|
|
#4
05-01-2007, 07:48 AM
|
||||
|
||||
|
Looks great Steve. Dedication and attention to detail pays off.
 Rick
__________________
Rick Nelson Musclecar Restoration and Design, Inc (retired) www.musclecarrestorationanddesign.com https://www.youtube.com/watch?v=62r-6vgk2_8 specialized in (only real) LS6 Chevelle restorations
|
|
#5
05-01-2007, 05:06 PM
|
||||
|
||||
|
Here's another bit of useless trivia for everybody. The date on the original gas tank is 12-20-1971. According to the cowl tag, the car was scheduled to be built the first week of December 1971 (12A). It was completed and shipped on 12-21-1971 to Reliable Pontiac in Roseville, California. How's that for "just-in-time" parts delivery at the plant?
|
|
#6
05-02-2007, 04:27 AM
|
||||
|
||||
|
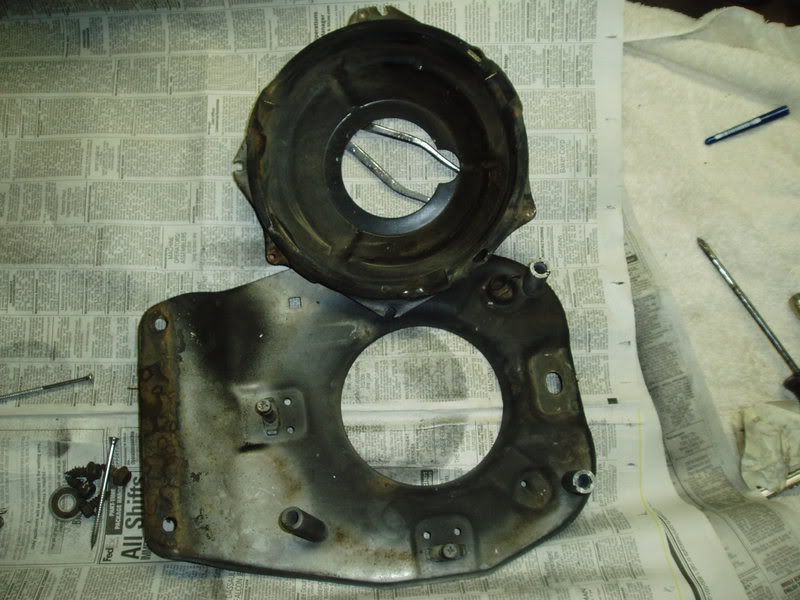
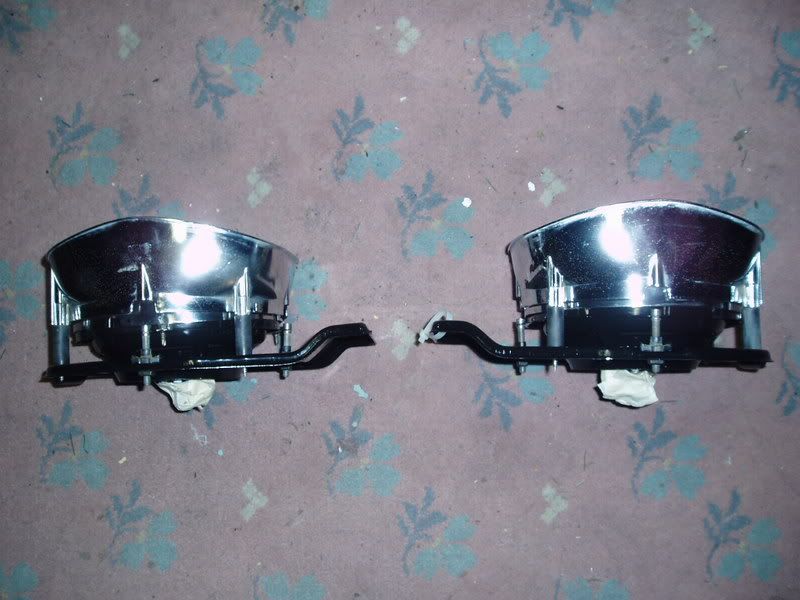
I have been slowly refinishing the headlight assemblies over the past week. Nothing high tech: I just disassembled one of them, took a lot of photos of where the little clips and attachment points were installed and then used paint stripper to completely strip the bucket and the backing plate. I soaked the stripped pieces in the derusting liquid to get rid of the underlying specks of rust and then I repainted the pieces in gloss black. I then reassembled the left side and put all the little clips and springs back in place. Once that was finished I tackled the right side. The adjustment points have four possible positions, only one of which is correct for the particular side of the car. The headlight bezels also have four possible mounting positions. So if you dont watch what you are doing you have 16 possible combinations, only one of which is correct (according to my 5th grader who is definitely smarter than me) It's like doing drum brakes: always leave one side untouched so you have a roadmap of where everything goes.
|
|
|
|


 Hybrid Mode
