
Dedicated to the Promotion and Preservation of American Muscle Cars, Dealer built Supercars and COPO cars. |
|
|||||||
| Register | Album Gallery | Thread Gallery | FAQ | Community | Calendar | Become a Paid Member | Today's Posts | Search |


|
|
Thread Tools | Display Modes |
|
#10
 02-18-2023, 01:16 AM
|
|||
|
|||
|
I was backordered on some of the necessary suspension parts (lower a-arms were one of the big issues). Because of this, I decided to press forward building other parts of the car -- in particular, the interior.
One of the first jobs I did was to modify the old 3-on-the-tree column. I found a bowl from a floor shift car, swapped out the steering wheel assembly, eliminated all unnecessary column shift pieces internally, re-lubed the column and reassembled it with a new three-spoke finger grip wheel. I reduced the size of the interlock pieces and safety wired them. I discovered drilling the interlock pieces was much more difficult than it sounds. A local machine shop gave it try and gave up. Other machine shops laughed...Just before I sent the piece off to get EDM machined, I tried a bit for granite tile. It worked!:  The tach is an AutoMeter Pro Comp Monster. I used a conventional xl-size hose clamp to mount it, but I hated the look. So I trimmed back everything I could on the clamp, and then used a large heat shrink sleeve to cover it. I think the mount turned out well:  Electric water temp and mechanical oil PSI are also AutoMeter ProComp jobs. I didn't like any commercially available gauge brackets so I made my own: 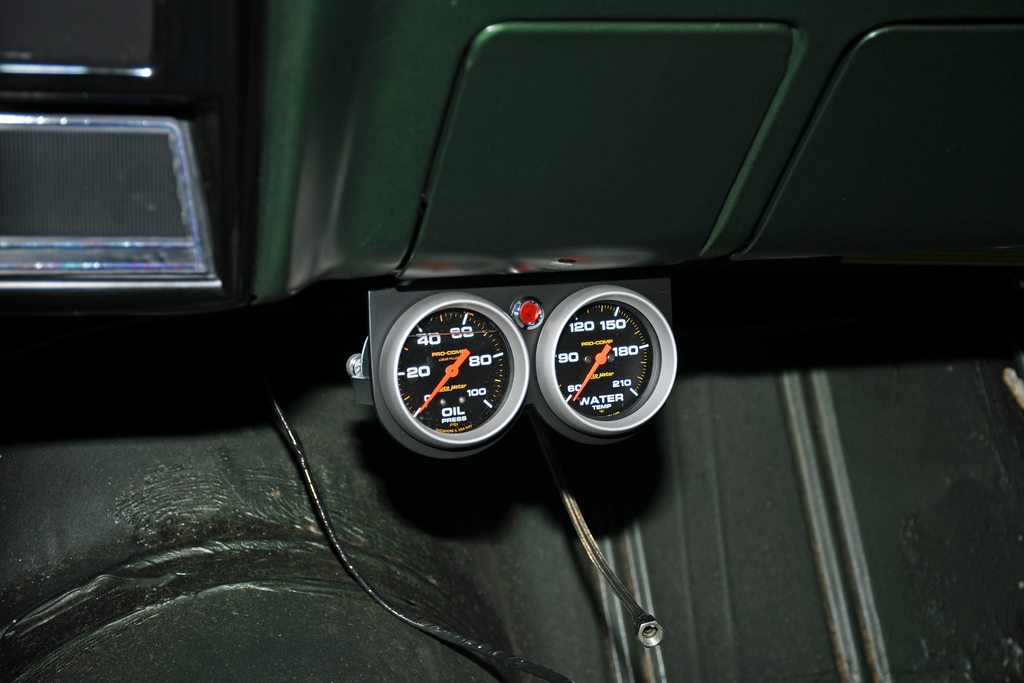 I always use a warning lamp for line locks. Instead of the standard cheap Hurst job, I used this aircraft indicator from Aircraft Spruce: 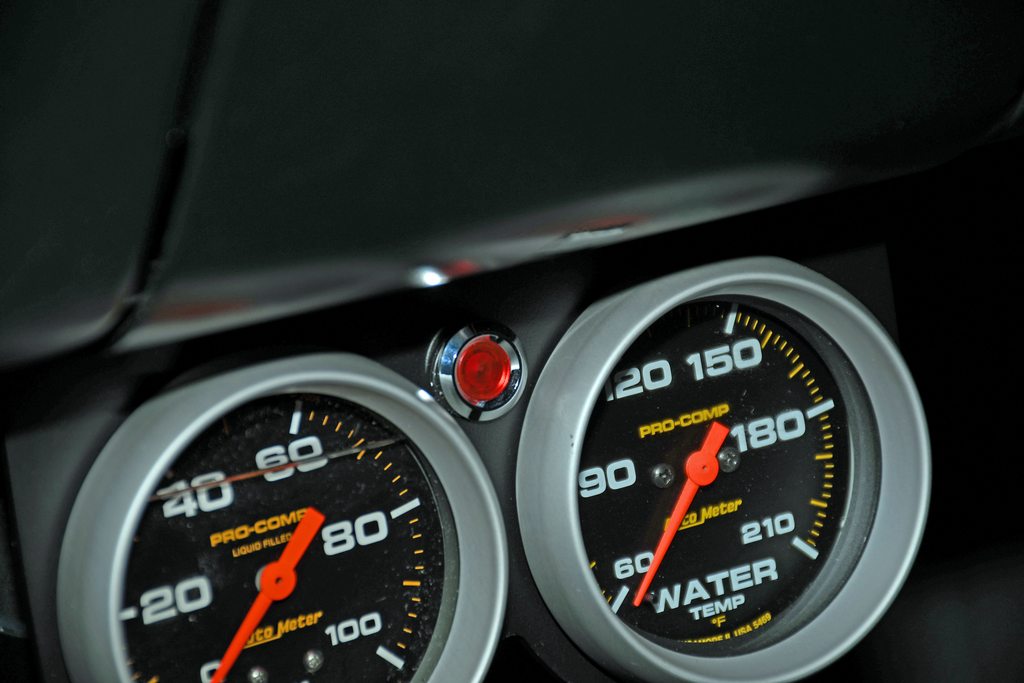 On the engine compartment side, I used a 90-degree AN bulkhead fitting for the oil psi gauge. There's a -3AN Teflon line in the cockpit that goes from the passenger compartment side of the fitting to the pressure gauge. And on the engine side, I use a short -3AN Teflon line to the Dart block oil gallery just above the bell housing flange. It's all very easy to assemble and disassemble. 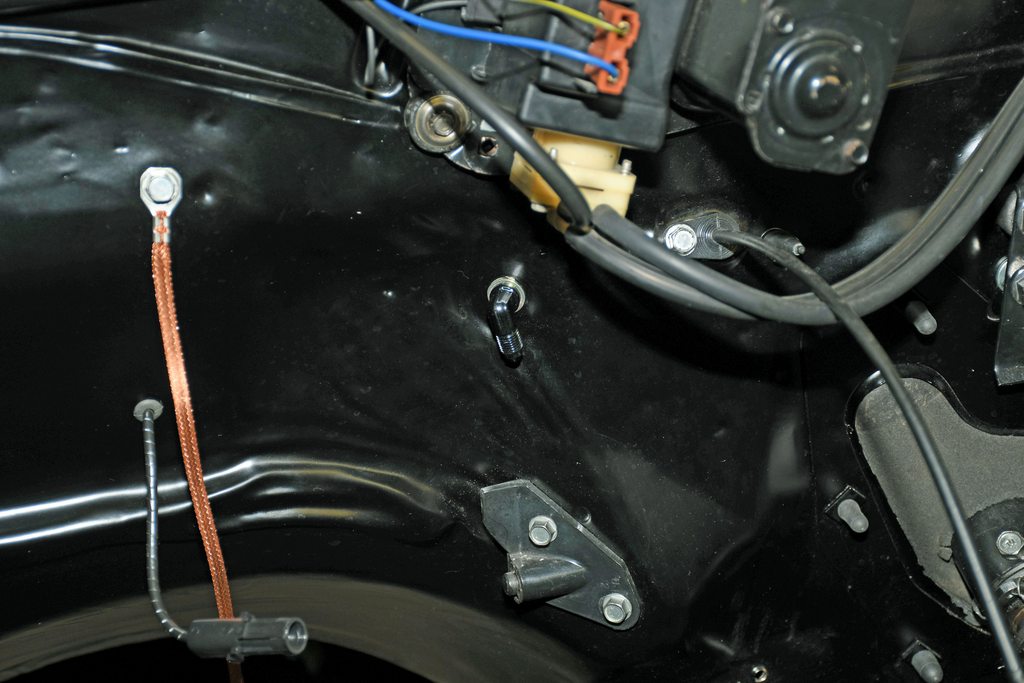 This is the sender harness for the water temp gauge. I wrapped it in aircraft spi-wrap and then wrapped that with OEM style harness tape so it looks sort of stock: 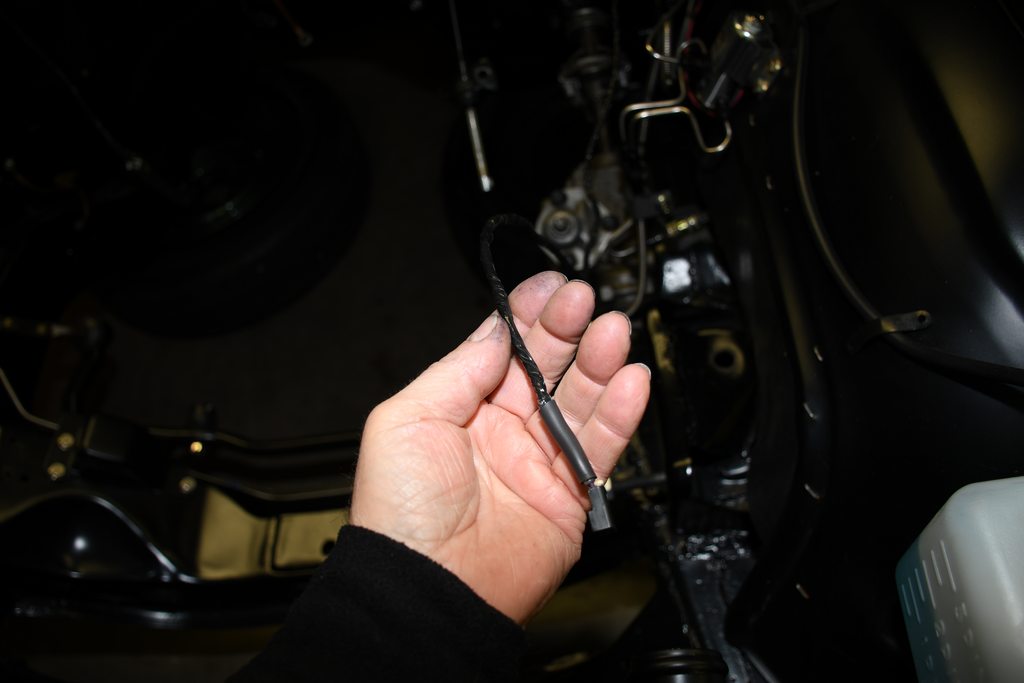 Much of a new big block engine harness was disassembled. I stripped every wire I didn't need and then re-wrapped it with harness tape. The harness is now very minimal: 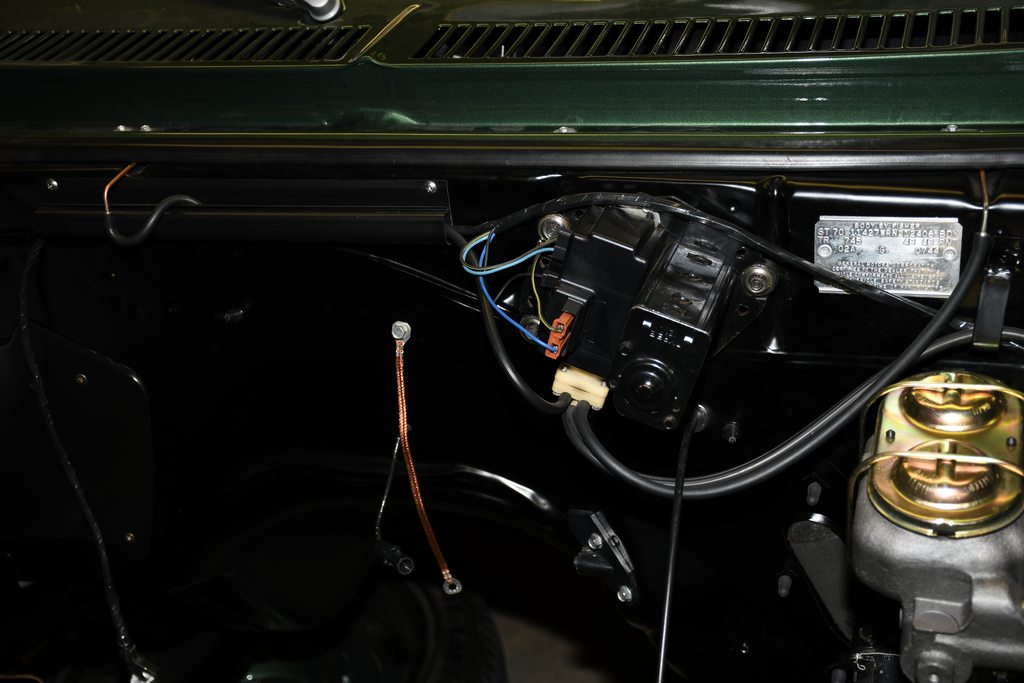 I cut, drilled and shaped a 1/4-inch thick nylon board in the shape of the backside of the OEM-style firewall heater delete plate. This became my ignition board inside the car: 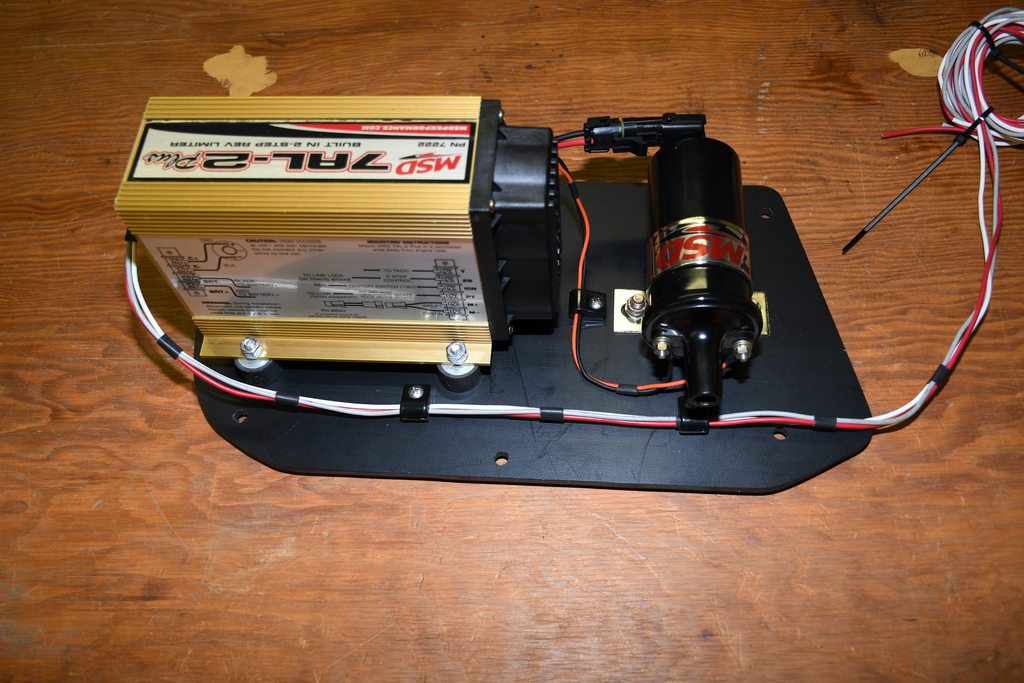 As you can see, I use an MSD 7AL2 and a very conventional MSD compatible coil for ignition. I think the wiring job came out pretty well:  Here's the whole thing mounted up under the dash. It is just over the carpet line. I used AN fasteners to hold the works in place. 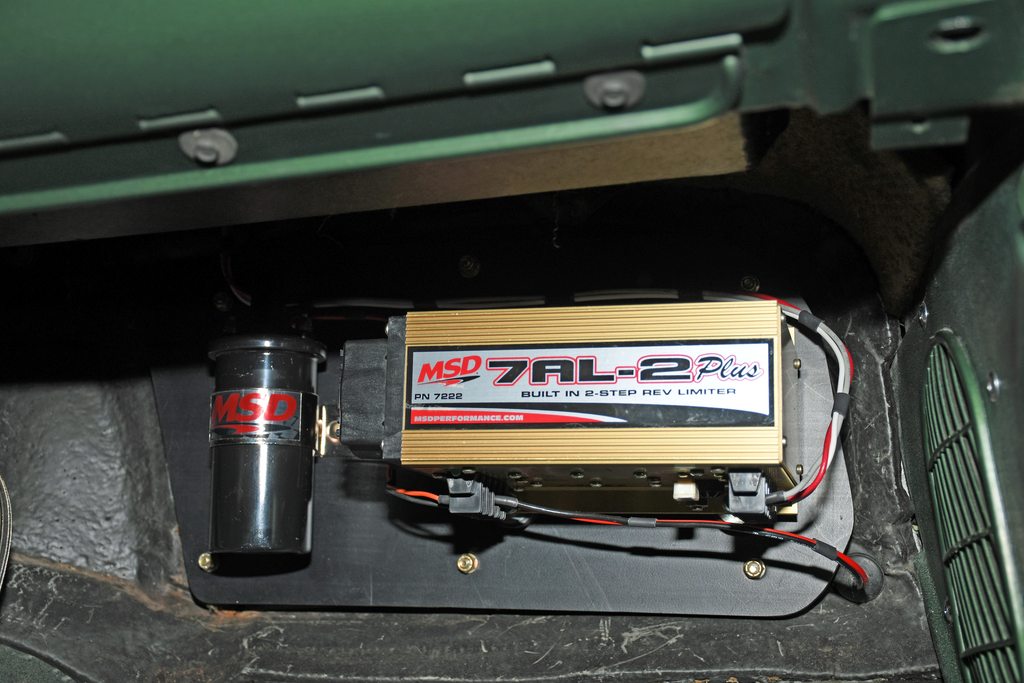 Outside, the main power/ground wires for the MSD route directly to the battery (per MSD instructions). The actual switch for on-off is wired to the fuse box. I used silver plated aircraft wire here -- it has a much smaller diameter for the wire gauge, and the jacket is much stiffer. I wrapped it with harness tape and the wire goes through one of the firewall insulator plugs: 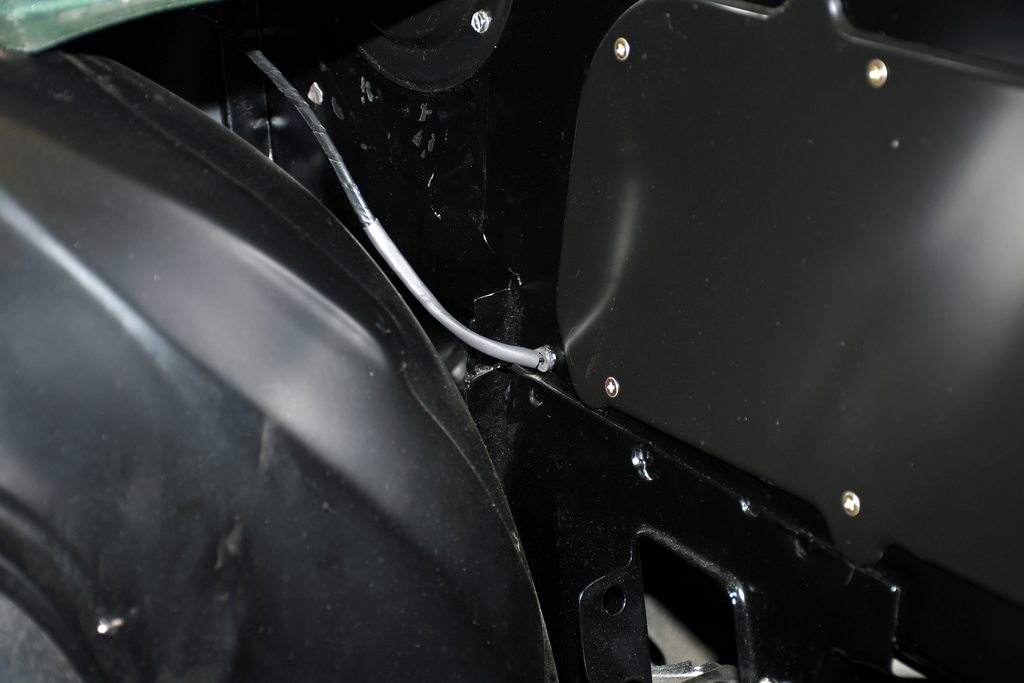 Downstairs, I replaced the back seat seat belt bolts with longer grade eight fasteners. This provides a spot to hang the exhaust turnouts under the car.  That's all for now...More later... 
|
| The Following 9 Users Say Thank You to Arrowsmith For This Useful Post: | ||
69M22Z (02-18-2023), big gear head (02-18-2023), BJCHEV396 (02-18-2023), dykstra (02-18-2023), L78_Nova (02-22-2023), olredalert (02-18-2023), Pro Stock John (02-18-2023), Stihl (01-26-2025), Xplantdad (02-18-2023) | ||
|
|


 Threaded Mode