
Dedicated to the Promotion and Preservation of American Muscle Cars, Dealer built Supercars and COPO cars. |
|
|||||||
| Register | Album Gallery | Thread Gallery | FAQ | Community | Calendar | Become a Paid Member | Today's Posts | Search |


|
|
|
Thread Tools | Display Modes |
|
#251
 11-23-2012, 02:50 PM
|
||||
|
||||
|
I scrubbed the M22 to get the all the engine oil off from the leaky rear main seal. The bellhousing got a scrubbing, too. That took a a day of soaking since the clutch dust combined with the leaking engine oil really soaked into the pores of the aluminum housing.
 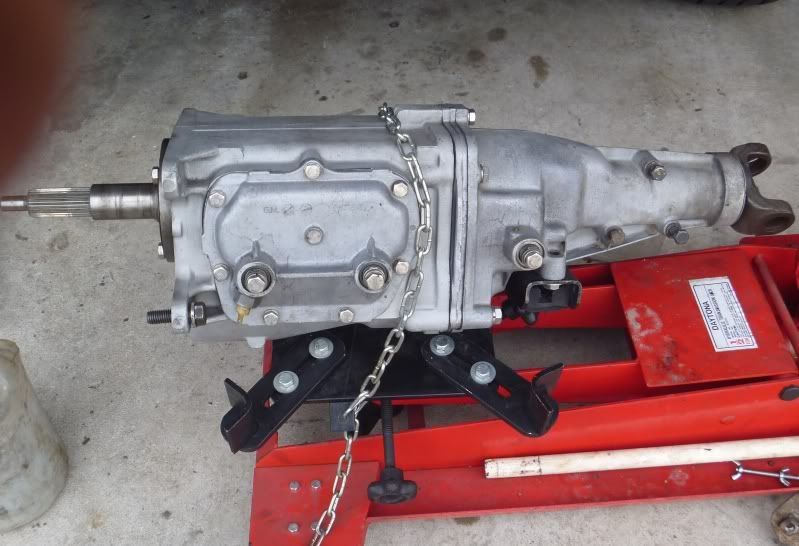  I had to order a new clutch fork since I noticed that one of the clips clips that retains the throw out bearing was broken off.   
|
|
#253
11-23-2012, 09:58 PM
|
||||
|
||||
|
Thanks! I enjoy the audience participation, too, so feel free to chime in, guys!
BTW, does anyone have a photo of the oil pan baffle that was tack welded in the later model Pontiac oil pans? I need a good photo with a ruler next to it so I can make one out of metal and weld it into the original pan. Pontiac started using the baffle in 1975 give or take a year. It prevents the oil from flowing up toward the front during braking and cornering. It looks like the one in this photo but this photo is at an angle. If I had an overhead photo with some measurements, I could make an accurate template. 
|
|
#254
11-25-2012, 05:27 PM
|
||||
|
||||
|
I was able to obtain some photos of the factory baffle used in the later 1970s. I made a cardboard template so I can hand make the baffle and weld it in during shop class on Tuesday. I also trial fitted the pan with stunt-baffle on the block with the oil pump and pickup installed. No clearance issues, thankfully.
 
|
|
#255
11-25-2012, 05:33 PM
|
||||
|
||||
|
I dragged my 12 year old, engine building apprentice out to the garage today (it's about 38 degrees or so at the moment). I had him measure the top and second ring gaps in the cylinders. I had to keep reminding him not to "saw" the feeler gauge but gently see if it passes between the ring ends. Only had to remind him 16 times. [img]<<GRAEMLIN_URL>>/grin.gif[/img]
Top gaps were .016 and second ring gaps were .020 after doing some mix and matching between the cylinders. 
|
|
#256
11-27-2012, 02:14 PM
|
||||
|
||||
|
I ended up getting a McLeod 673-16931 heavy duty clutch fork to replace the stock unit with the broken tab. http://www.jegs.com/i/McLeod/673/16931/10002/-1#
I did have to do a little trimming of the flared out portion on the top edge of the fork to clear the interior bolt mounting boss.   
|
|
#257
11-28-2012, 02:45 AM
|
||||
|
||||
|
Back from shop class with the revised oil pan. Took about an hour to fabricate and weld in the baffle. Gotta love those plasma cutters. Man those things cut the labor time into seconds. It took longer to trace the template onto the steel with a magic marker than it did to cut it out with the plasma cutter. Then I used a hammer and an anvil to bend the tabs and form the lip on the interior edges.
It's not too pretty but it fits and clears the oil pump perfectly. 
|
|
#259
11-28-2012, 10:46 PM
|
||||
|
||||
|
It's more like Cheap Old Man Thinking.
Why the heck would I buy a new pan with a baffle for $75 which won't even have the drain plug in the correct spot, when I can use the original pan and build a baffle for free out of scrap sheetmetal and get to play with neat cutting and welding equipment. [img]<<GRAEMLIN_URL>>/headbang.gif[/img]
|
|
#260
11-30-2012, 12:40 AM
|
||||
|
||||
|
I got the pistons and rods back today. The crank should be done with balancing tomorrow so we can start the assembly process this weekend.
The machinist said that the rods and pistons were all within a gram of each other and didn't really require any modifications to get them all matched. 
|
|
|
|


 Linear Mode

