
Dedicated to the Promotion and Preservation of American Muscle Cars, Dealer built Supercars and COPO cars. |
|
|||||||
| Register | Album Gallery | Thread Gallery | FAQ | Community | Calendar | Become a Paid Member | Today's Posts | Search |


|
|
|
Thread Tools | Display Modes |
|
#631
 06-24-2008, 04:11 AM
|
||||
|
||||
|
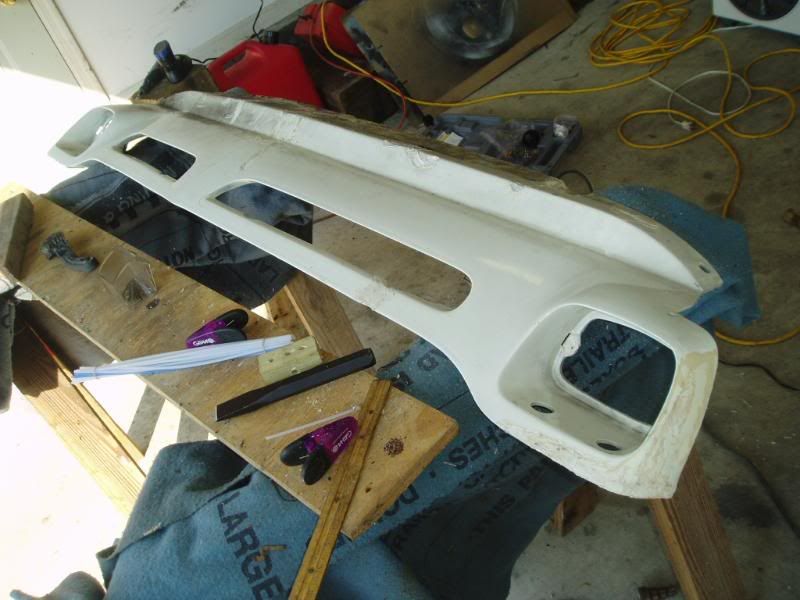
Once the rough repair was done so that the valance could be moved without cracking further, I moved it to the garage and started the Franken-Valance process.
Here I used some white polyethylene welding rods to fill in the missing areas in the center fracture. I just kept melting and massaging in more polyethylene rods till the area was filled. 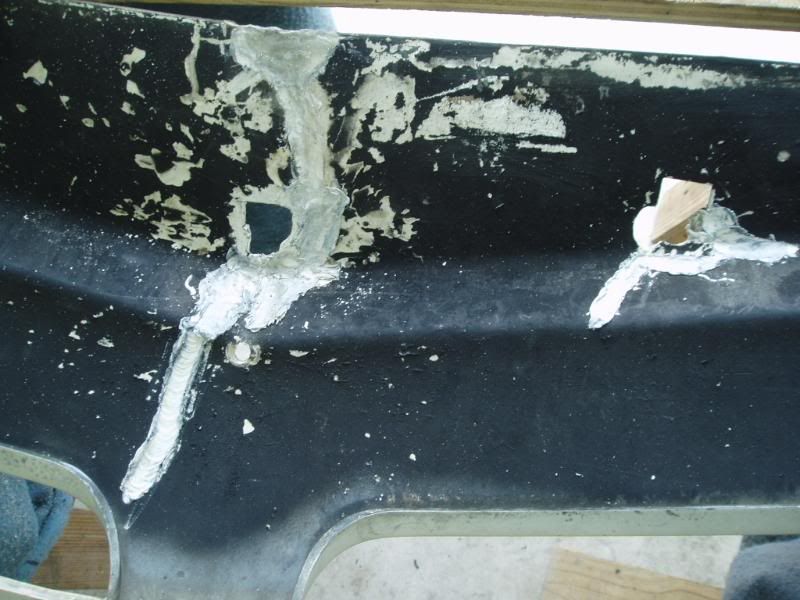  
|
|
#632
06-24-2008, 04:18 AM
|
||||
|
||||
|
Here is the right mounting flange area. It was shattered completely. I had some of the parts so I used a Dremel tool and ground the edges clean and beveled them so I could get some good weld/heat penetration.
 And here it is after welding and filling in extra material to make a rough estimation of the second mounting lug. Later sanding and heating will get the shape more accurately finished.  And here is the left side, during and after  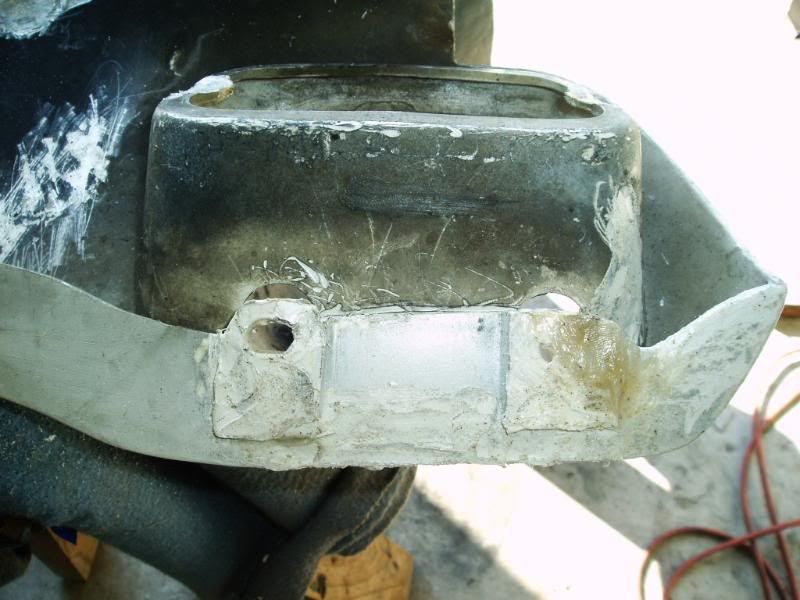
|
|
#634
06-24-2008, 05:41 AM
|
||||
|
||||
|
Steve MacGyver
 great work !! 
|
|
#635
06-25-2008, 04:15 AM
|
||||
|
||||
|
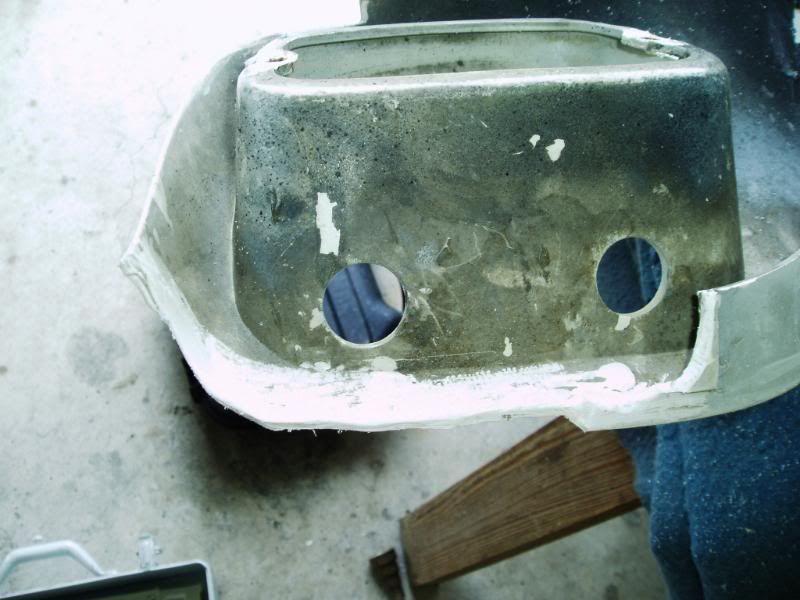
I soaked the valance in the old Purple Stuff degreaser over the last couple days. I used a tall kitchen garbage can and was able to get one third of the panel covered, and then turned it over to get the other third. For the center I had to lay it flat and cover that area with a towel soaked in the Purple Stuff and let it sit overnight on the area. That purple stuff works wonders: it removed all the soot and the flat black spray paint. The heavy white paint and primer surfacer is another story.
I had to use a razor blade and shave the white paint off. In some areas the paint and primer layer flaked away together, in others, just the white paint, and in others, neither came off. So I had to use the mini sander, which promptly burned out so now I have to buy another one... Here's the cleaned valance:   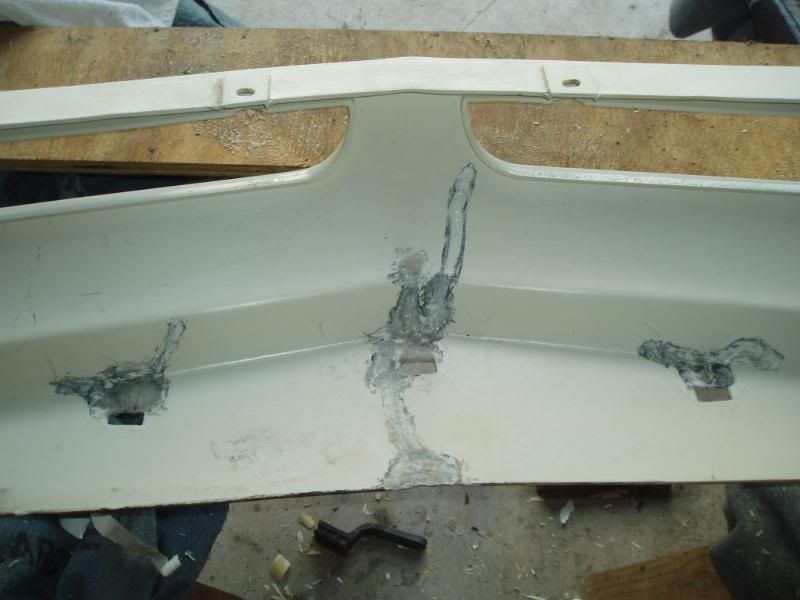
|
|
#636
06-25-2008, 04:18 AM
|
||||
|
||||
|
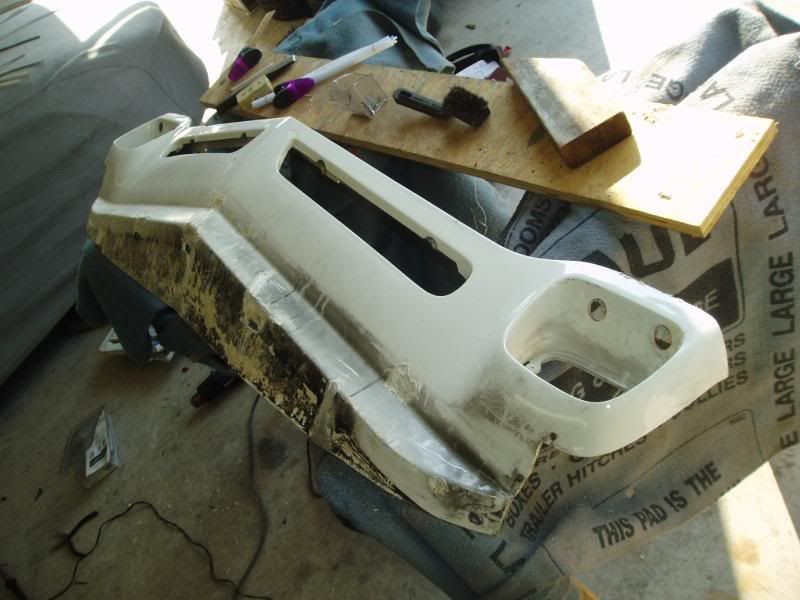
And the front side. You can see the different areas of good and bad paint adhesion.
 Here's some of the filled in rough repairs: 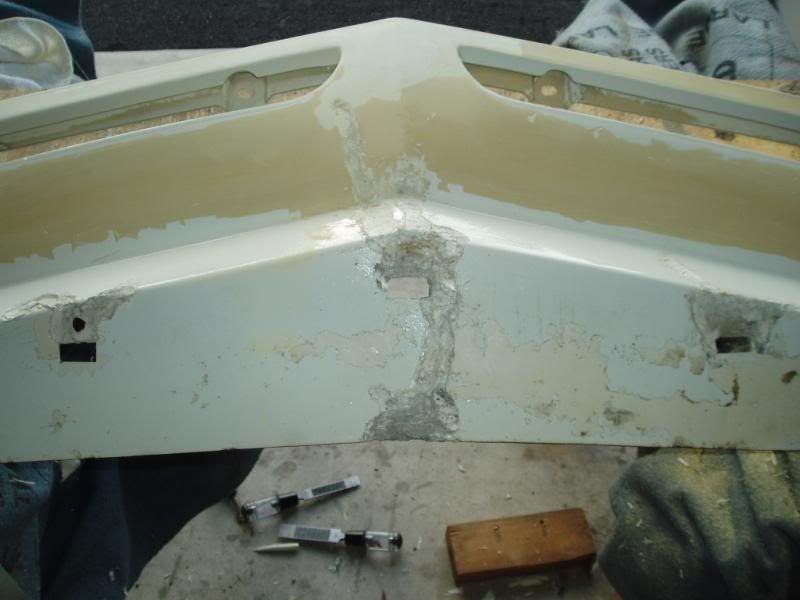   And the preliminary rough sanding of the upper face bar repair: 
|
|
#637
06-25-2008, 05:13 PM
|
||||
|
||||
|
So if Frankenstein returns from the dead what are you going to do with it? Put it back on your car or hang it on the wall for posterity's sake?
__________________
~JAG~ NCRS#65120 68 GTO HO 4 spd Alpine Blue /Parchment 2 owner car #21783 71 Corvette LT1 45k miles Orig paint - Brandshatch Green - National Top Flight - last known 71 LT1 built. 71 Corvette LT1 42k miles Original paint - Black - black leather - only black LT1 known to exist. NUMEROUS Lemans blue Camaros, Monza Red and Daytona Yellow Corvettes & a Chevelle or two... Survivors, restored cars, & other photos https://picasaweb.google.com/lh/myphotos
|
|
#638
06-25-2008, 06:11 PM
|
||||
|
||||
|
Better hang it up. There must be about 20 or 30 hours in that thing, and all it takes is one rock.
 Steve, how many total hours do you figure you have in this project? 
__________________
 COPO 9561/9737 M40 X11D80 13.37 @ 105.50 on pump gas,drove it to NATL TRAILS and back [email protected] SCR22
|
|
#639
06-26-2008, 03:06 AM
|
||||
|
||||
|
Actually it is going so well, I think I will use the white one on the car since it is the original one from the car. Then I'll hang up the blue one.
The reason these things were so fragile wasn't the material (polyethylene) that they were made of, it was the fact that the mounting holes were so far off, the assembly line guys had to muscle them into place to get the bolt holes to line up. The valances were under so much stress when bolted to the car, if you hit one good pothole, they shattered like glass. That is why you always see the center split up the middle and one of the upper bars broken. I fill in all of the lower mounting holes and redrill them in a new position, about 3/4" away from the original mounting holes. Also, you cant tighten the bolts with a wrench, you just finger tighten them with locktight on the bolts so the panel can expand and flex with the nose.
|
|
#640
06-26-2008, 03:08 AM
|
||||
|
||||
|
[ QUOTE ]
Steve, how many total hours do you figure you have in this project? [/ QUOTE ] All of them. (Well there are 8,760 hours in a year, multiply that by 4 years and you have the answer...35,040 hours so far.  ) )
|
|
|
|


 Linear Mode

