

Dedicated to the Promotion and Preservation of American Muscle Cars, Dealer built Supercars and COPO cars. |
|
|||||||
| Register | Album Gallery | Thread Gallery | FAQ | Community | Calendar | Become a Paid Member | Today's Posts | Search |

|
|
|
Thread Tools | Display Modes |
|
|
|
#1
|
||||
|
||||
|
First one to guess what it is, with the least amount of clues provided, wins a prize. (the prize being more photos)
[img]<<GRAEMLIN_URL>>/grin.gif[/img]  |
|
#2
|
||||
|
||||
|
A special order paint 72 Firebird Formula with bucket seats but with a 1971 style body series number?
__________________
Rick Nelson Musclecar Restoration and Design, Inc (retired) www.musclecarrestorationanddesign.com https://www.youtube.com/watch?v=62r-6vgk2_8 specialized in (only real) LS6 Chevelle restorations |
|
#3
|
||||
|
||||
|
We have a winner!
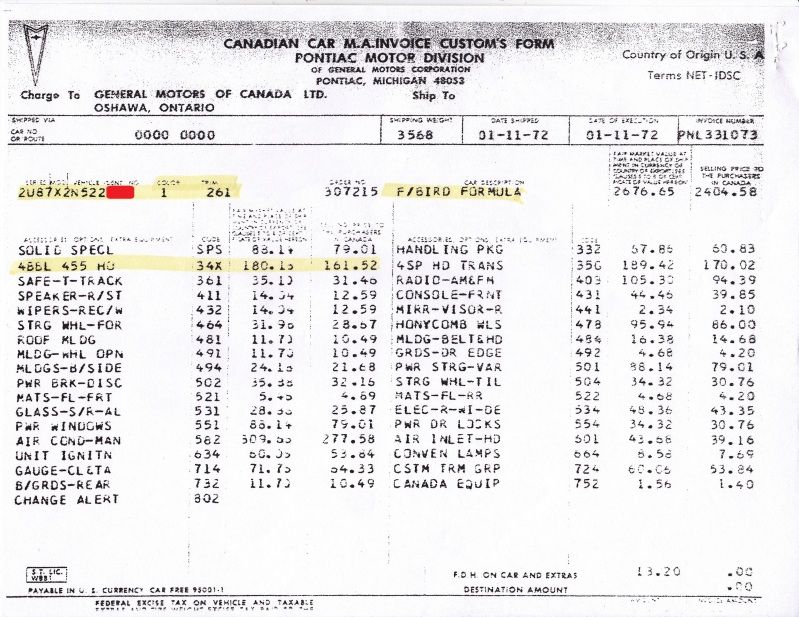 And here is the recent GM of Canada record. Compare them to the ones from 20 years ago that actually show the black paint as the paint color on the W51 line.   Here are the 1993 GM of Canada docs: 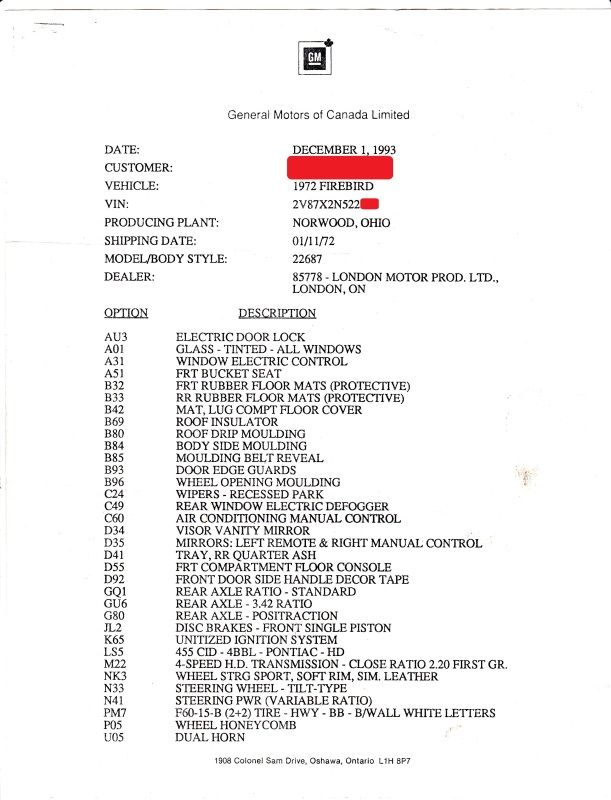 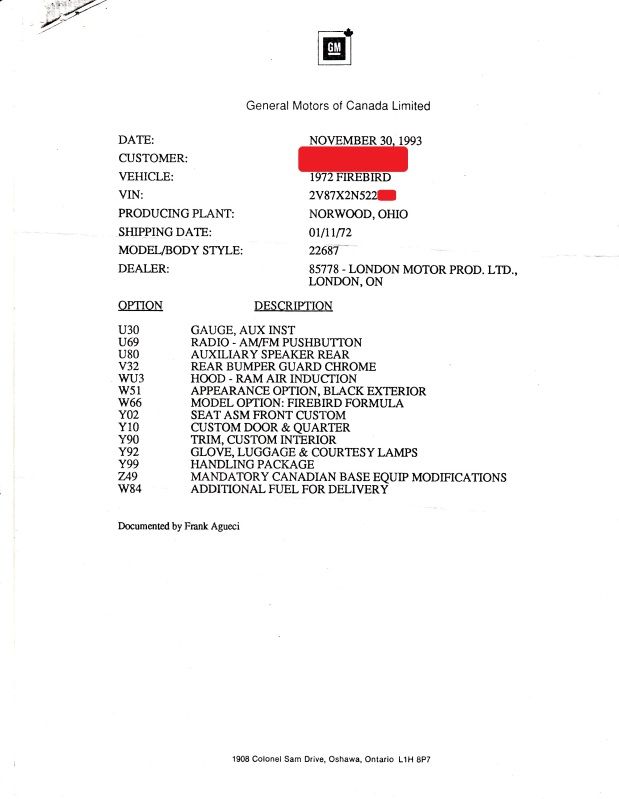 |
|
#4
|
||||
|
||||
|
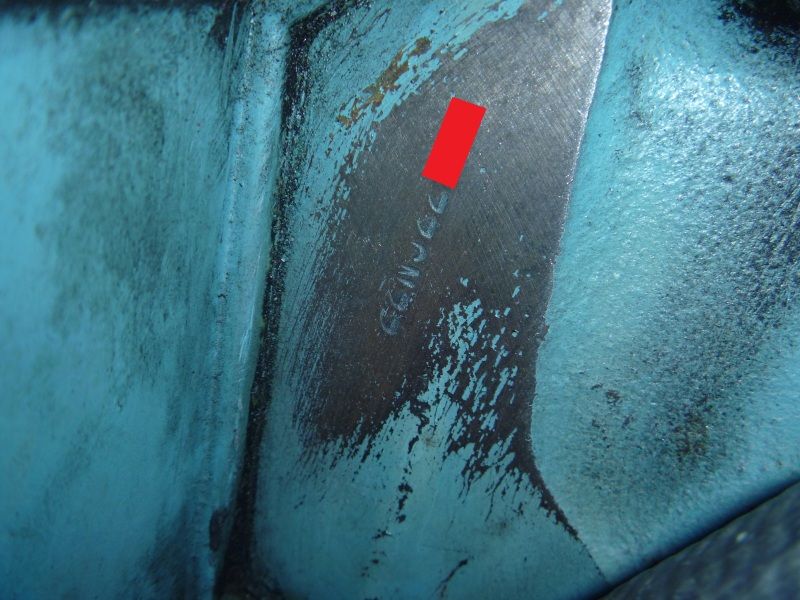
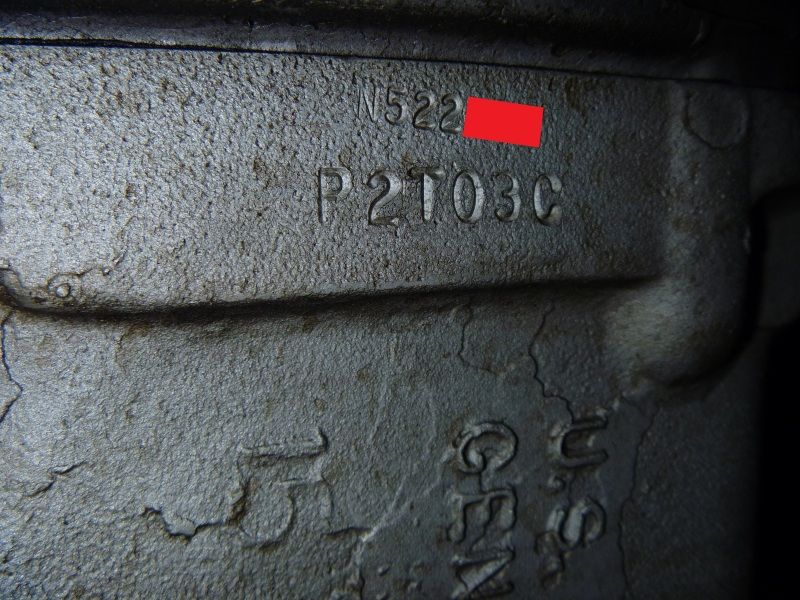
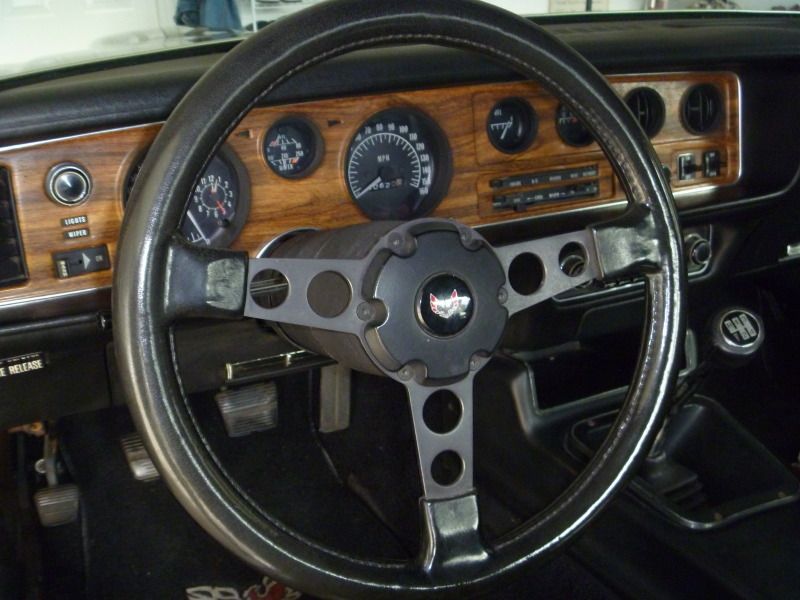
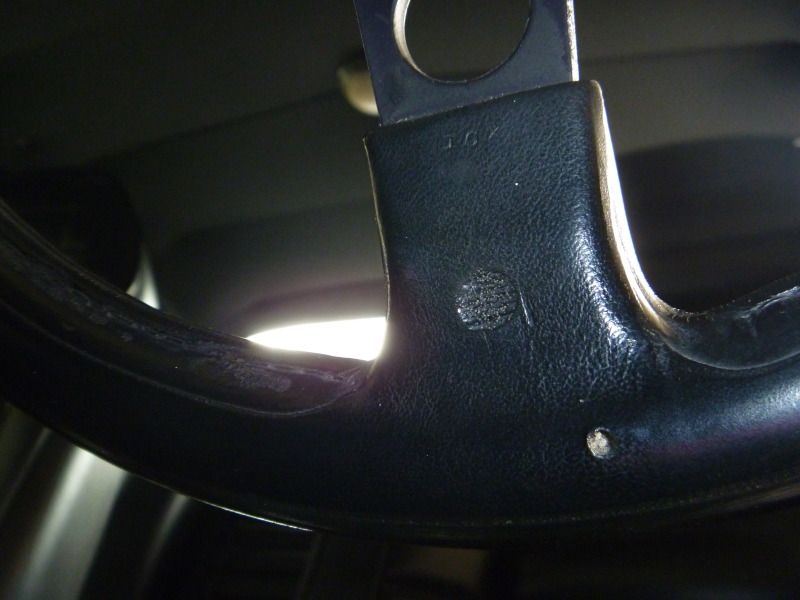
Here's some of the good stuff:
     |
|
#5
|
||||
|
||||
|
Wow and WOW!!!! What a combo! [img]<<GRAEMLIN_URL>>/shocked.gif[/img] 455 HD, M22, a/c, honey combs, black paint.......!!!!!!!!! [img]<<GRAEMLIN_URL>>/beers.gif[/img]
I am guessing this is in your stable now?? [img]<<GRAEMLIN_URL>>/naughty.gif[/img]
__________________
Sam...  
|
|
#6
|
||||
|
||||
|
Yup, it's a one of one. You had to special order black in 1972, and a total of only ten 455HO Formulas were delivered in Canada. A total of 276 were produced in 1972. (no breakdown on automatic versus M22, though.)
Hereís the full story on the car: Last summer, a new member, Grant, posted about finding and buying this car, here on the Yenko.net site. https://www.yenko.net/ubbthreads/ubbt...850&page=1 When he originally posted about the Firebird, I PM'd Grant and asked if he ever wanted to sell the car, I'd be happy to give him what he wanted for it. Grant (a great guy, by the way) only recently revisited the site and saw the PM, and then responded to me. In the original posting, Grant told the story about how his brother was out giving an estimate for a new roof for a ladyís home in British Columbia, Canada. When she opened the garage, Grantís brother saw the car for the first time. The Firebird belonged to her late husband who passed away several years earlier from cancer at a far too early age. The woman and her daughter were very attached to the car as it was a special project that the husband/father put back together shortly before he passed on. After he died, they kept the car in the garage and would start it once in a while, trying to maintain it. Grantís brother, who didnít really know much about Firebirds took a few fuzzy cellphone snapshots of the car and forwarded the info to Grant, who eventually contacted the woman and was able to purchase the car. After getting all the boxes and stuff out from around the car and getting it out into the daylight for the first time in years, the car pretty much started right up after a new battery was installed. The car has more than an inch of original documents with it, including every repair work order for anything ever done with it. It was originally leased from London Motor Products in Ontario, Canada (a big GM dealer), to a law firm from 1972 to 1975. In February, 1975, the lease ended and the lawyer, who leased it, bought the car (with a partial trade of a 72 Vega). The lawyer owned the car until 1985 when he sold it to a broker who put a quickie repaint on it and sold it to the husband in British Columbia. He and his family owned it until Grant bought it in the summer of 2011. Here's the original sale document when the lease ended: 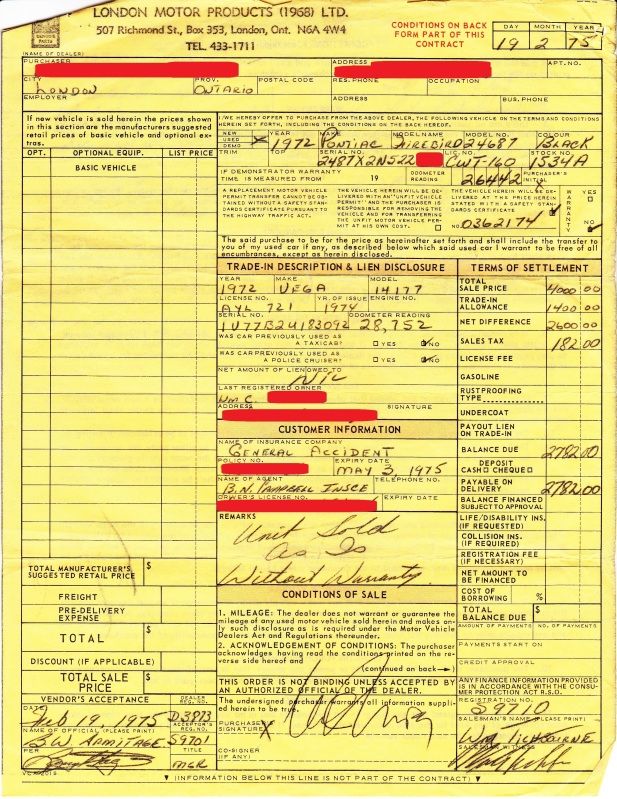 |
|
#7
|
||||
|
||||
|
Purdy please more pix!'!!!!!!!!!!!
__________________
Sam...  
|
|
#8
|
||||
|
||||
|
I am currently awaiting transport with TFX in Canada. A couple of you Great White North guys recommended them in past postings. The car is 3,000 miles away in B.C. It is just about the farthest you can get from New Jersey, going west, without hitting the Pacific Ocean.
|
|
#9
|
||||
|
||||
|
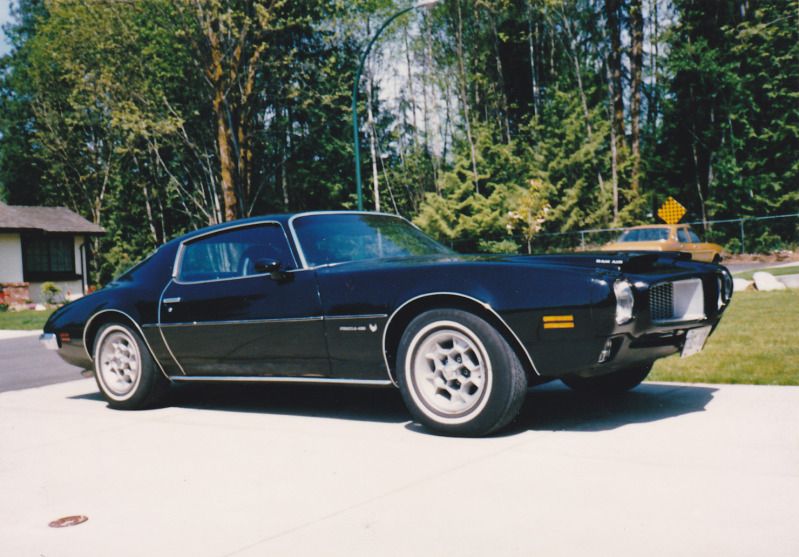
Here's what it looked like in 1987:
  |
|
#10
|
||||
|
||||
|
Here are some engine shots:
The car had the prehistoric Pontiac unitized ignition system originally (along with five years of dealer repair work orders attempting to fix the "no start" problem related to these units). An HEI was swapped in its placed in the 1980s.  I have started gathering A/C parts but will need some of the small A/C line brackets, a correct 054 POA valve and the correct housing-to-firewall bolts. At least the unique 455HO A/C brackets are still intact. 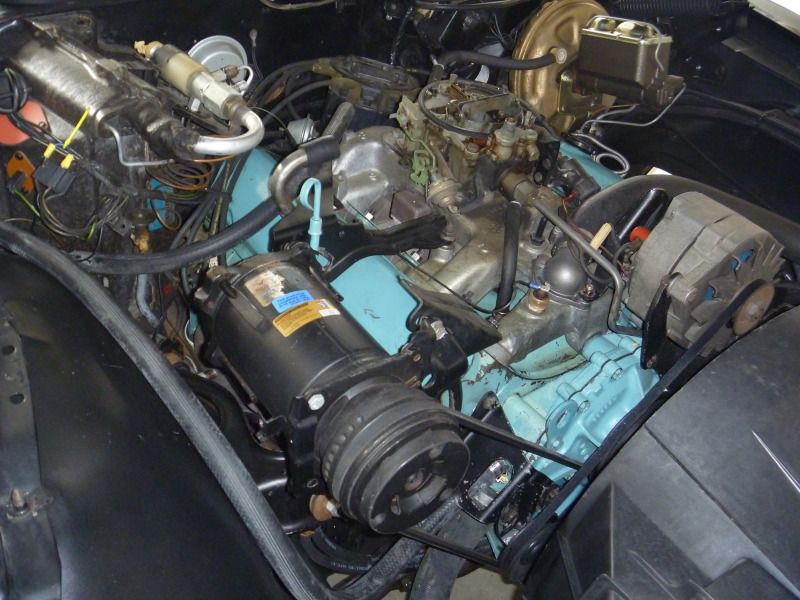 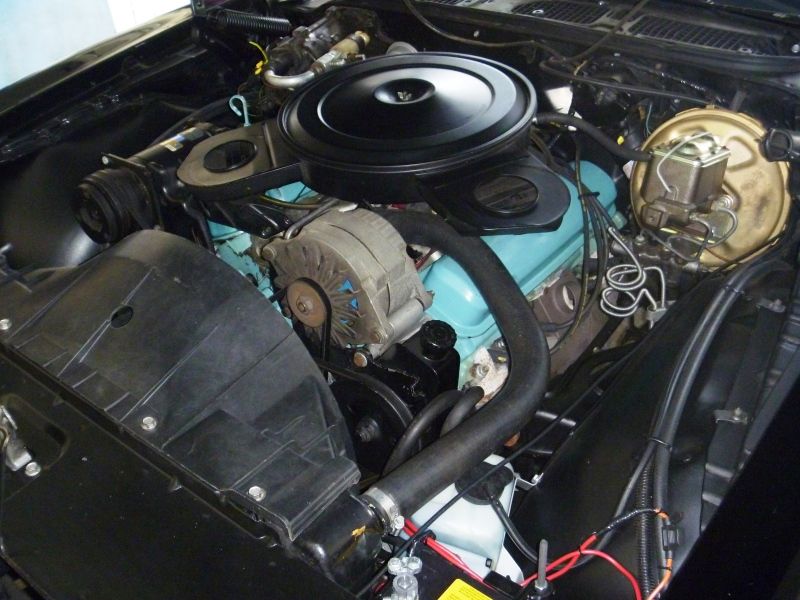 Unfortunately, there is a hole sawed into the top of the very rare, original 1972 radiator shroud. I'm glad I saved my old melted one from the other 72 so I have a donor plug to patch it with. The second owner put an electric fan in along with a fixed blade engine fan (I'll need a thermo clutch and fan, now...and a dual bleeder master cylinder) |
 |
|
|