
Dedicated to the Promotion and Preservation of American Muscle Cars, Dealer built Supercars and COPO cars. |
|
|||||||
| Register | Album Gallery | Thread Gallery | FAQ | Community | Calendar | Become a Paid Member | Today's Posts | Search |


|
|
|
Thread Tools | Display Modes |
|
#251
 01-28-2020, 07:05 PM
|
||||
|
||||
|
Do you know if originals were flat, semi gloss, or gloss black?
__________________
I like solid lifter cars, big cams and cars w/ 3 pedals in them. 

|
|
#252
01-28-2020, 07:10 PM
|
||||
|
||||
|
They're on the glossy side but not full gloss...Joe
__________________
1968 Z/28 Corvette Bronze. Black Hounds Tooth. 02E Los Angeles born 3/13/1968 pnt OO 1969 SS396 Yellow/Yellow 08E Norwood born 8/28/1969 pnt 76E 1970 'cuda Moulin Rouge, 440-6, 4 speed
|
| The Following User Says Thank You to X66 714 For This Useful Post: | ||
NorCam (01-28-2020) | ||
|
#253
02-01-2020, 08:15 PM
|
||||
|
||||
|
Sanded and repainted some engine parts while the weather has been decent of late. This included the original fan, original pulleys and a few odds and ends that needed refinishing. In particular, the engine peripherals to match the original engine which was rebuilt and repainted. Back on the car this weekend and working inside the engine bay now.
I also wanted to give props to Lloyd Costley who was kind enough to share a lower rear leaf to replace the broken one that was found in this car. He reached out last week and quickly shipped me the much-needed part which is going to work out great for this car. Thanks again, Lloyd. I really appreciate you hooking me up with this leaf.   Repainted the fan to match it's surrounding in the engine bay. 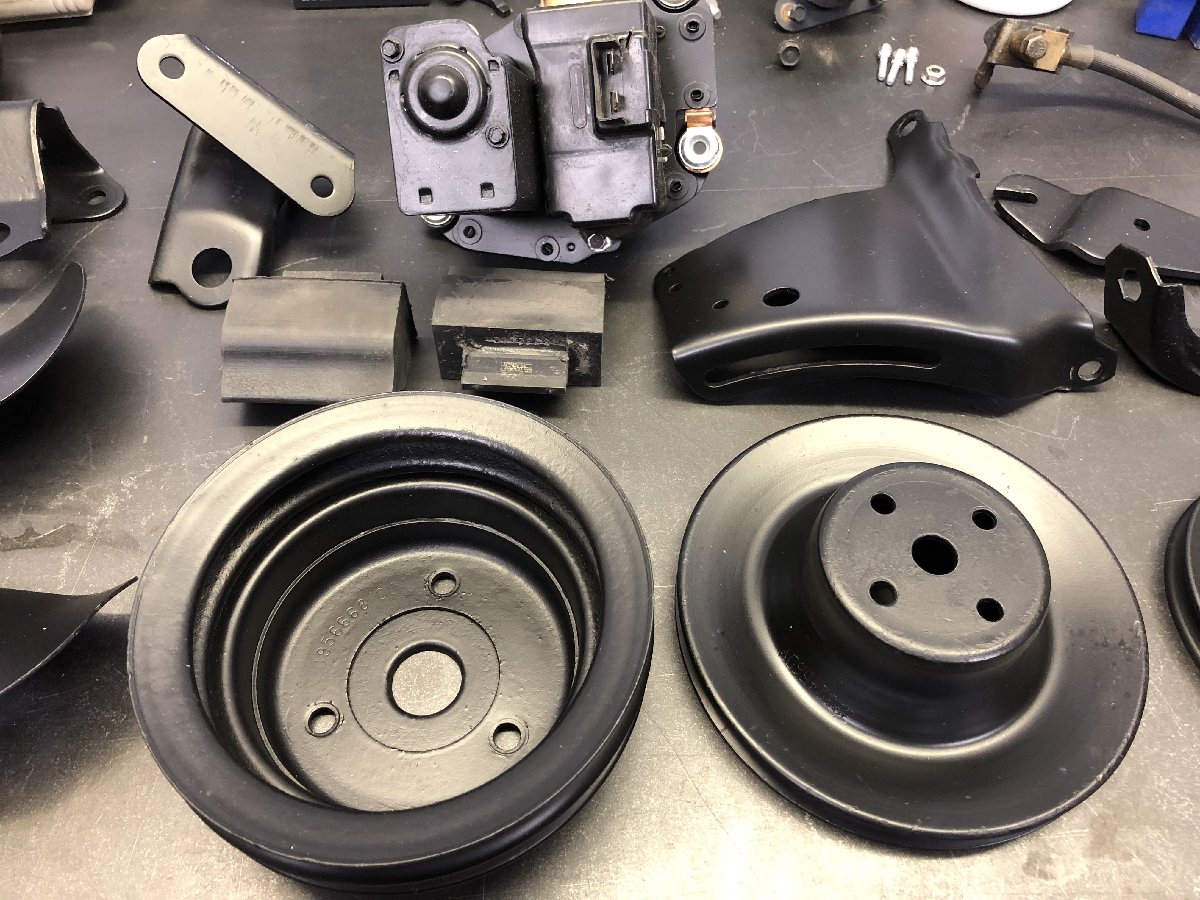 Pulleys were all in different finishes so these were all repainted. 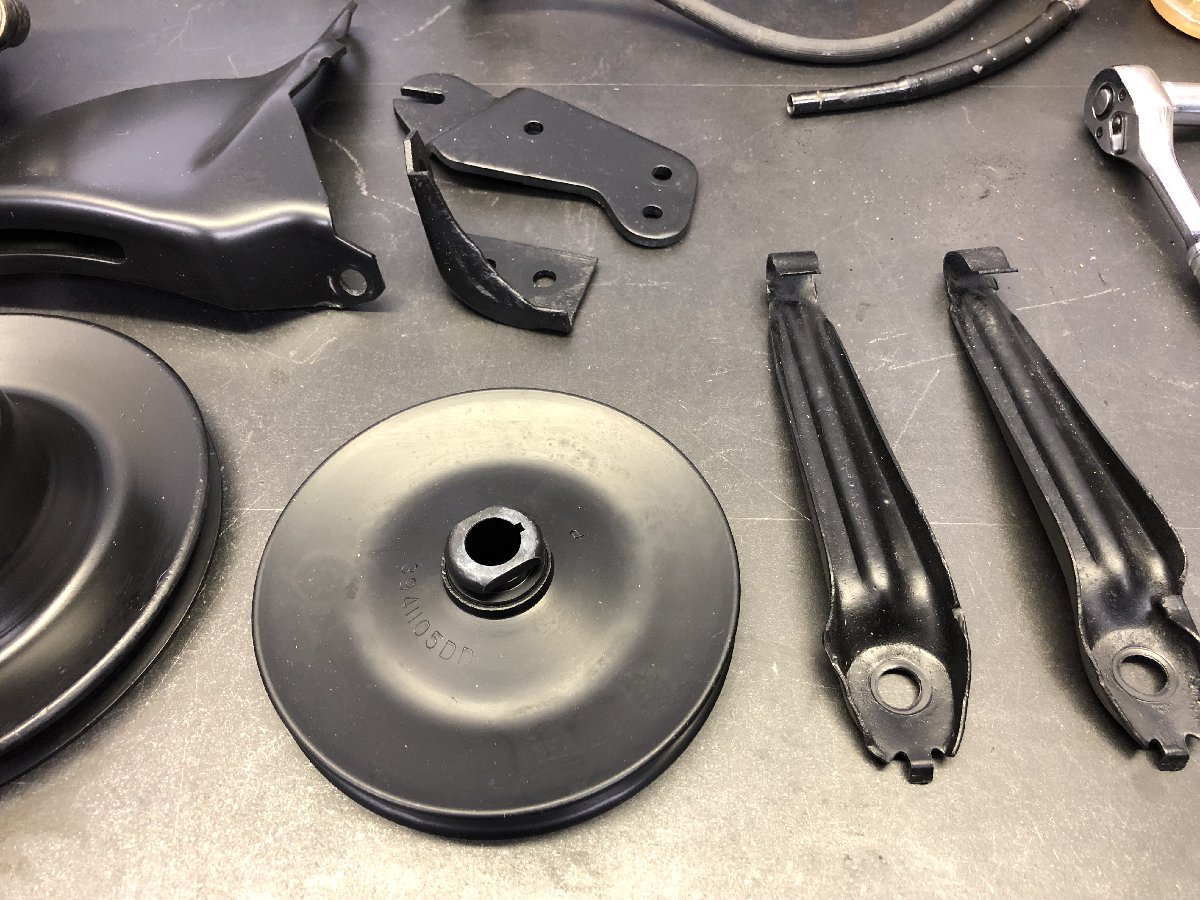 Also painted some small parts that each had some paint loss.  Radiator is recored and paint. Need to spray the core some more.  Broken leaf is now matched up with an original given to me by Lloyd.
__________________
I like solid lifter cars, big cams and cars w/ 3 pedals in them.
|
| The Following 4 Users Say Thank You to NorCam For This Useful Post: | ||
Edgemontvillage (02-04-2020), HawkX66 (02-03-2020), PeteLeathersac (02-05-2020), x77-69z28 (02-05-2020) | ||
|
#255
02-05-2020, 01:43 AM
|
||||
|
||||
|
The subframe is not coming off!
As a matter of fact, I finally got onto the front end today and got the passenger side inner fender cleaned up. It actually dialed back rather nicely and has left a cool patina with a few wear marks being left behind from the heater hoses having had rubbed through the original paint close to the mid fender clamp. I'll continue on tomorrow with the inner front subframe rails and will then work my way across the K members and up onto the other side. Once complete I will then go after the outer control arms and the suspension from the wheel well side of things. Happy with the progress thus far and in no rush. 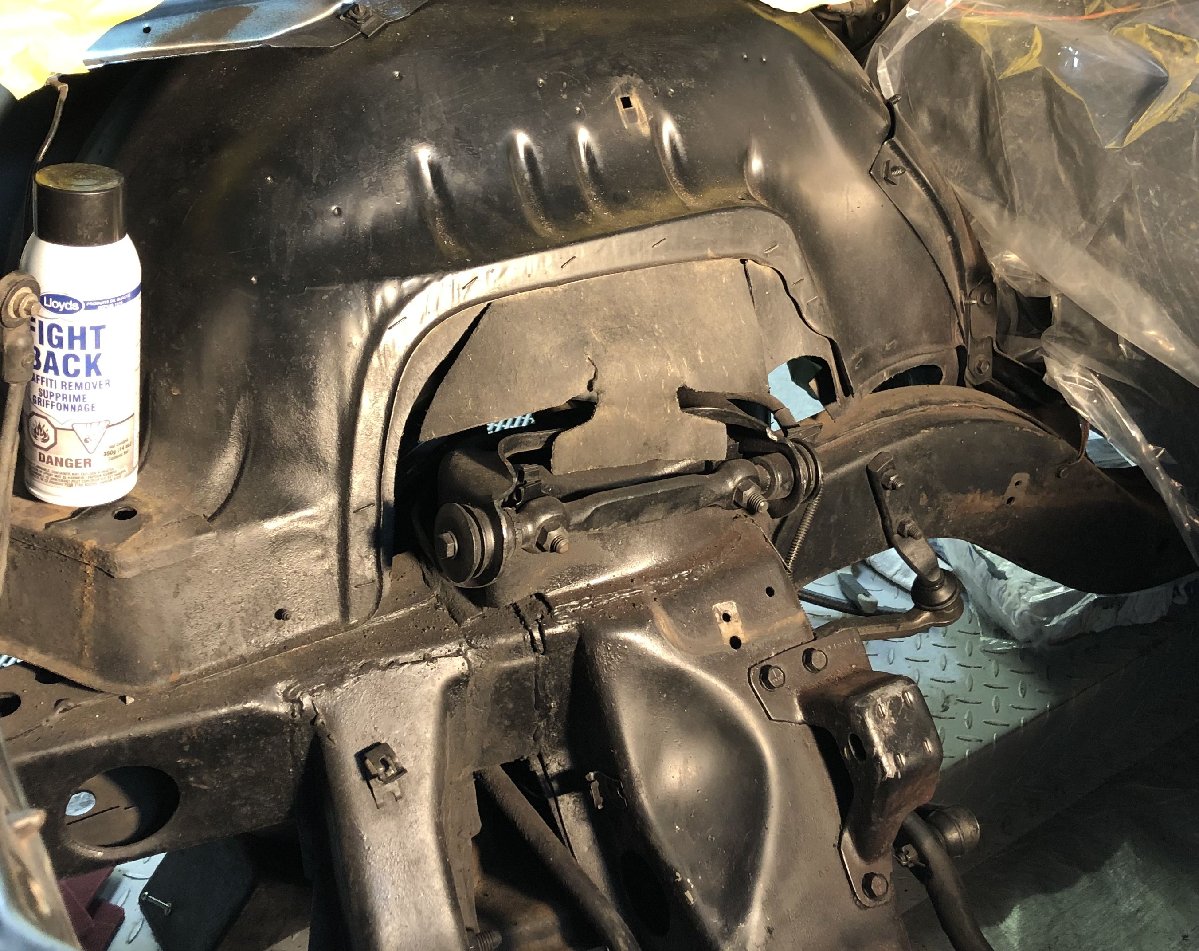 Before hitting the inner fender with Lloyd's graffiti remover.  After a scuff and a few wipe downs, it's looking a bit aged. I like it!
__________________
I like solid lifter cars, big cams and cars w/ 3 pedals in them.
|
| The Following User Says Thank You to NorCam For This Useful Post: | ||
PeteLeathersac (02-05-2020) | ||
|
#256
02-06-2020, 03:31 AM
|
||||
|
||||
|
Sometimes a little trial and error with cleaning can lead to a bonehead move. Case in point was to clean the original smog trees which in all fairness were fairly decent, to begin with. Further to that, I would have said they previously fit the bill of survivor condition. Until I screwed that up. I thought the evapo-rust being as mild as it is would simply clean them up a touch, but dunking them in there even for a short period was a big mistake. In a matter of about 20 minutes it leveled the original coating and they came out looking bare without any original coating. Like the copperish colored base or what was left of it simply wiped right off of them. This was just before MCACN and I was pretty choked at myself for not leaving those alone.
Since then I have tried finding someone who could reapply the phosphate coating and really never found anyone who could replace the factory-like finish. I read some posts about dunking them in a phosphate solution, and that others had painted them black with some phosphate spray paint but decided to try something else and see what brown colors I could find. Enter Stove Bright high temp primer and paint. I found this reddish metallic primer rated for 1200 degrees and then paired that with a can of Bark Brown which looked close to the original copper-like tone. Ordered them from Amazon in late December and they finally showed up about 5 weeks later. Needless to say, I prepped the tubes and today I put a couple of coats of the red primer on them before hitting them with the bark brown. It isn't exactly copper colored but I sure like the low luster satin finish they now have after a couple of coats of this high temp paint. With the engine already having been rebuilt and painted by others, I'm planning to tumble the exhaust manifolds next week and get them looking more factory-like. With that now in the works, the smog trees should look right at home when the engine bay is all back together in a few short weeks. Once I put some heat through them I'll see how they blend in I suppose? Note to self, evapo-rust and original smog trees do not mix. That original finish is quite delicate and does not play well with chemicals. Now, if you ever want to repaint a set of smog trees...here's what I ended up finding through Amazon. IMHO, the results are not too bad, in spite of my previous lack of judgment. (lol) Here's the stuff... 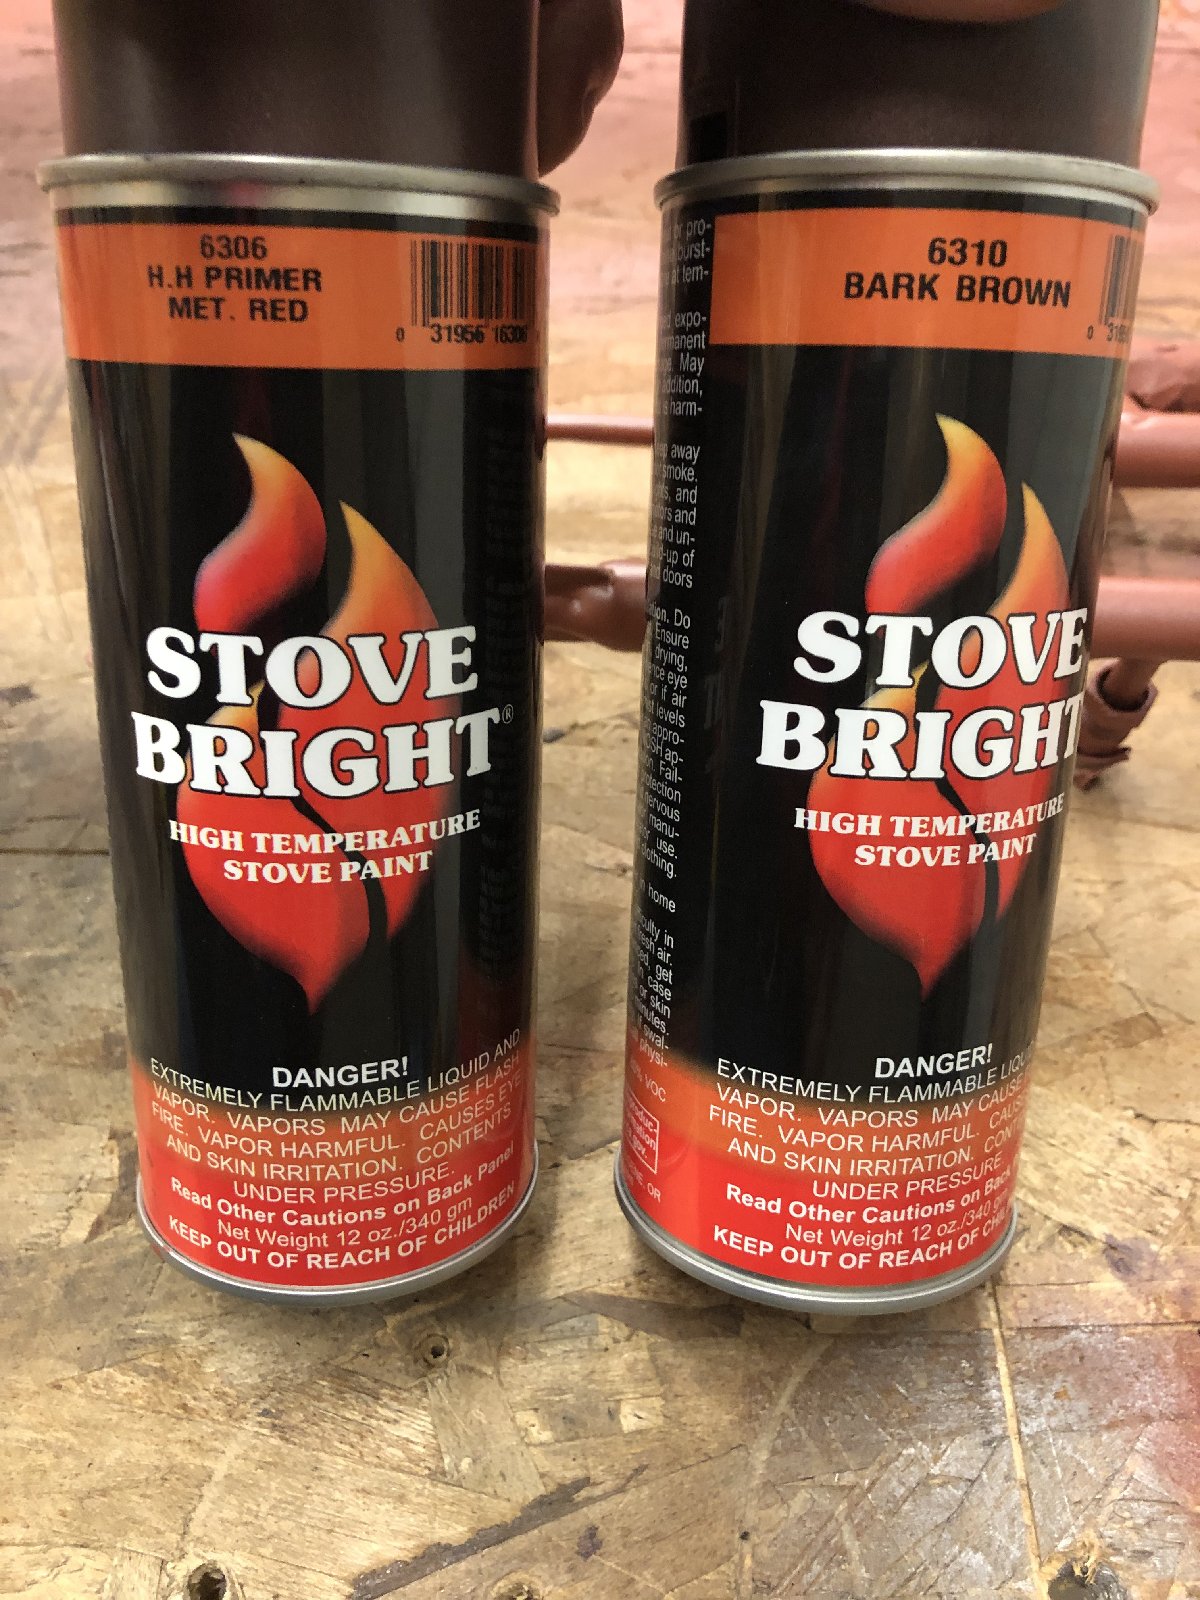 The high temp primer and the brown paint I used to refinish the trees. 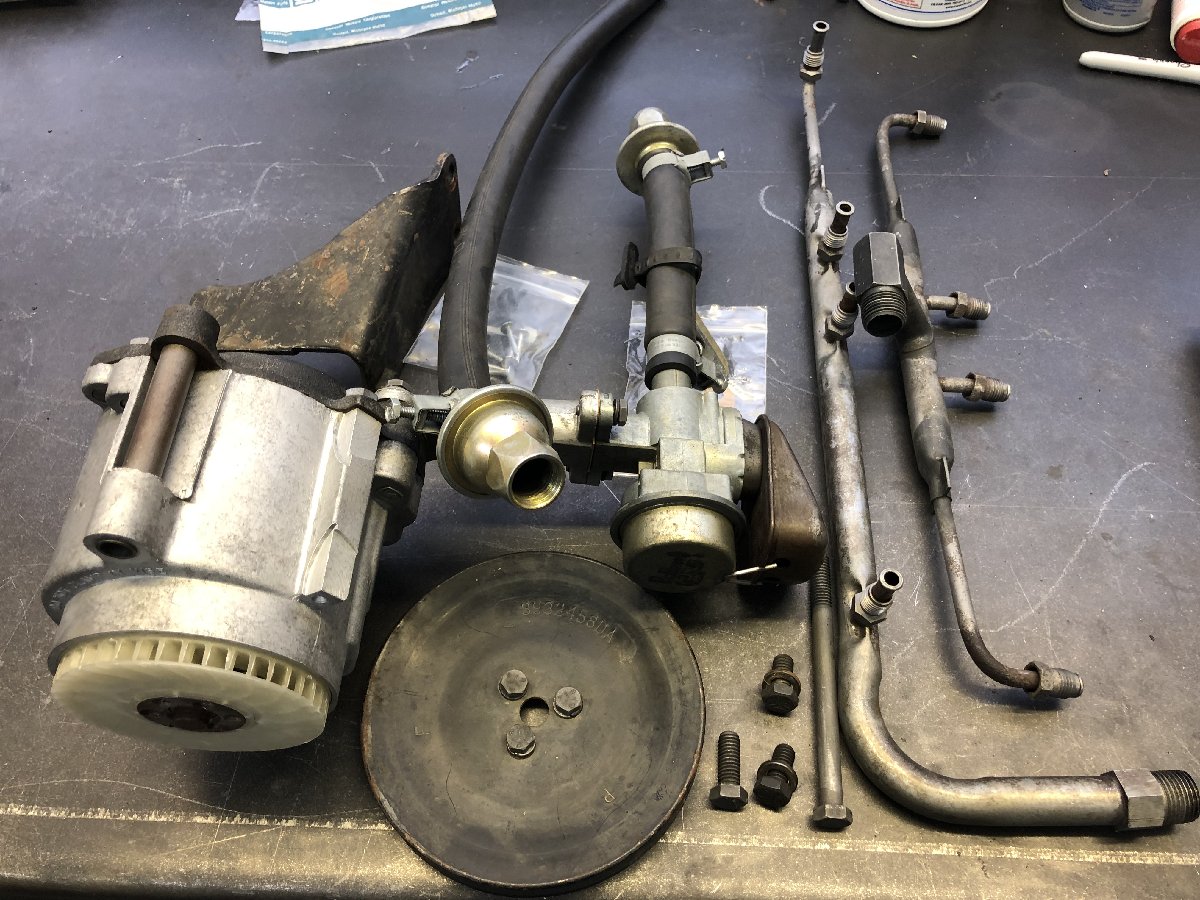 Here's how they looked after dunking them in Evapo-Rust (big no-no) 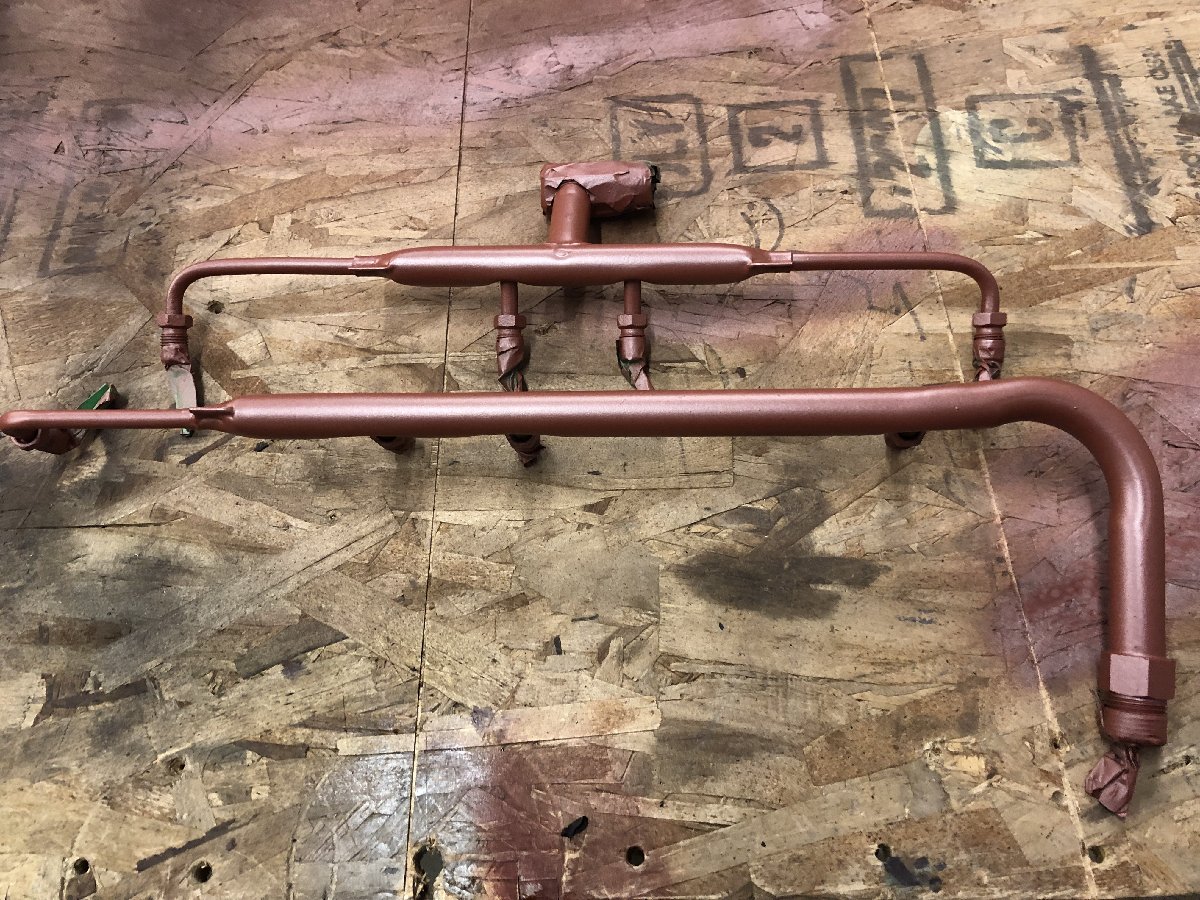 And here they are after being refinished. Hoping these fade a touch after some heat cycling. The paint was fresh here and they have darkened up some more since drying.
__________________
I like solid lifter cars, big cams and cars w/ 3 pedals in them.
|
|
#258
02-06-2020, 12:53 PM
|
||||
|
||||
|
You definitely have to be careful of Evaporust. I put some brake hardware in and all nice the paint marks came off. I just use high concentrate vinegar now. It's a lot cheaper too.
__________________
-Dave Semper Fi! 69 Camaro SS396 L34 X66
|
|
#259
02-06-2020, 04:07 PM
|
||||
|
||||
|
Yeah Evaporust will destroy or remove any original plating... zinc, cad, phosphate etc. I too had to learn that by experience

__________________
I ain't nobody, dork.
|
| The Following User Says Thank You to Tracker1 For This Useful Post: | ||
NorCam (02-07-2020) | ||
|
#260
02-07-2020, 12:46 AM
|
||||
|
||||
|
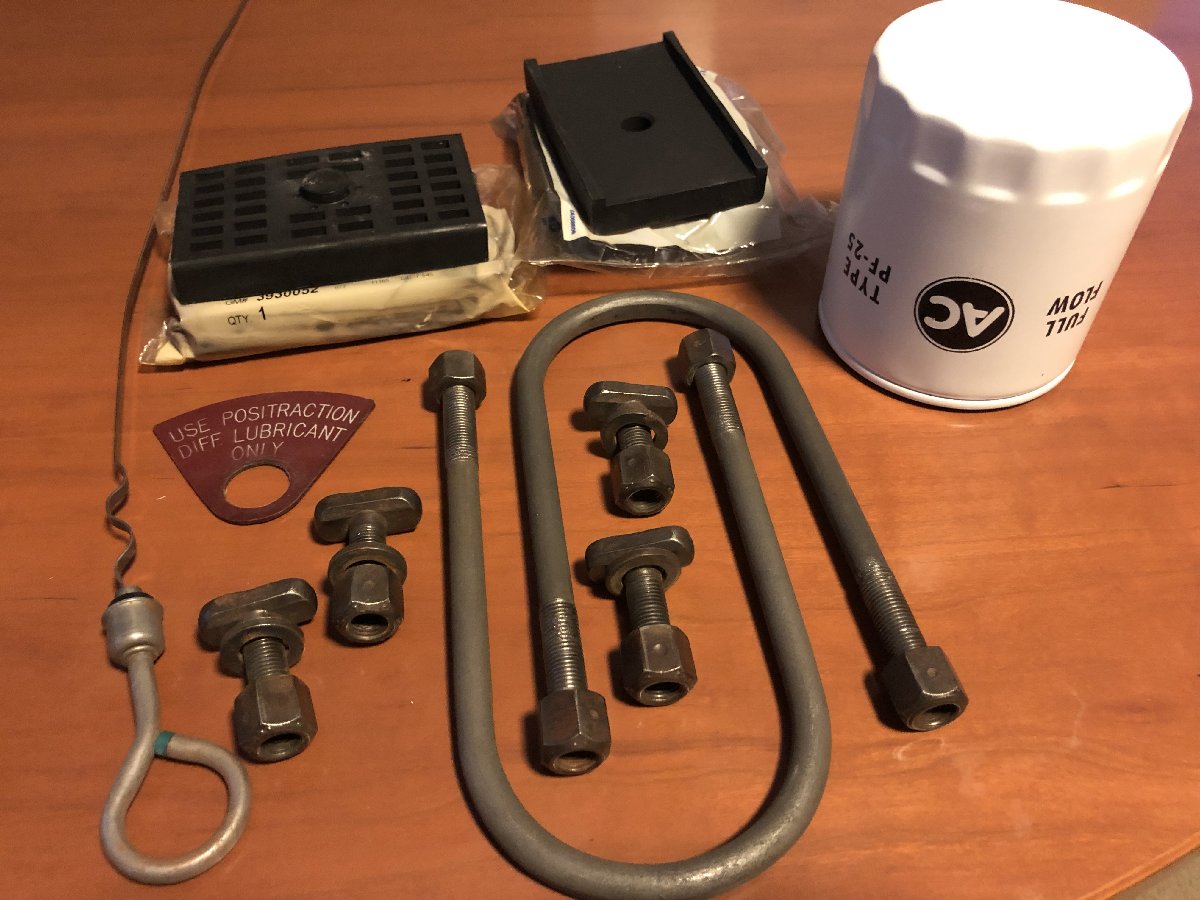
Making good progress on the floors and subframe the past couple of days. My US deliveries also arrived today with a few nice original parts that will complement the differential going back into the car. I have my helper coming tomorrow so the fuel line will go back in followed by the differential. That will allow me to get the front end in the air next week and start cleaning the front suspension with the wheels off the car. Boogying right along here now.
__________________
I like solid lifter cars, big cams and cars w/ 3 pedals in them.
Last edited by NorCam; 02-07-2020 at 03:28 AM.
|
| The Following 3 Users Say Thank You to NorCam For This Useful Post: | ||
|
|
|


 Linear Mode

