
Dedicated to the Promotion and Preservation of American Muscle Cars, Dealer built Supercars and COPO cars. |
|
|||||||
| Register | Album Gallery | Thread Gallery | FAQ | Community | Calendar | Become a Paid Member | Today's Posts | Search |


|
|
|
Thread Tools | Display Modes |
|
#181
 01-23-2006, 06:24 PM
|
||||
|
||||
|
It should have an AM/FM stereo unit (very hard to find) but I found a nice non stereo AM/FM and put that in. I connected the rear speakers off of the single speaker output wire that comes out of the radio. So I believe that would be in series, giving me one 10 ohm dash speaker, and two 4 ohm rear speakers for a total of 18 ohms of resistance. It sounded fine in terms of volume and clarity. So hopefully it won't burn anything out.

|
|
#182
01-29-2006, 02:17 AM
|
||||
|
||||
|
Here's a tech tip for the day: I've been trying to figure out where the short was in the wiring for the blower motor. I got so frustrated after an hour or two under the dash that I gave the damn motor a smack with my hand and what happens? It starts working. Typical. I then sprayed the heck out of the internals with WD-40 and it works fine now. So remember when all else fails, smack it with a bigger hammer...it just might help.

|
|
#183
01-29-2006, 02:33 AM
|
|||
|
|||
|
I have to say that this has been my favorite thread to watch throughout the past few months. I love to watch the progress and see the various tips and tricks that are being used to restore such a nice TA.
Keep the updates coming........I really look forward to them
|
|
#184
01-30-2006, 02:16 AM
|
||||
|
||||
|
The last thing to do before taking it off the jack stands was to adjust the subframe and tighten it up. I loosened the bushing bolts and then used a tapered 3/4" brass drift to align the holes in the subframe mounts with the pilot holes in the body mounts. It worked great. I then tightened the 4 bolts to 95 pounds. I finally was able to put the T/A back on the ground again and then rolled it out of the way to sweep out the garage and clean up the workbench. I found all the little clips and nuts and things that have been flinging out of sight over the past 6 months or so. It's amazing how they all migrate to the center, underneath the car.
I Hooked up the battery and cranked the engine over just to get the oil pressure up. The factory gauge is actually still accurate. After about 5 seconds of cranking it was reading 75 pounds, which is the same as the mechanical gauge I had hooked up.  
|
|
#185
01-30-2006, 02:19 AM
|
||||
|
||||
|
I unbolted the rear spoiler, tail panel, rear lamps and bumper. You can still see where the remnants of the original set of tape stripes were. Interestingly, the factory was about 3/8" inch to the left of center. So much for assembly line precision.

|
|
#186
01-30-2006, 02:37 AM
|
||||
|
||||
|
Here's the finished dash and gauges. I removed everything and cleaned it up (mainly removed all the dust). The 1970-73 engine-turned dash panels are nearly impossible to find in nice shape -they all turn yellow with age. I ended up disassembling mine, removing the factory clear varnish with lacquer thinner and then sprayed a new layer of clear over the aluminum. It worked great -really pops now. The switches all function properly now too, even the A/C stuff: you can hear the compressor clutch click when you trip the switch. All the gauges work too, even the clock. That was actually fun to restore. It's even rather easy, just remove the unit, take a small file (your wife's favorite nail file works perfectly) and file the set of points flat. Then spray all the gears and internals with WD-40. That's it. The clock runs, well...like clock now.
Here's the "before" shot, complete with cheesy aftermarket Grant steering wheel and stereo:  Here's the "after" shot, complete with my daughter's baby shoes hanging from the mirror -she's already claimed the car as hers. I guess that means now I have to teach her how to powershift an M-22:  
|
|
#187
02-19-2006, 09:45 PM
|
||||
|
||||
|
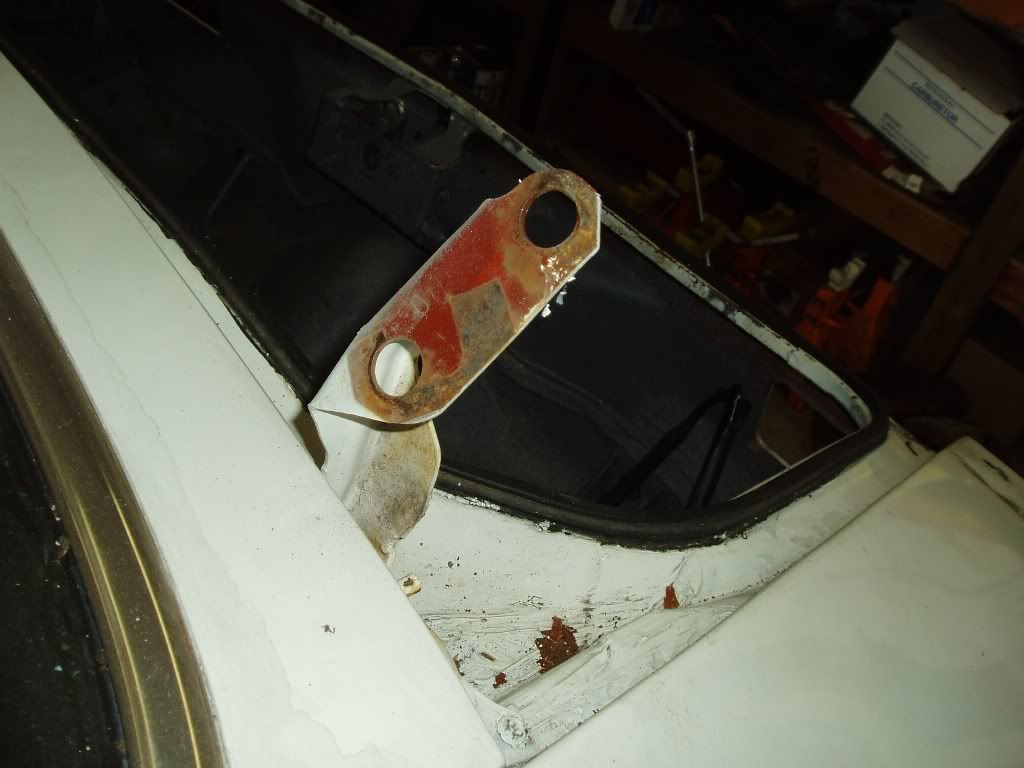
I removed the doors and trunk lid and loaded the front sheetmetal up, to bring them to Enoch tomorrow so he can start on them. This way he can have 1/2 the car semifinished when the body arrives. More evidentiary photos show that these cars must have had their doors and trunk lids installed when they went through the red oxide primer dip. Notice that there is no primer under the hinge area at the door jam and only some seepage on top of the trunk hinge where the shims left a gap.
|
|
#189
02-19-2006, 09:48 PM
|
||||
|
||||
|
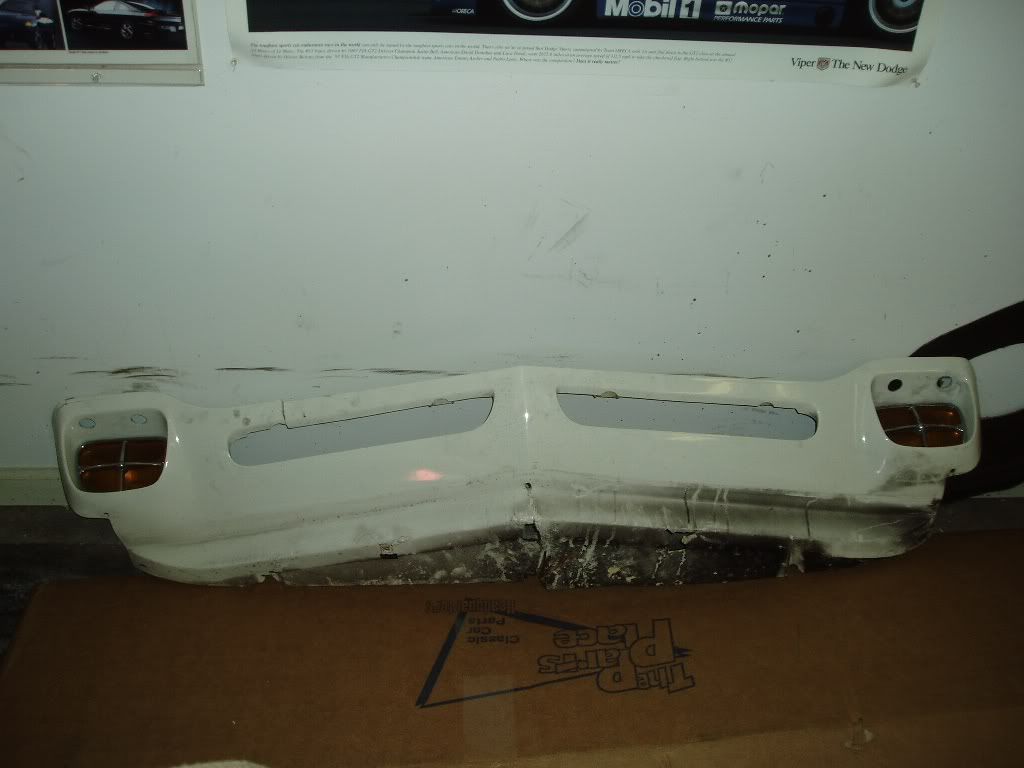
Here is the original plastic front valance from the car. All of the mounting points are broken and it is cracked in several places...and the parts that aren't cracked, are melted from a past carb fire gone out of control. Next to it is the "Parts Place" reproduction. The upper flanges seem to be wider than the originals and of course the whole thing is much thinner tha the original factory piece, but it's all we have to work with at the moment until someone makes a better one. I would think that these pieces would be in high demand to accurately reproduce as the cars look so much better with the plastic valance than the steel one: you don't see the unfinished lower nose flange with the plastic valance as you do with the steel ones.
|
|
#190
02-20-2006, 12:08 AM
|
|||
|
|||
|
Hey Steve, good job on that dash panel. Following this thread is kind of like watching old episodes of "McGyver". Keep the pics coming.
__________________
Steve H. industrial art collector
|
|
|
|


 Linear Mode

