
Dedicated to the Promotion and Preservation of American Muscle Cars, Dealer built Supercars and COPO cars. |
|
|||||||
| Register | Album Gallery | Thread Gallery | FAQ | Community | Calendar | Become a Paid Member | Today's Posts | Search |


|
|
|
Thread Tools | Display Modes |
|
#161
 01-06-2006, 04:43 AM
|
||||
|
||||
|
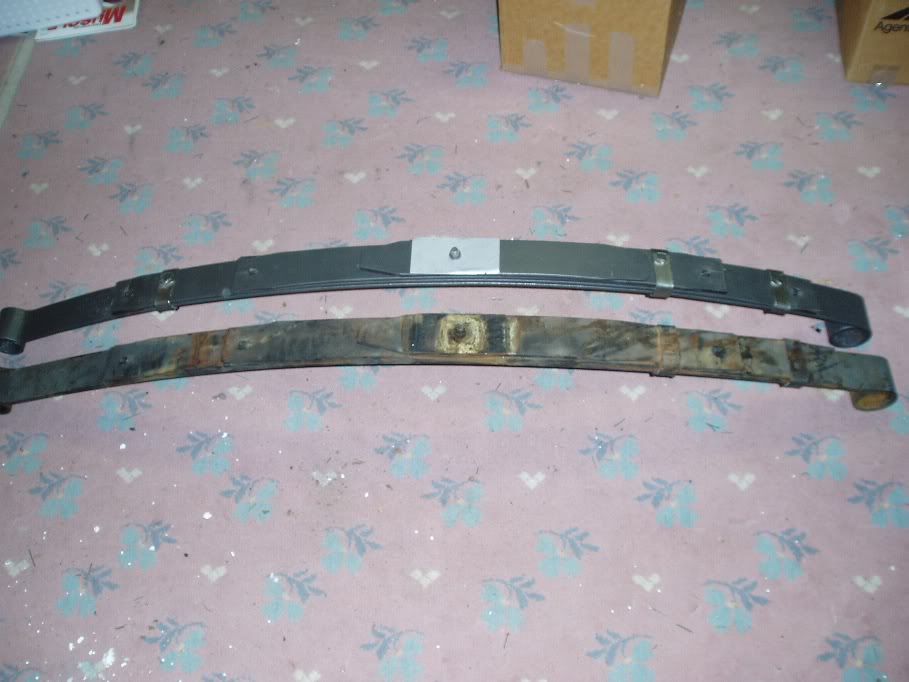
I've spent some time away from the T/A doing the holiday thing. But back to work now. With the rear dif all finished, it's time to hit the springs. I disassembled one of the leaf spring assemblies by gently tapping the spring clamps to each end with a wooden mallet so I wouldn't have to try to unbend them. I then removed the center bolt and wirebrushed each spring leaf, washed them, coated them with oxy-solv rust killer and then painted them in cast iron engine paint. I then greased the plastic insulator pads and reassembled the spring pack and then tapped the clamps back into place. The spring steel that the leaves are made of is really rough and pitted, even without having been rusted. I guess that's just the quality that came from the steel mills back in 1972.
I have been thinking about how to duplicate the factory stenciled part number and ended up with this solution: I took a photo of the part number next to a ruler, uploaded the photo to my computer and then reduced the file size until the image of the ruler on the screen was the exact size of a ruler I held up to the screen. I then printed the photo out in black and white and cut the letters out with a razor knife...and voila, a perfect stencil for the original PL-461612 1972 455 HO with a/c rear leaf spring assembly!  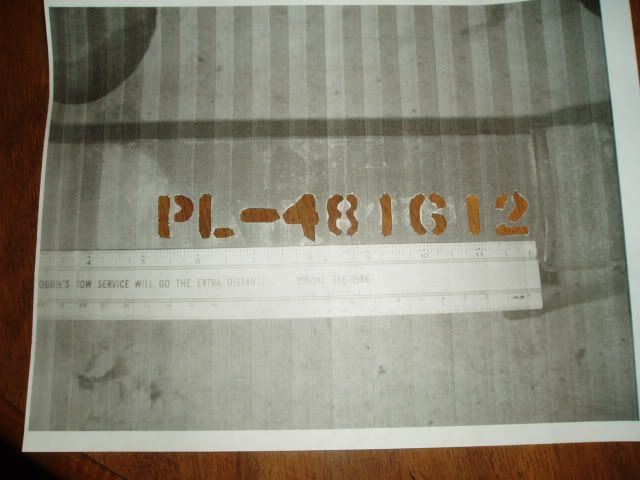 
|
|
#162
01-06-2006, 04:46 AM
|
||||
|
||||
|
Here's the finished product. Now I have to do the other side, but I will be masking off and keeping intact the original paint mark.
|
|
#163
01-15-2006, 02:44 AM
|
||||
|
||||
|
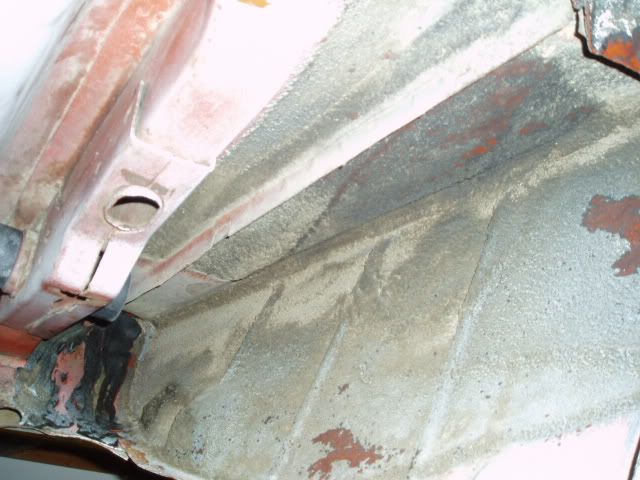
I spent the morning cleaning the frame rail area in preparation for installing the springs and rear end. I used lacquer thinner on a red rag and a lot of elbow grease and it worked great. It removed the years of dust and grime from the bottom. Interesting note: It looks like on 2nd Gen F-Bodies the factory had the rear axle snubbers installed on the body prior to being dipped in the primer bath at the assembbly plant. As you can see that is shiny metal under the area where the snubber was.
 
|
|
#164
01-15-2006, 02:45 AM
|
||||
|
||||
|
I kept going underneath, cleaning til I got to the other side...It also looks like they had the passenger side upper sway bar mount break away from the frame. Evidence of a sloppy weld repair is present.
 
|
|
#165
01-15-2006, 02:47 AM
|
||||
|
||||
|
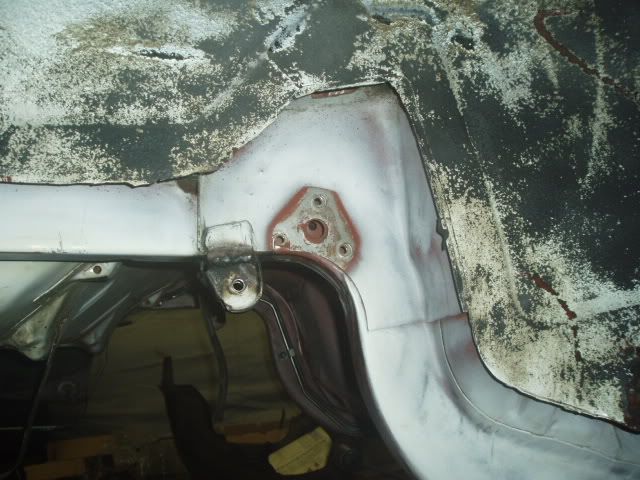
Here are some details of the inner trunk floor extensions. They were undercoated from the factory on this car. You can also see the seam sealer in the rear joint area.
|
|
#166
01-15-2006, 02:49 AM
|
||||
|
||||
|
And here's the passenger side rear inner fender area. While scrubbing away with the lacquer thinner and a rag I discovered a non-scratching scraper tool on my garage floor...a plastic bottle cap! It was within arms reach so I grabbed it and it worked wonders. I was able to get into the tiny areas and it was soft enough not to scratch any of the original primer or paint. I should patent it!
|
|
#167
01-15-2006, 05:16 AM
|
|||
|
|||
|
Hey Steve, that was a pretty neat trick with the leaf spring stencils. Looking good!

__________________
Steve H. industrial art collector
|
|
#169
01-16-2006, 02:08 AM
|
||||
|
||||
|
Got the rear end installed, along with the sway bar and shocks. I ended up painting a set of KYB gas shocks in the GM grey color (did the same in the front). This way they won't stick out so much as not being original.

|
|
#170
01-16-2006, 02:09 AM
|
||||
|
||||
|
I started to clean up the driveshaft and noticed that the original paint marks were still there, under the grey paint someone put on. Some careful cleaning and here's the remnants: From the front of the driveshaft the order is orange, white, then yellow. (This stripe scheme is corroborated by the '72 repair manual list as the correct code for the M-22 and M40 driveshaft for 1972) The stripes are brushed on and they are 1/2" wide with a 3/8" gap between them. (You can still see the brush marks in the paint) The front stripe is 19-3/8" from the front weld seam and the rear stripe is 22-1/2" from the rear weld seam.

|
|
|
|


 Linear Mode

