
Dedicated to the Promotion and Preservation of American Muscle Cars, Dealer built Supercars and COPO cars. |
|
#591
 05-03-2008, 04:42 AM
|
||||
|
||||
|
I have been getting the underside ready for the fuel tank and the rest of the emission lines. The new center trunk floor was primed with the matching red oxide primer by the bodyshop. I had a spray can made up with the correct paint code Cameo White and fogged in the overspray to match the original overspray on the trunk floor edges.
 
|
|
#592
05-03-2008, 04:45 AM
|
||||
|
||||
|
Here is the driver's side area before the trunk floor replacement:
 And after I did the matching overspray on the new trunk floor: 
|
|
#593
05-03-2008, 04:49 AM
|
||||
|
||||
|
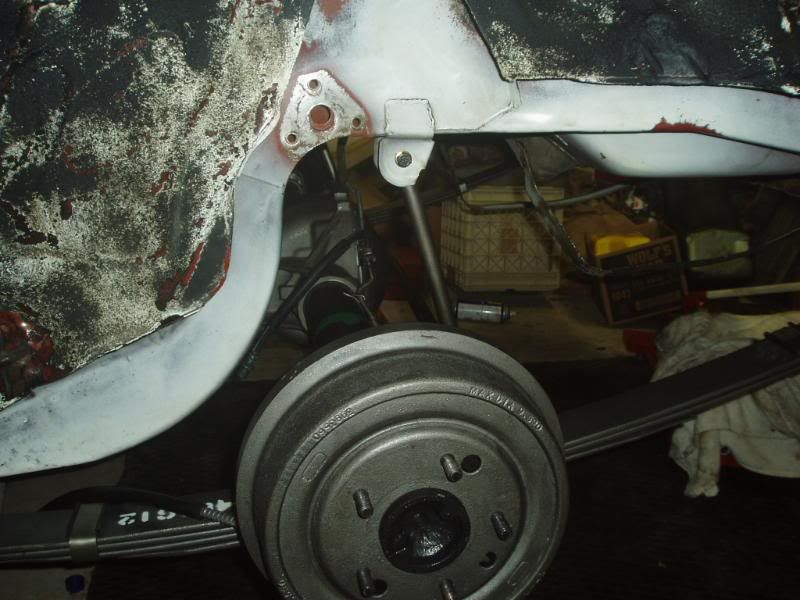
Here's the passenger side. This was a little more tricky since the body shop had to fix the crappy weld repair on the original broken sway bar mount. They did a great job repairing the original repair. I had to mask around and fog in the overpray without altering the original finish around the mount. Luckily the paint color matched the original overspray color perfectly.
The before shot:  And after my patented, supersecret overspray replication process: 
|
|
#594
05-03-2008, 04:48 PM
|
|||
|
|||
|
Good "before" pictures are the key to an accurate restoration, and I know you have plenty!! Keep up the good work!
 Verne 
|
|
#595
05-05-2008, 03:54 AM
|
||||
|
||||
|
Today's job was installing the fuel tank, rear fuel lines and all of the emission lines that went from the tank to the evaporative canister in the rear trunk bulkhead. I also reinstalled the four original exhaust system mounts.
The tank was one of those Canadian reproductions. I bought it at Carlisle last year and saved the crazy shipping costs. It was about 98% accurate and only needed a little persuasion to get the filler neck adjusted to the correct angle. It was off by a couple of degrees and was 1/8" longer than the original filler neck. I replaced the original tank because it had several screw holes in the top where someone must have tried to mount something in the trunk and punched the screws right through the trunk floor and into the tank. As for the seven emission lines' routing, luckily I took some good photos of the layout before. I ended up taping the photos together like a jigsaw puzzle and then taped the whole photo montage to the underside of the car as a map, while I was working under it. It worked out well. All the lines and now replumbed exactly as they were originally, but with new rubber, of course. There is no way I would ever reuse original emissions and fuel lines. They may look good on the outside with their original date codes and paint stripes, but they were hard as rock and just waiting for the exact moment to crack and leak. No sense risking your car (and life) to be THAT original. Oh, and yes I remembered to install the fuel guage sender lead and ground before installing the tank (the second time).  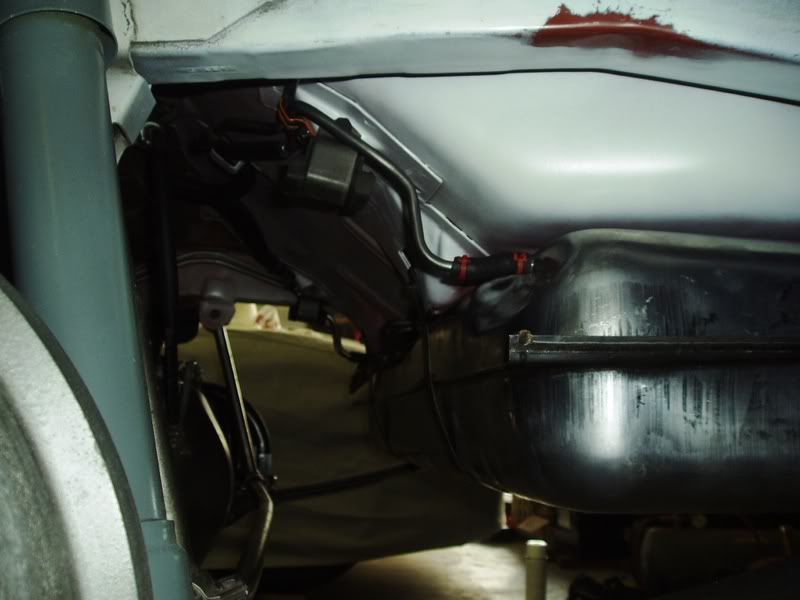 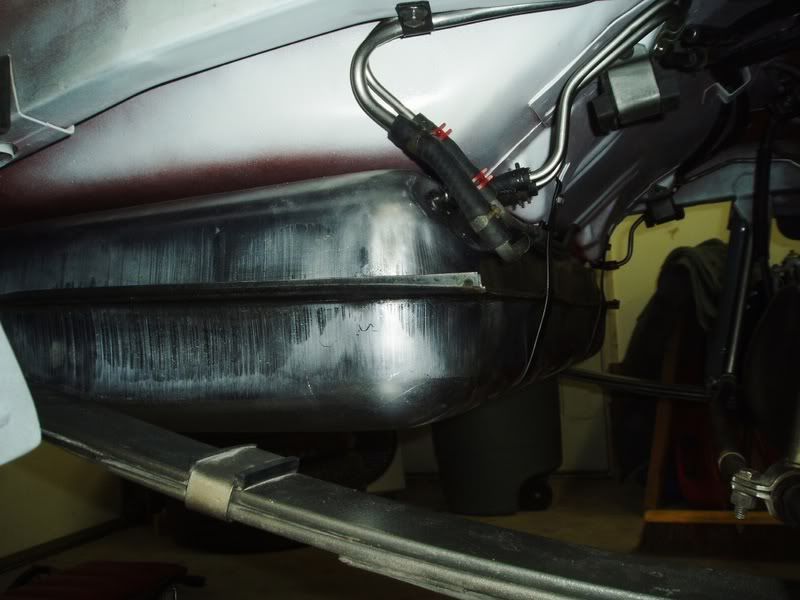
|
|
#596
05-06-2008, 03:15 AM
|
||||
|
||||
|
I had an hour to spare this evening and installed the Gardner exhaust system on the car. It is amazingly refreshing to come across a reproduction part that does more than you would expect. It bolts up with no problems: everything slides into place and fits perfectly. Even the exhaust clamps slide into their saddles like they were made for each other. When I say it took about an hour I wasn't being sarcastic, the system is that good. I took a little longer due to time spent admiring my own work.
 Passenger side:  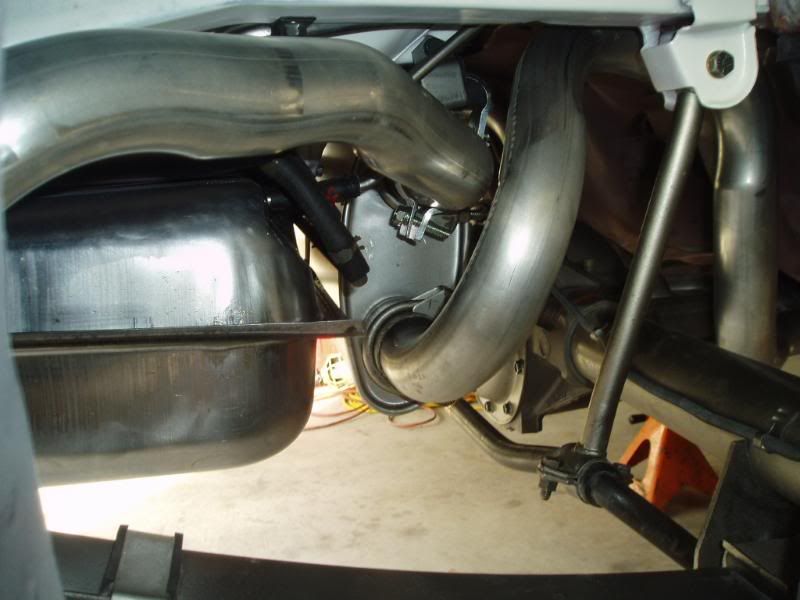 Driver's side:  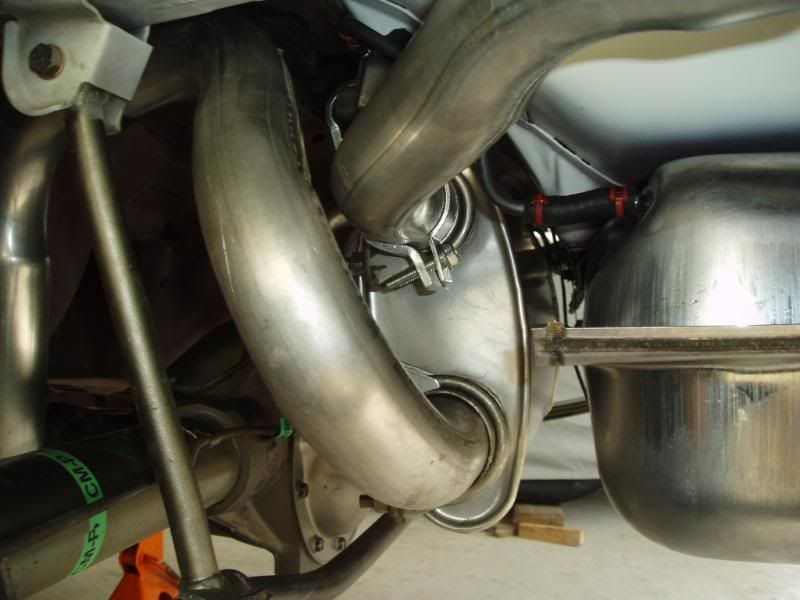 Ant's eye view: 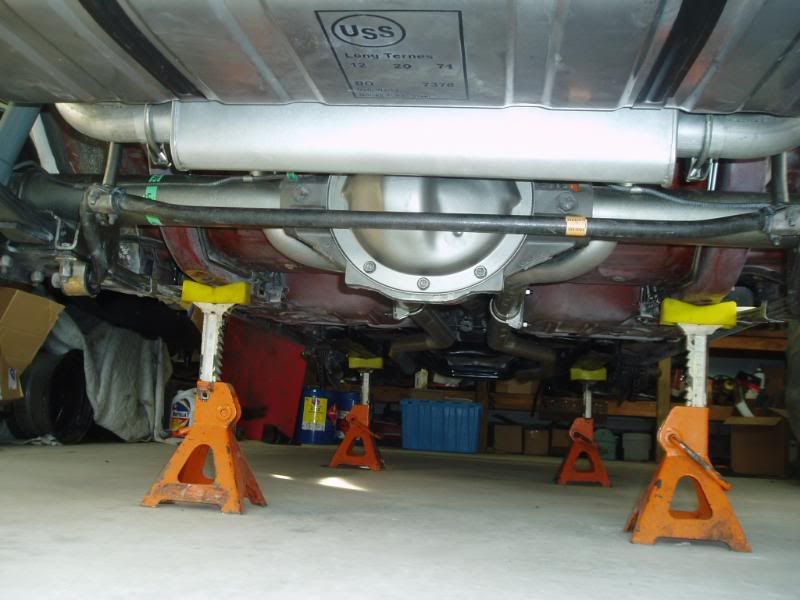
|
|
#597
05-06-2008, 03:19 AM
|
||||
|
||||
|
I ended up using my original rubber insulated muffler and tailpipe hangers, so I now have the new set of Gardner hangers available in case anyone needs them for a 2nd gen F-Body.
The tail pipe hangers. The Gardner hanger is on the left - there are two of them in a set)  The muffler hangers: The Gardner hanger is on the right. (also two of these in the set) 
|
|
#598
05-06-2008, 07:38 PM
|
|||
|
|||
|
Steve, you have a PM.
Paul
__________________
70 Camaro LA Z-28 03B Citrus Green LT-1 M-40 3.73's 69 Camaro X-77 Z-28 10C Cortez Silver M-21 3.73's Deluxe Project X - SOLD 69 Camaro X-77 Z-28 01B Garnet Red w/Black top, M-20 3.73 Deluxe Houndstooth
|
|
#599
05-07-2008, 02:33 AM
|
||||
|
||||
|
I threw a couple gallons of gas in the tank today and cranked her up. She started on the first turn!
Here's how the Gardner exhaust sounds on a 455HO.  
|
|
#600
05-07-2008, 02:39 AM
|
||||
|
||||
|
Beautimus Mac!!!!!!!! Congrats!

__________________
Sam...  
|
 |
| Thread Tools | |
| Display Modes | |
|
|


 Linear Mode

