
Dedicated to the Promotion and Preservation of American Muscle Cars, Dealer built Supercars and COPO cars. |
|
#552
 01-31-2008, 12:36 AM
|
||||
|
||||
|
After soaking for over 2 weeks in the purple stuff, all the paint finally came off of the spoiler end caps and the fender vents. There was some thick paint on there for sure.
I was also able to trim the black spoiler end cap to the correct length by placing a piece of masking tape along each leading edge of the white end cap and marking where the taper ended. I then removed the pieces of tape and placed them on the black end cap along the same leading edges. I then marked the locations. I then verified that the cut angles were the same as on the white end cap (65 and 80 degrees) through the use of my 7th grader and her protractor. I then used a fine bladed hand saw to remove the excess and voila, a correct 1970-73 end cap. Before: 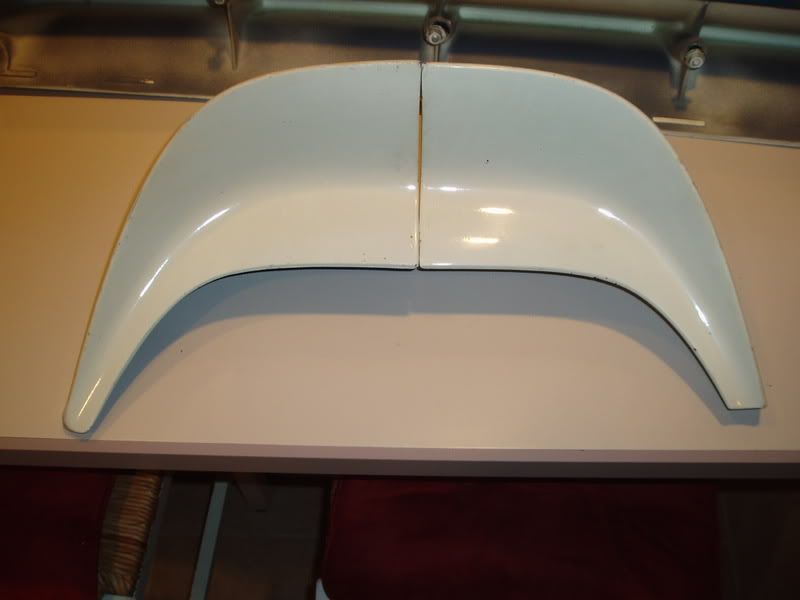 And after: 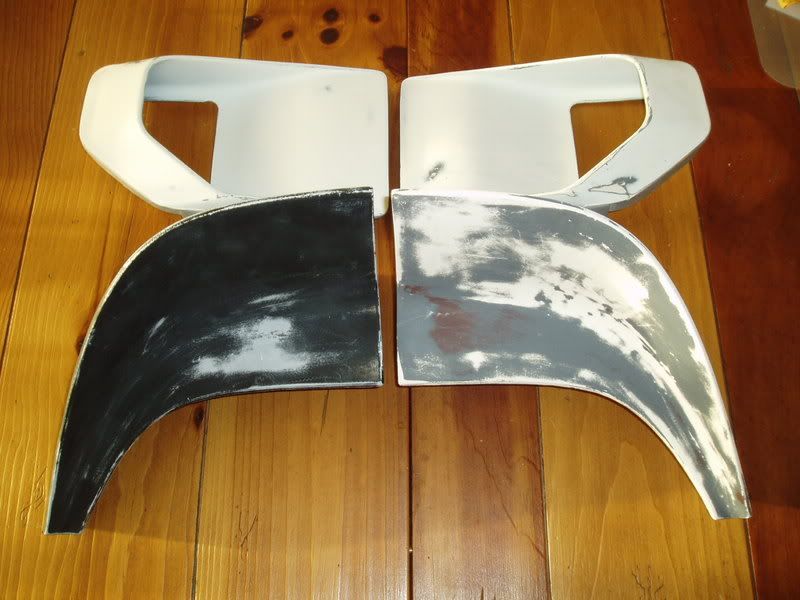  
|
|
#553
01-31-2008, 12:49 AM
|
||||
|
||||
|
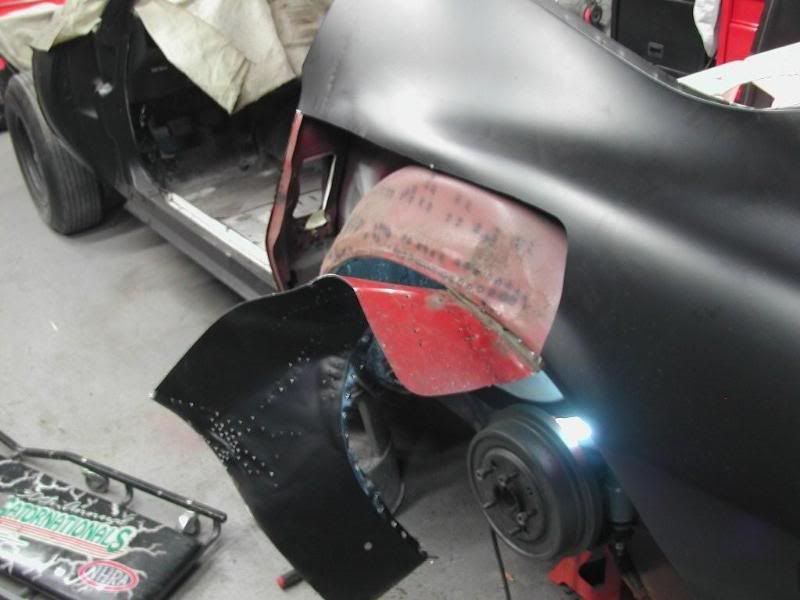
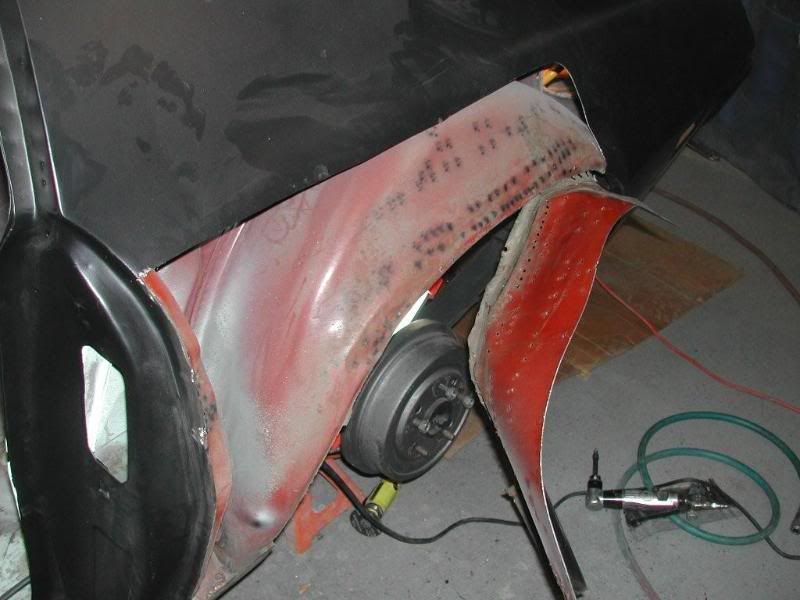
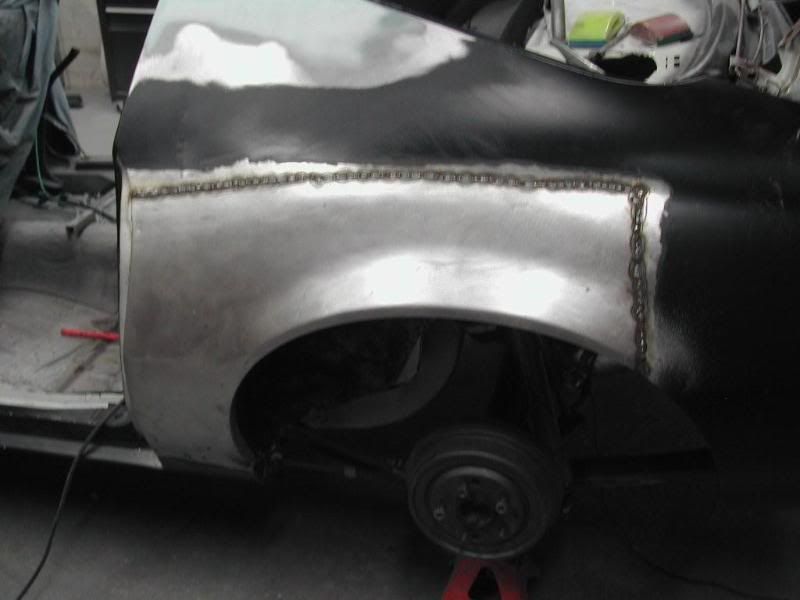
At the body shop, they started trimming the replacement section for the front of the driver's quarter.
  And welding up the 27 dent puller holes in the passenger quarter:  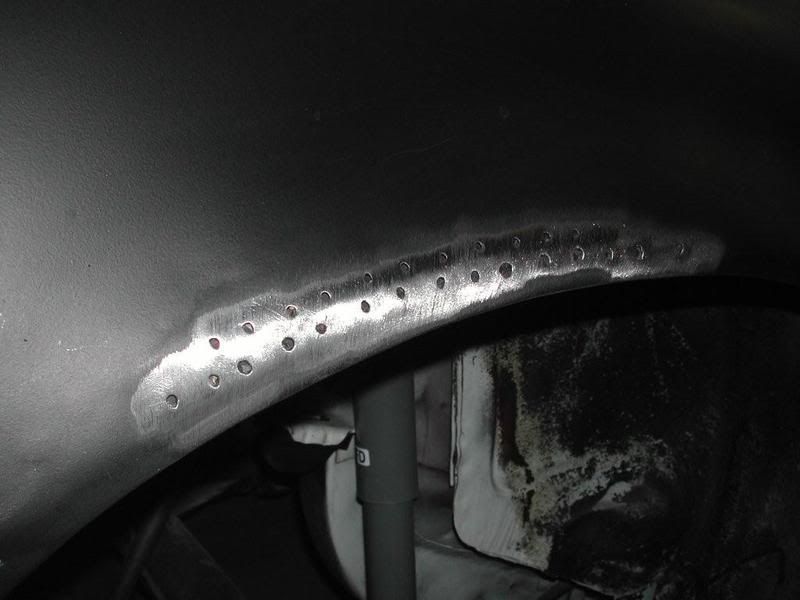 
|
|
#554
02-02-2008, 11:53 AM
|
||||
|
||||
|
They cut out the shoved in section of the rear valance and hammered it back into shape in order to then weld it back in place. He said after metal working the panel, it's now 1/2 wider and 3/8 longer! Love that original red-oxide primer inside!

|
|
#555
02-20-2008, 09:09 PM
|
||||
|
||||
|
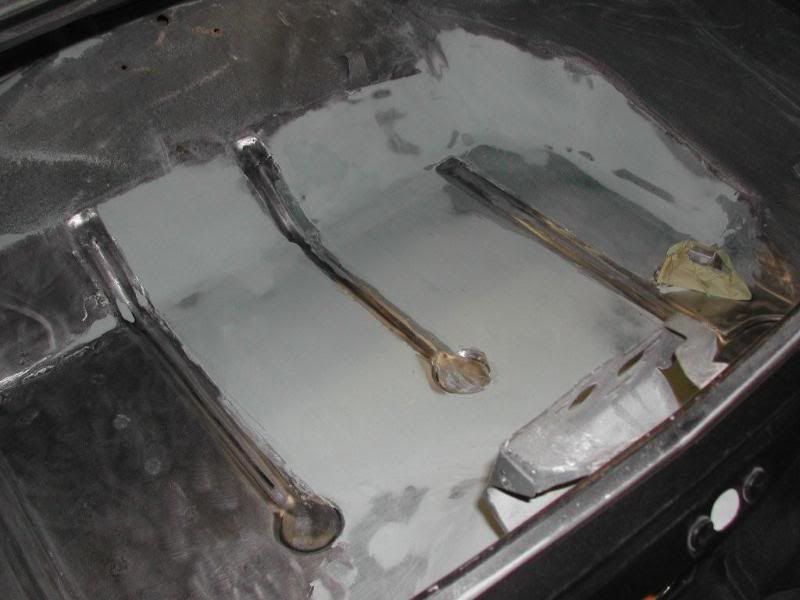
More progress on the trunk floor. The welding is done and the body work is commencing on the center section of the trunk floor. He used as much of the original trunk as possible, the bad part was the flat area where the water sits on all second gen F-bodies.
|
|
#556
02-20-2008, 09:12 PM
|
||||
|
||||
|
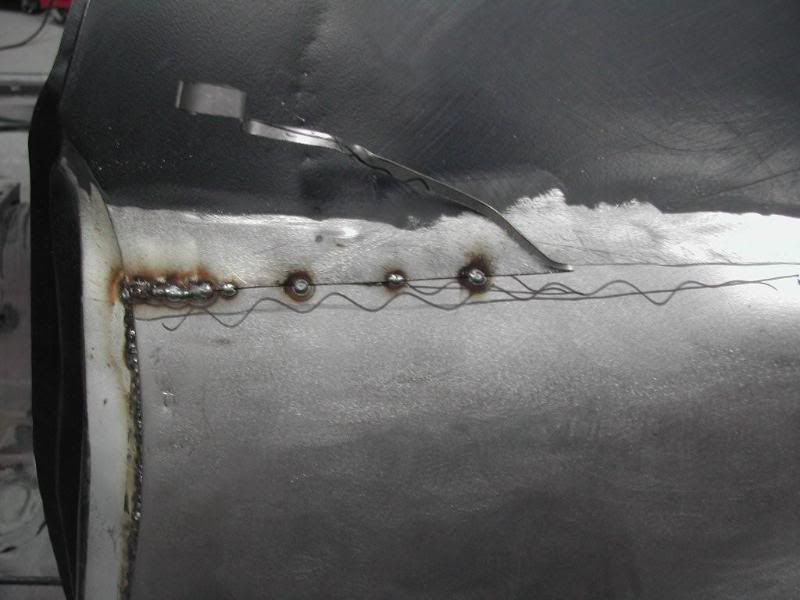
The "Lite Brite" repair. The body shop screwed and tack welded the donor panel in place in preparation for final trimming so the edges match perfectly and the ends can be butt-welded together.
  
|
|
#559
02-20-2008, 10:02 PM
|
||||
|
||||
|
Steve,
Are they overlapping the panels and then using a sawzall or a jig saw to cut through both at the same time giving them a uniform gap and exact mating all the way down?
__________________
~JAG~ NCRS#65120 68 GTO HO 4 spd Alpine Blue /Parchment 2 owner car #21783 71 Corvette LT1 45k miles Orig paint - Brandshatch Green - National Top Flight - last known 71 LT1 built. 71 Corvette LT1 42k miles Original paint - Black - black leather - only black LT1 known to exist. NUMEROUS Lemans blue Camaros, Monza Red and Daytona Yellow Corvettes & a Chevelle or two... Survivors, restored cars, & other photos https://picasaweb.google.com/lh/myphotos
|
|
#560
02-20-2008, 10:10 PM
|
||||
|
||||
|
That seems to be the theory. From what I can tell, he fixes the position by tack welding it first in a couple spots and then uses a cut-off wheel and cuts through both panels, leaving a tiny gap the width of the cut-off wheel. The weld then fills the gap between the two panels and gets the right amount of penetration into both sections of metal.
|
 |
| Thread Tools | |
| Display Modes | |
|
|


 Linear Mode

