
Dedicated to the Promotion and Preservation of American Muscle Cars, Dealer built Supercars and COPO cars. |
|
|||||||
| Register | Album Gallery | Thread Gallery | FAQ | Members List | Calendar | Become a Paid Member | Search | Today's Posts | Mark Forums Read |


|
|
|
Thread Tools | Display Modes |
|
|
|
#1
 01-31-2017, 08:01 PM
|
||||
|
||||
|
I believe my 74 z/28 has this welded nut thing also.
__________________
1969 Camaro RS/SS Azure Turquoise 1969 Camaro Z/28 Azure Turquoise 1984 Camaro z/28 L69 HO 5 speed 1984 Camaro z/28 zz4 conversion 1987 Monte Carlo SS original owner 
|
|
#2
02-18-2017, 04:11 PM
|
||||
|
||||
|
Things are moving along nicely. A fellow member over at the Performance Years forum sent me 1974 casting date spindle from one of her parts cars and we are good to go. Thank you LadyTATA! [img]<<GRAEMLIN_URL>>/biggthumpup.gif[/img]
Here are the new coil springs. I got them from Coil Spring Specialties http://www.coilsprings.com/ They build your springs to order using the factory specs, out of specific coil material. They don't just hack an inch off of some unversal sized coil. It usually takes a week or two to get them made. They did an awesome job making me a set of springs for the black 72 Formula a few years ago which had the car sitting perfectly - not too high, not too low. I looked up my old invoice and had them build the same set again, under that work order. The spec was for a 72 T/A 455 with A/C and a one-inch ride height drop. (Even though the spec were for a lower ride height, the springs had the car sitting at the exact ride height as original). Here they are. They are shorter than the factory spring but made of a stiffer material. If I put my weight on the old spring I can compress it a little...not with the new spring! 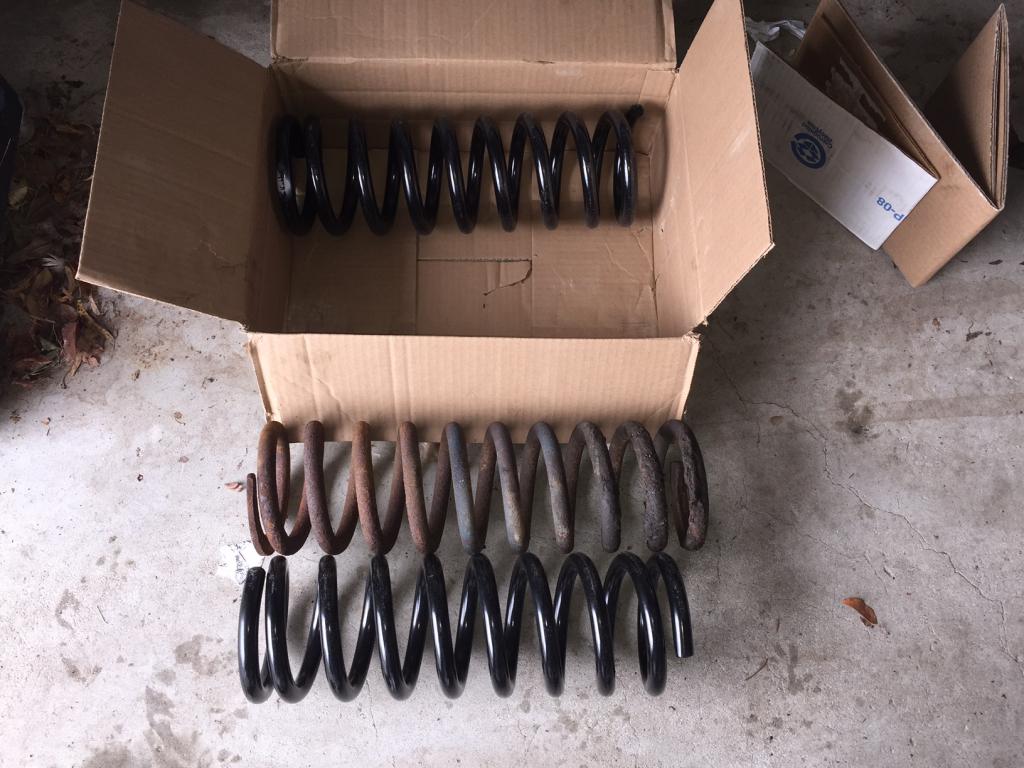 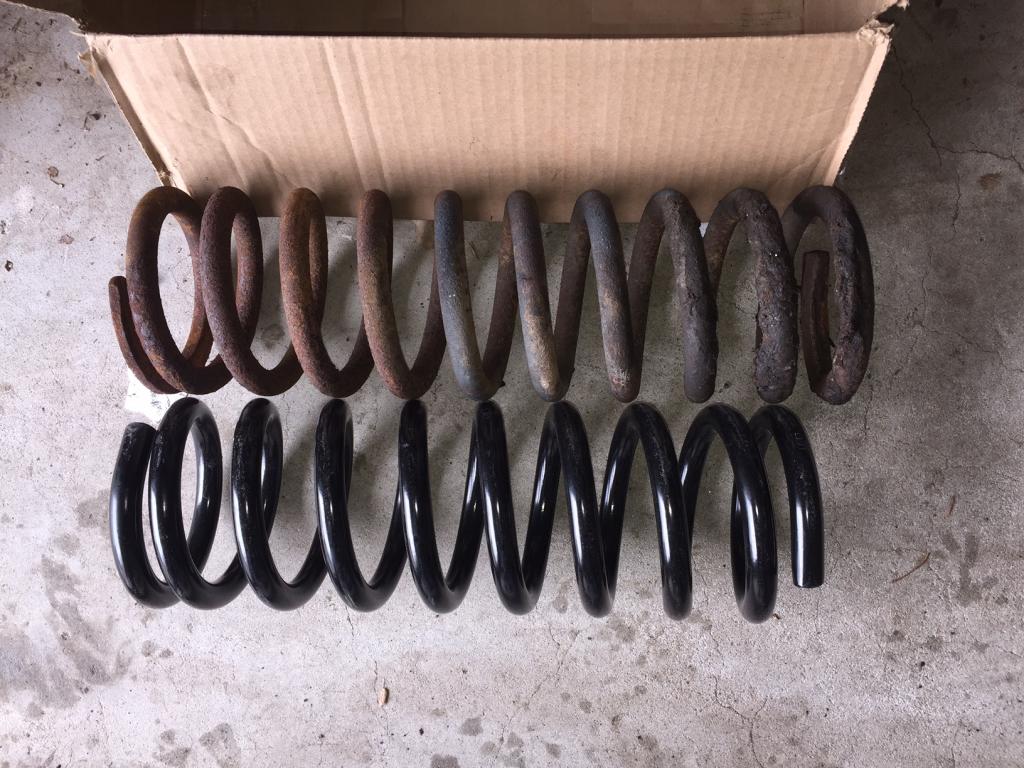
|
|
#3
02-18-2017, 04:18 PM
|
||||
|
||||
|
On Monday I dropped off the control arms and inner fenders at Xtreme powder coating in West Easton, PA http://xtremecustomcoatings.com/. They had them blasted and powder coated and ready for pickup on Friday! Now that's service! Very good price too. I was lucky in that they had a load of other stuff to do in semi-gloass black scheduled that week and I came by at the exact right time to add it to the batch.
Once I got them back, I painted the bare metal portions with stainless steel paint to duplicate the original undipped portion of the arms. Now it's time for pressing in the new bushings and balljoints. 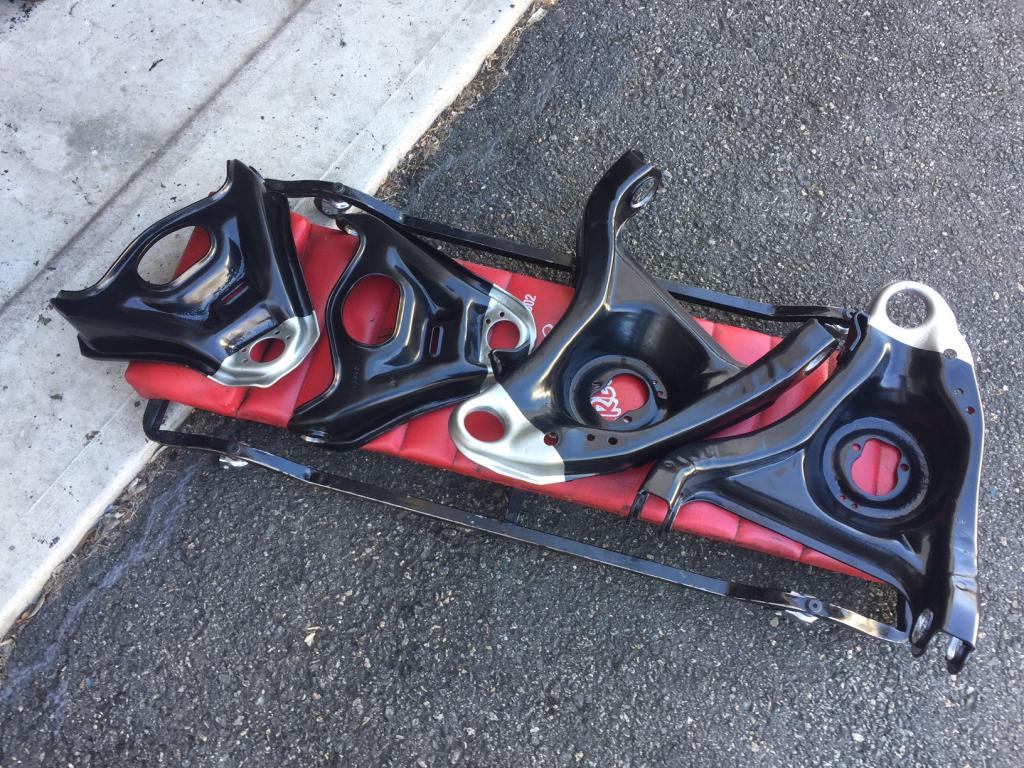
|
|
#4
02-18-2017, 08:10 PM
|
|||
|
|||
|
Steve, Do you any knowledge of what kind/brand of filler can be used on rust pits
on metal that would be then powder coated ??? Also having recently pressed bushings into unpainted control arms.... I'm very interested to see/learn how YOU do this with damaging your fresh powder coat.
__________________
Chuck Sharin [email protected] Auburn,WA (30 miles South of Seattle) 70 Camaro R/S Z-28, L-78, R/S SS 69 Camaro COPO "recreation"
|
|
#5
02-18-2017, 09:02 PM
|
||||
|
||||
|
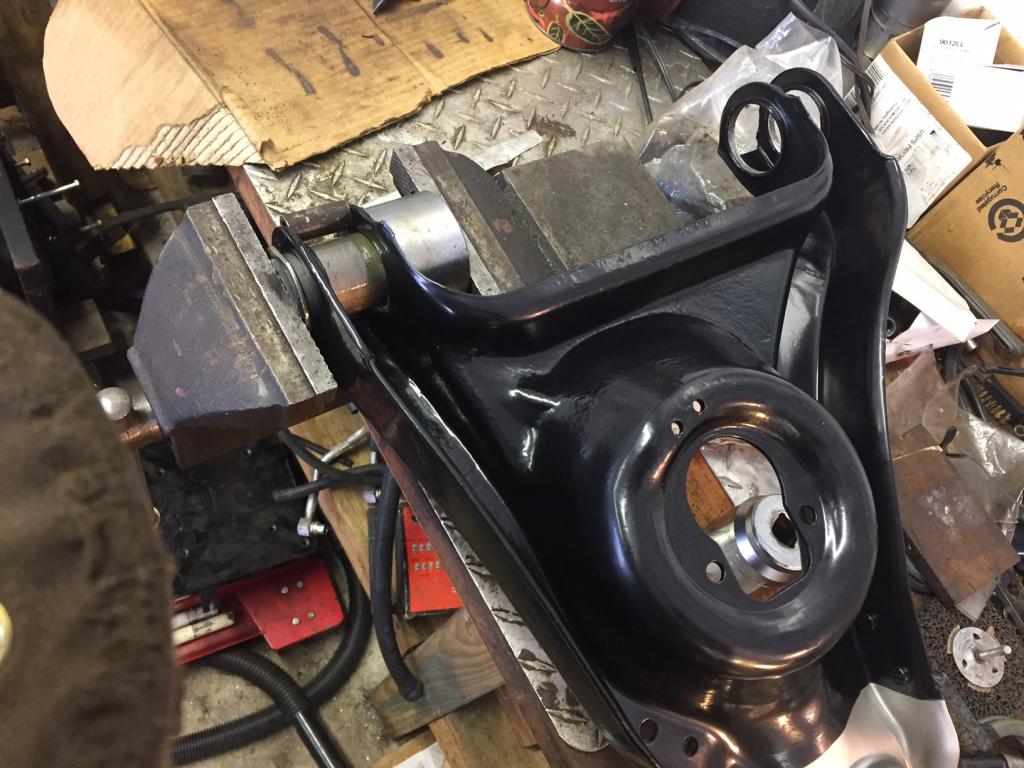
The installation of the lower control arm bushings was not too difficult. I used the bench vice and several 3/4 drive sockets to press them . The powder coat held up fine. I oiled the bushings so they'd slide a little easier.
|
|
#6
02-18-2017, 09:45 PM
|
|||
|
|||
|
----Chuck,,,I was thinking JB Weld. The only thing is that I have found it hard to feather out at the edges, but not impossible......Bill S
|
|
#7
02-18-2017, 10:59 PM
|
||||
|
||||
|
Make sure you use a spacer to keep the flanges from bending inward. I used a section of Mopar alternator bushing for the lower control arms.

|
|
#8
02-18-2017, 11:11 PM
|
||||
|
||||
|
The upper control arms are a little more involved. If you try to press both bushings in without supporting the inner arms where the flanges are, it will bend the entire arm in half and destroy it. Originally there was a dealer issued tool (no longer available) that supported the area between the two arms while using a press. So I built my own...
First, I used the vice to press in the smaller bushing (1975 used a large and a small bushing, while earlier models used the same small bushing on both sides). I then set the pivot bar in place, passing it through the larger bushing hole and set the large bushing in place. I then set up the spacer bar I fabricated from the old central pivot bar that I had to cut off due to the factory spot weld. I cut it to the exact length that could run parallel to the new bar. This way I could use a couple long bolts to pin them together to hold the spacer bar from flying outward under pressure. It worked great! 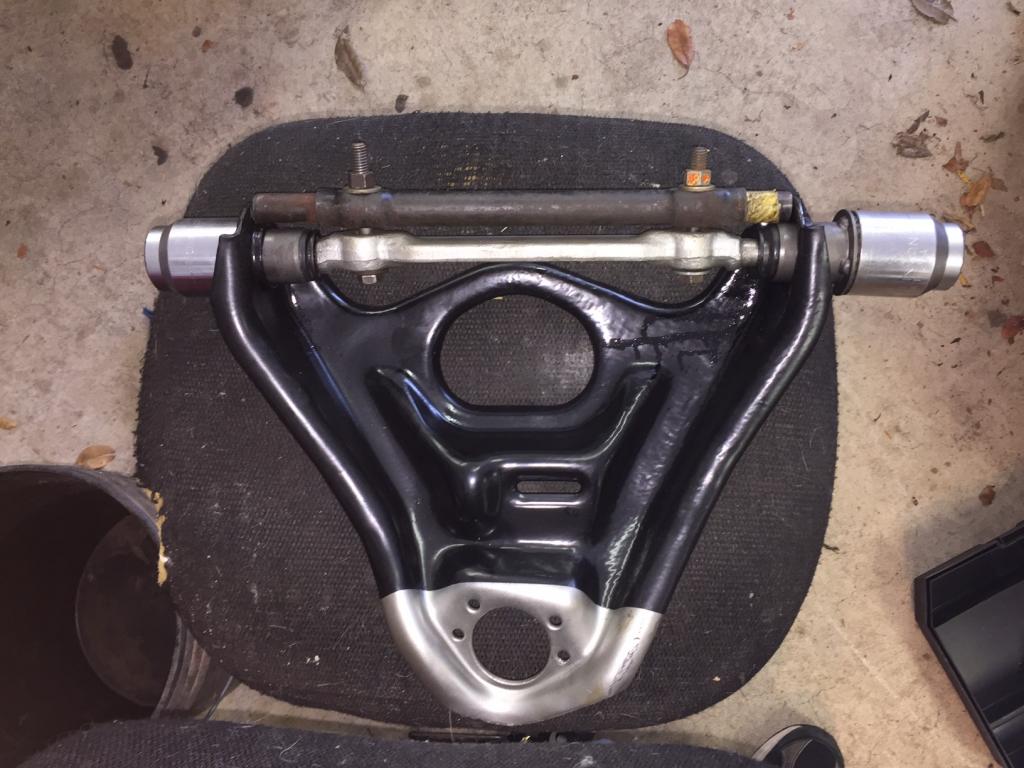 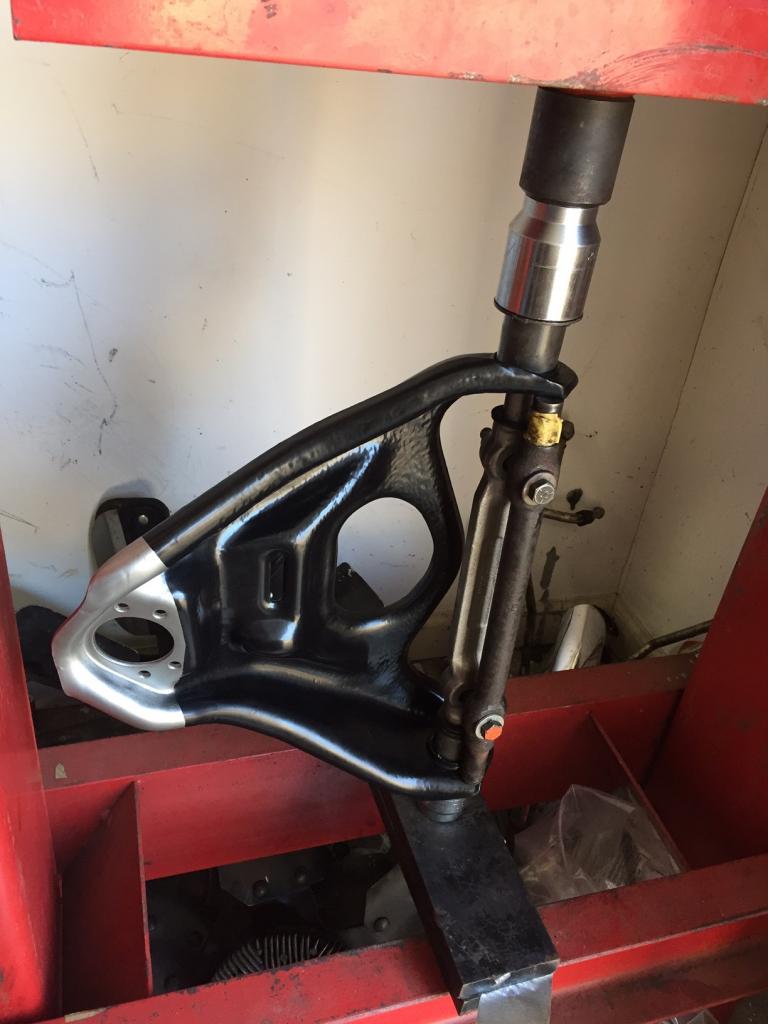
|
|
#9
02-18-2017, 11:16 PM
|
||||
|
||||
|
As for the powder coating holding up, it survived the process relatively unscathed. The silver paint did scratch off when I pressed the lower ball joints in but that was easily resprayed, and it didn't hurt the underlying black powder coating either. (although I had to buy another Moog ball joint after I neglected to account for how far the balljoint stud would protrude through the large sockets when pressed, and it bound up against the press'es floorplate and ruined the internal parts. So I had to go out and buy another one at the local auto parts store. They actually had the same Moog part in stock (at twice the price I paid for the first one). [img]<<GRAEMLIN_URL>>/mad.gif[/img]
|
|
#10
02-24-2017, 04:10 AM
|
|||
|
|||
|
May I ask what method you used to remove the upper control arm shaft from the upper control arms so you could replace the bushings? Thank you for your documentation, I will be doing this to my '71 Camaro soon.
__________________
--Nick
|
|
| Thread Tools | |
| Display Modes | |
|
|


 Hybrid Mode
