
Dedicated to the Promotion and Preservation of American Muscle Cars, Dealer built Supercars and COPO cars. |
|
#11
 06-17-2021, 04:15 AM
|
||||
|
||||
|
Cool thread and you're doing a great job resurrecting the Chevelle. It's a deja vu thing for me since my Dana '68 Z had been hit in the left rear somewhere around 1970. They just bondo'd it up and called it good. Fortunately, there's a shop in my town with all the right frame straightening equipment. The owner has an appreciation for old cars so I made sure I took advantage of the opportunity to fix the car right. I look forward to seeing more of your handiwork on the Chevelle.

|
| The Following 4 Users Say Thank You to 1967Z28 For This Useful Post: | ||
|
#12
06-17-2021, 04:43 AM
|
||||
|
||||
|
Quote:
My '67 ss/rs was hit fairly hard in the right rear early in it's life and a quarter skin brazed on, partly over the old one. The trunk floor was still all wavy and the tail panel had been sectioned on thru the left tail light. LOTS of bondo on that mess to blend it all together too. A couple years ago, I replaced the entire trunk floor with a 1 piece and recently removed the cobbled quarter and got an NOS one in TN for the car. I do have a thread somewhere for that, slow moving, rebuild also. The Chevelle is good practice for me, as I have a documented '70 SS Chevelle that needs nearly every panel replaced. I hope I can live long enough to get all my "too many projects" done... 
__________________
Mitch 1970 Chevelle SS 1966 Chevelle SS 1967 Camaro ss/rs 1938 Business coupe, street rod 2000 FXSTS, original owner, 13k miles
|
| The Following 4 Users Say Thank You to Too Many Projects For This Useful Post: | ||
|
#13
06-29-2021, 03:10 AM
|
||||
|
||||
|
I have been working on this, just not updating the thread as well as I could/should. I'll make brief comments on the progress, to keep this, somewhat short.
NONE of the 4 bolts in the trunk floor body mounts would come out, so I used a porta-power to make a little room for the sawzall and cut them off. Floor is junk anyway, so no loss.   I left the right side floor intact for now, to hold the quarter panel in place. 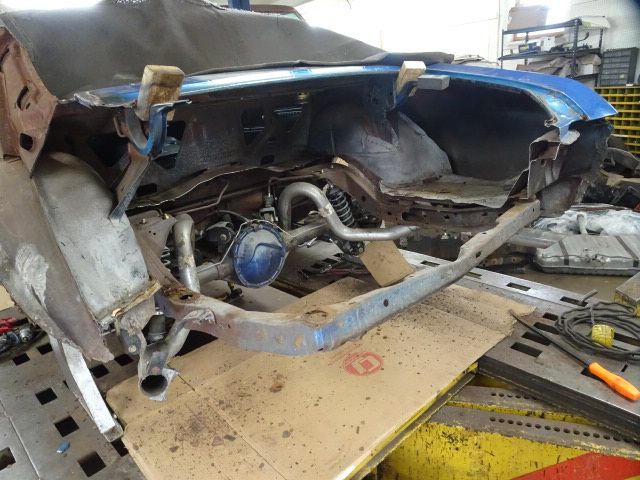 Then I crawled inside to drill out the spot welds at the leading edge to cabin pan.  I "thought" the spot welds I could see on the seat brace went all the way thru...NOT, I had to cut the brace off and drill out more welds under it.  The floor still wouldn't come loose, so I cut the next level off and found MORE welds under that. The floor had been put in, in 3 pieces and all of them had their own welds...   FINALLY got that out. Poor weld flange looks like a shredder got ahold of it. No worries, I'll straighten it out, but weld the new one along the leading edge anyway.   Next, I cut off all the rusted flange areas of both the inner and outer wheel houses.  
__________________
Mitch 1970 Chevelle SS 1966 Chevelle SS 1967 Camaro ss/rs 1938 Business coupe, street rod 2000 FXSTS, original owner, 13k miles
|
|
#14
06-29-2021, 03:27 AM
|
||||
|
||||
|
Next day, I went at it with the crud thug and removed the undercoating to have clean metal to weld to.
 I used the cut offs as a guide for cutting repair sections out of the new houses.   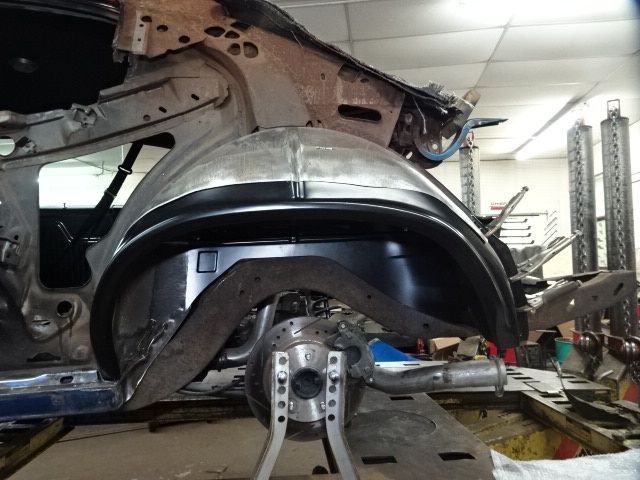 That lump of filler is what formed the lower 6" of the old, rusted out, houses.  They actually fit together and line up well. 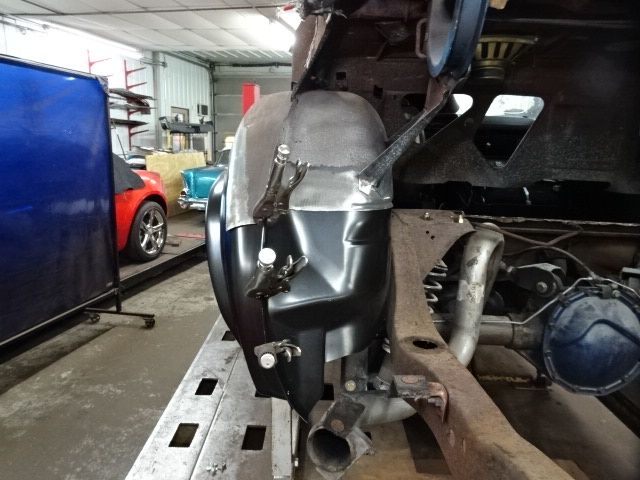 Then I removed the rest of the floor and most of the tail panel above it.  The left tail pipe was bent badly over the axle and the extension pipe is gone from the crash. I got the numbers and did a search and both are obsolete, so I clamped on the pipe with the tower and pulled it out, but forgot the camera that day  Yep, the clamp should be right under the hanger. Even THAT seems to be obsolete. 
__________________
Mitch 1970 Chevelle SS 1966 Chevelle SS 1967 Camaro ss/rs 1938 Business coupe, street rod 2000 FXSTS, original owner, 13k miles
|
| The Following 3 Users Say Thank You to Too Many Projects For This Useful Post: | ||
|
#15
06-29-2021, 03:39 AM
|
||||
|
||||
|
Today was, sort of, fun. I placed the new floor, lined up the leading edge with the cabin pan, bolted it down with new mounts and welded the front onto the cabin pan. Not fun hunched inside doing all that, but the result was definitely fun...
  New floor lined up well, but had a bow thru the center, so I used drill screws a bit of "influence" to convince it to lay flat.  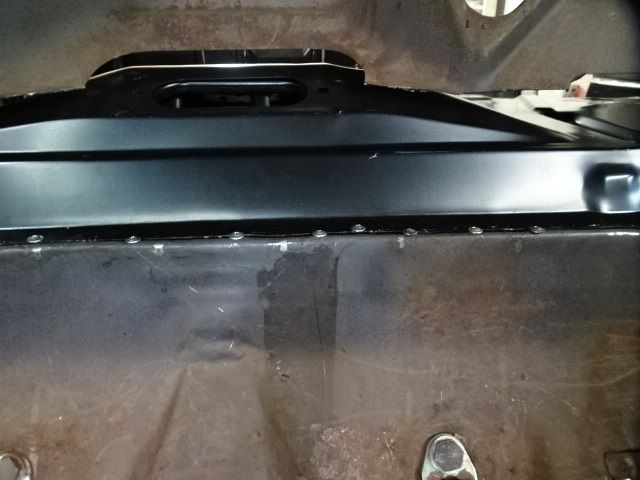 Then I had to make a cocoon of burn blankets to protect the interior from weld spatter. 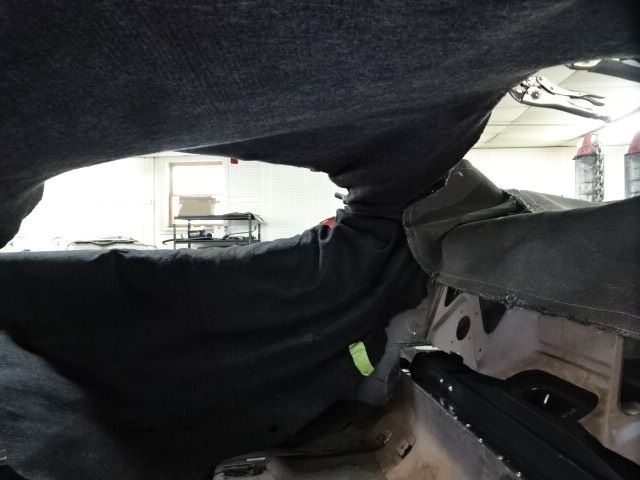 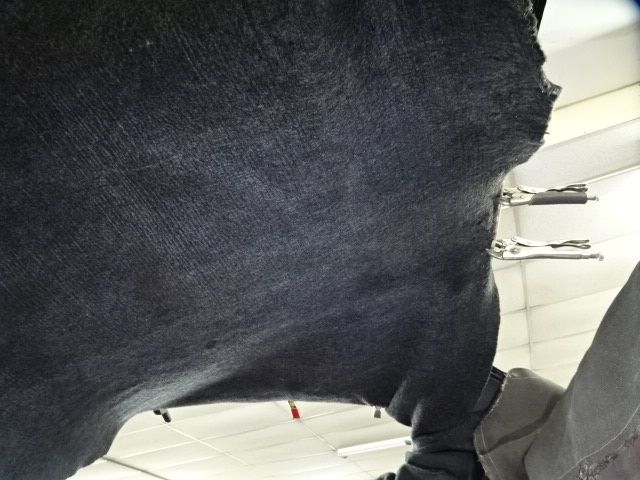 Floor welded  Welded the seat brace back on and screwed the bottom down for welding.  Got that done and cleaned up the welds a little so it doesn't look as much like amateur hour welding. That seat brace is rather thin material. 
__________________
Mitch 1970 Chevelle SS 1966 Chevelle SS 1967 Camaro ss/rs 1938 Business coupe, street rod 2000 FXSTS, original owner, 13k miles Last edited by Too Many Projects; 06-29-2021 at 01:31 PM. Reason: missing a picture
|
| The Following 7 Users Say Thank You to Too Many Projects For This Useful Post: | ||
69M22Z (06-29-2021), big gear head (06-29-2021), Bill Pritchard (06-29-2021), dustinm (06-29-2021), PeteLeathersac (06-29-2021), scuncio (06-29-2021), Xplantdad (06-29-2021) | ||
|
#16
06-29-2021, 04:17 AM
|
|||
|
|||
|
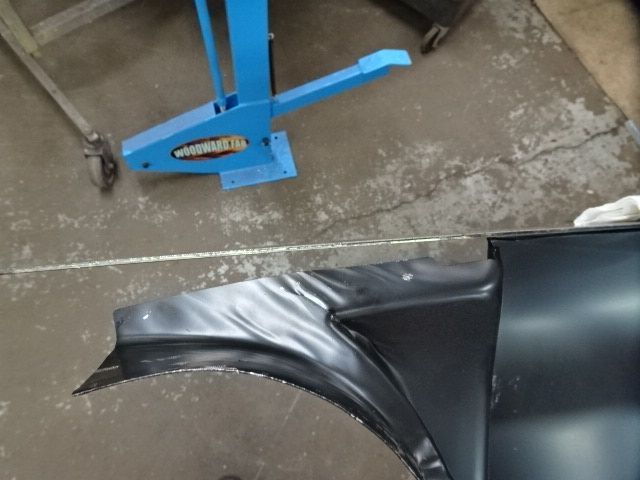
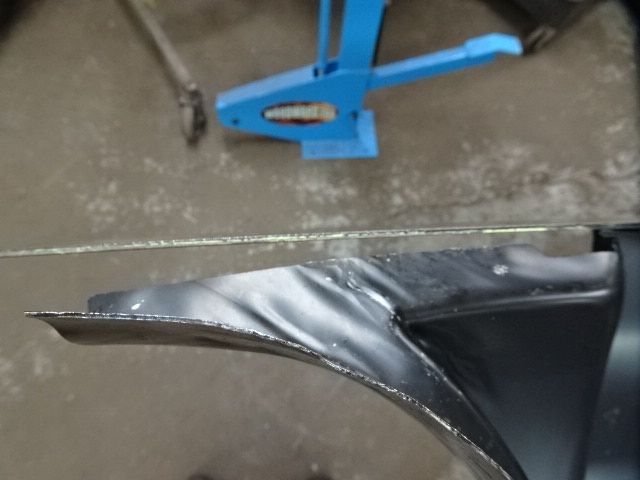
Why don't you put a 70 front end on there while you got it apart! (just kidding but I do like that look)
__________________
69 Chevelle SS L88 "Day-2" Lemans Blue 69 Chevelle SS L34 postsedan project-Azure Turquoise
|
|
#17
06-29-2021, 04:50 AM
|
||||
|
||||
|
Quote:
He thought about it, but original '70 front end parts are harder to find and more expensive. I've been looking for 2 nice front fenders for mine for a long time. They sell quickly and I'm always a day late seeing the ad. Called to order a repro cowl induction hood and they are a month out. Trunk lid is 4-6 MONTHS out. I have a nice original one I can use for fitting the new stuff in the back, but I need it for my '70, someday, so he can't keep it and have it painted. Well, he could, but I'm gonna repossess it someday... ...maybe. I should look at the one on my car and see what condition it is in. Been a "few" years since I looked at it...
__________________
Mitch 1970 Chevelle SS 1966 Chevelle SS 1967 Camaro ss/rs 1938 Business coupe, street rod 2000 FXSTS, original owner, 13k miles
|
|
#18
06-29-2021, 01:34 PM
|
||||
|
||||
|
Great sheet metal work
|
| The Following 3 Users Say Thank You to m22mike For This Useful Post: | ||
|
#19
06-30-2021, 12:45 AM
|
||||
|
||||
|
This pic is a repeat. Hard to see but I left the weld flange of the right trunk drop on the quarter panel. It was brazed on and buried in bondo to "blend" it.
That was this morning task...remove the rest of the drop and tail panel. I dug thru the bondo with a mini belt sander and then cut off the brazing.  There was bondo covering this cobbled mess too. I used the torch to melt out the brazing and cut the remnant off in the seal gutter. 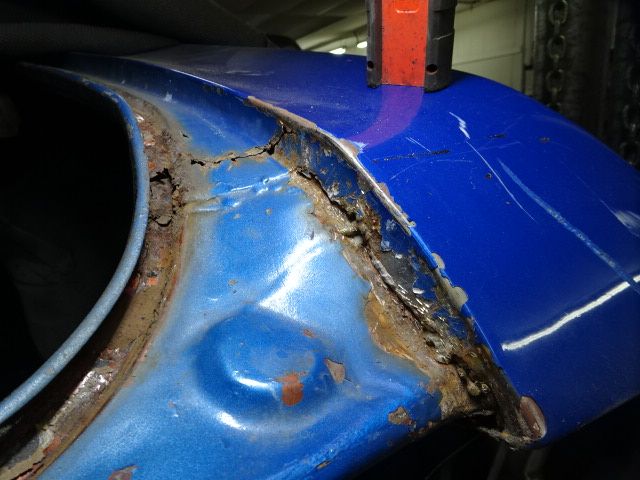  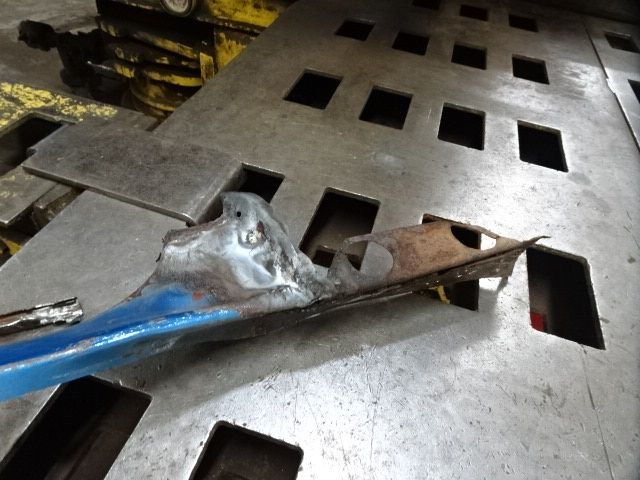 Tail panel still had pieces of the old quarter holding the new one down too low. This was all leveled with filer too. Once this was out of the way, I ground out the spot welds in the seal gutter with the mini belt sander and removed the last of the old tail panel. Forgot to take a pic of that.  I had to grind off 1/2" from the end of the tail panel to get it to sit in the quarter, but it fit's OK now. I'll have to make a decision about the rusted quarter later. Might let the bodyman/painter deal with that...   When I stopped yesterday, I thought I would come in today and prep and weld on the left inner wheel house repair section. After looking at the way the trunk drop interconnects with that and the tail panel made me stop and figure out the sequence of how this puzzle goes together. I did decide I can sneak the drop in after the quarter is on, so went ahead and prepped the section and welded it on. I left the last 8" or so loose for the drop to slip in and get welded later. It did take some hammer/dolly and bending to get all these pieces to fit snug, and I ended up with very tight gaps on all the parts. 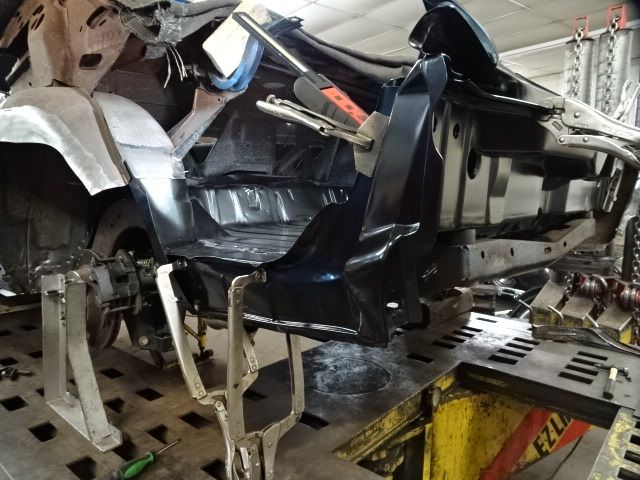  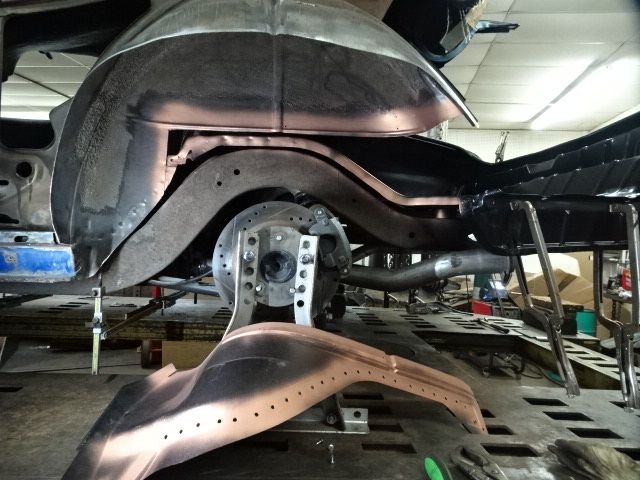 
__________________
Mitch 1970 Chevelle SS 1966 Chevelle SS 1967 Camaro ss/rs 1938 Business coupe, street rod 2000 FXSTS, original owner, 13k miles
|
| The Following 7 Users Say Thank You to Too Many Projects For This Useful Post: | ||
1967Z28 (07-01-2021), big gear head (06-30-2021), Bill Pritchard (07-08-2021), dykstra (07-08-2021), markinnaples (06-30-2021), olredalert (06-30-2021), RPOLS3 (07-01-2021) | ||
|
#20
07-08-2021, 03:09 AM
|
||||
|
||||
|
With the holiday and other things distracting me, I haven't made as much progress on this as I would have liked, but it is getting there. The panel has a bit of a fitment issue in the door pillar. The factory put way too much curve in the lowest jam area and I had to try to get some back. The curve is too tight to get the panel in our stretcher jaws, so I beat the snot out of it with hammer on dolly to stretch the metal back out. I got about half of it back and then marked where I would cut a relief slot to get the rest.
   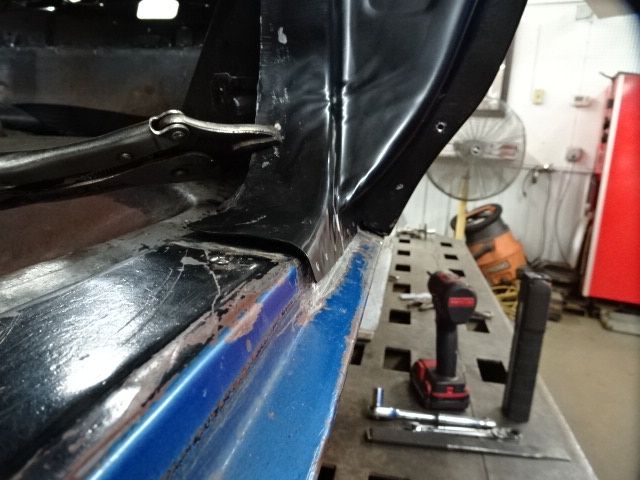 After making the cut and drilling 103 holes to plug weld, I sprayed the bare metal with weld thru primer and was ready to make this panel part of the car.  All clamped and drill screwed in place.   Now the fun starts, figure out a way to weld the bottom to the rocker in the window well area. 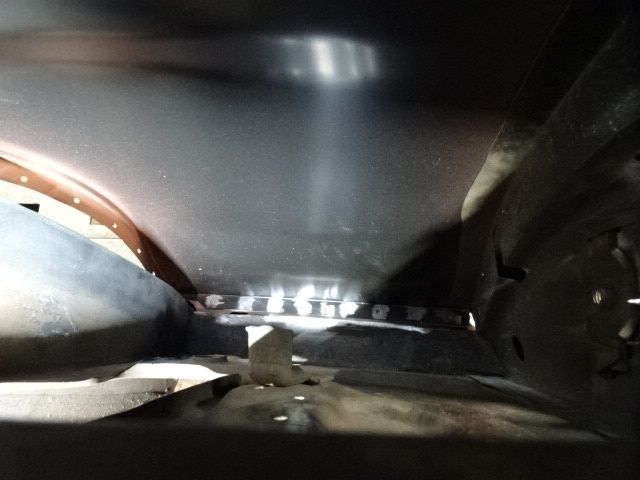 With a few contortionist positions, I got them. Not pretty, but no one will see them. 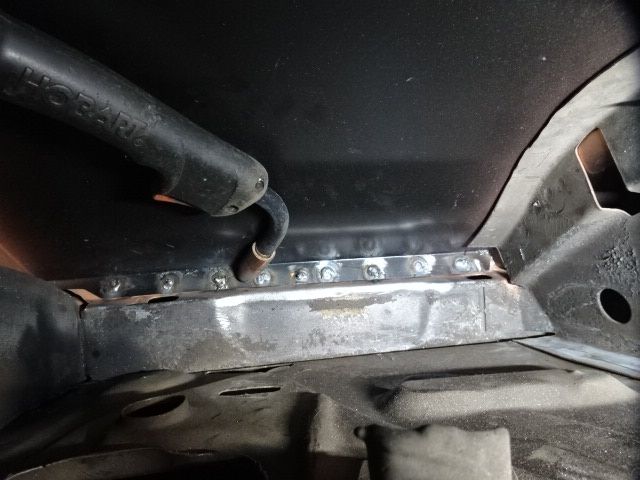 Whole door pillar on and cleaned up. The bottom curve came out really nice. 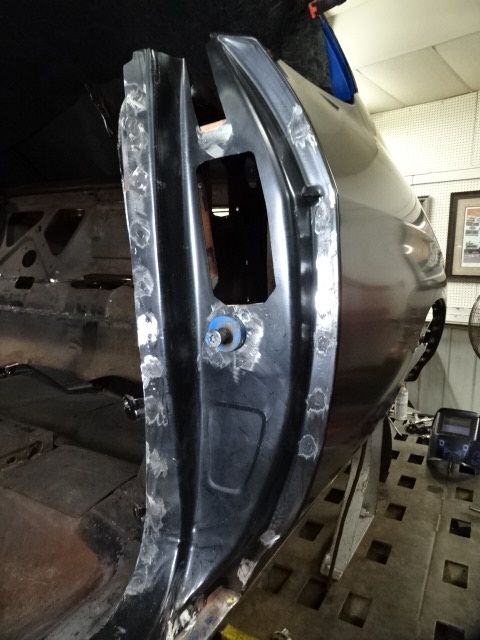   On to the drip rail seam and roof.    That's all for today.
__________________
Mitch 1970 Chevelle SS 1966 Chevelle SS 1967 Camaro ss/rs 1938 Business coupe, street rod 2000 FXSTS, original owner, 13k miles
|
| The Following 10 Users Say Thank You to Too Many Projects For This Useful Post: | ||
1967Z28 (07-09-2021), big gear head (07-08-2021), Bill Pritchard (07-08-2021), dykstra (07-08-2021), L_e_e (07-08-2021), mhurd (07-08-2021), RPOLS3 (07-08-2021), SuperNovaSS (07-08-2021), Xplantdad (07-08-2021), Zman1969 (08-13-2021) | ||
 |
| Thread Tools | |
| Display Modes | |
|
|


 Linear Mode

