
Dedicated to the Promotion and Preservation of American Muscle Cars, Dealer built Supercars and COPO cars. |
|
|
|
#1
 11-13-2006, 06:30 AM
|
||||
|
||||
|
Todays' question: I am looking at using some of the modern plastic panel repair adhesives to repair the cracks in the lower front valance for this car and was wondering if anyone knows exactly what type of plastic these valances were made of? Is it ABS plastic or something else more prehistoric than that?
Any recommendations on adhesives? This was a very rare piece used on late 72 and early 73 Firebirds. The problem was that they were easily broken. As a result the factory replaced them all under warranty with the steel valance used in 70 to 72. The steel valance makes the front end of the car look quite different, not nearly as streamlined looking as the plastic valance version. Here's a couple shots of the one I am working on at the moment. It arrived a little more broken in shipping that I expected but I have had it in my extremely expensive ACME Plastic Valance Repair Fixture, as you can see. It took years of development and millions of dollars to perfect and cannot be duplicated at any price. It actually is working great. In about three weeks it has completely pulled the edges of the main center crack back together. Now if I only had the right adhesive to keep it there, it would be wonderful (P.S. I am still looking for whole plastic valances or even parts to repair the plastic valance that I have for my 72 T/A if anyone out there has one for sale.) Here's the before photos: 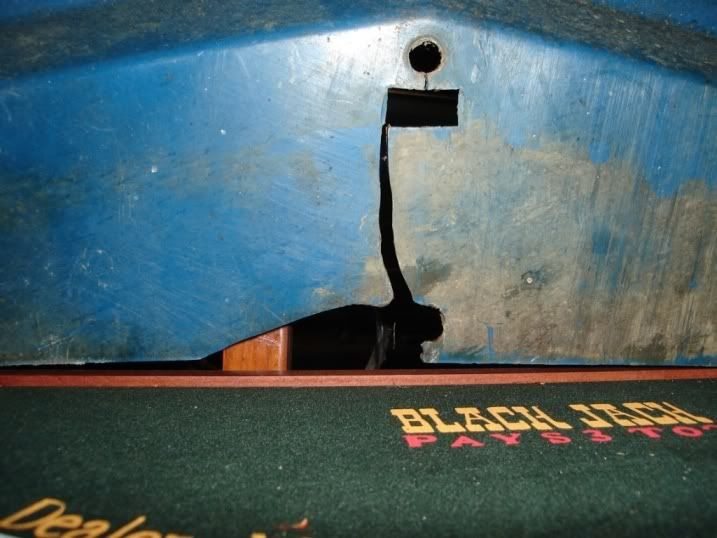  
|
|
#2
11-13-2006, 06:32 AM
|
||||
|
||||
|
Here's the ACME repair fixture in all its glory:
 And here's the "after" photo showing the edges of the crack completely rejoined together through the magic of gravity and professionally applied industrial counterweights: 
|
|
#3
11-13-2006, 04:46 PM
|
|||
|
|||
|
Steve, I saw this stuff demonstrated at Carlise. It was really amazing what they could do with it. I have not puchased any because I am not there with what I have to repair yet. I'm still working with metal!
 http://plastex.home.att.net/
__________________
69 SS 350 convertible (in peices) 69 327 convertible (driver)
|
|
#4
11-13-2006, 10:17 PM
|
|||
|
|||
|
Steve your best bet would be to find a similar type of thin rubber and urethane it behind the crack, If you just try to
butt weld the crack together the part will break. I have refurbished more then my share of Z/28 and TA covers. The aftermarket covers did not even come close to OEM.
__________________
Kentucky Gold 70 SS/RS L78. 81 Z/28 Silver/Silver Int 09 G8/GXP #992 98 Pontiac GTP Daytona Pace Car #605 90 Olds Touring Sedan SUPRCHRGD L32 83 El Camino
|
|
#5
11-14-2006, 09:26 PM
|
||||
|
||||
|
Through testing I determined material is polyurethane, the same thing they make ATV body panels, motorcycle fenders and water tanks out of. I dealt with this place over the past few days: http://www.urethanesupply.com/index.html and they were an amazing help. I have one of their airless welders on its way along with the welding rods for the polyurethane material. (there is no adhesive known to man that will bond polyurethane -you must weld it to repair it) Another problem is that it is very difficult to get paint to adhere to polyurethane. They even had a step by step on how to do that! http://www.urethanesupply.com/atvpainting.html Great website. Now we know the reason these valances were molded in color: because there were no paints or additives to make the paint stick to them back then.
|
|
#7
11-17-2006, 07:57 AM
|
||||
|
||||
|
I purchased a plastic welder from www.urethanesupply.com and had some really good results fixing the original polyethylene front valance
Here is the process I went through which was remarkably easy. These valances are made out of polyethylene and once I figured that out, it was just boiled down to following the directions in the kit and using the right plastic welding rods. This contraption is basically a soldering iron with a special tip that you feed the polyurethane rods into. The first step of course is cleaning the area as best as possible and the using aluminum tape to hold the cracks together. (The aluminum tape is critical as it is very thick and wont stretch like masking tape will: it holds the crack together tightly) Once that is done you use the hot tool to melt a groove in the crack halfway into the plastic. You then apply the flat face of the iron onto the crack and while melting the base material, you feed the rod material into the melted area. You do about an inch at a time and them massage it in very well. Once you get the entire length done you take a strip of stainless steel mesh and apply it onto the repair and melt that into the repair for added strength (preferably on the back side of the panel). When that is done and cooled off (apply cold water to speed things up) you can turn the valance over and remove the aluminum tape, groove the other side's crack and do the same only without the mesh. The interesting thing about the welding rods is that they have a selection of colors available in this kit due to the fact that it is used mainly to repair kayaks and ATV fenders which are molded in color. Once it is cooled you can sand it down. The face bar portion was a little trickier since it was very hard to get into the rear part of the crack. I heated up the area quite a bit and placed the mesh and a bunch of extra polyethylene rod into the area for added strength. The process and the tool was amazingly easy and I just saved an irreplaceable part for about $90 in material and 3 hours of work. Here's the crack: 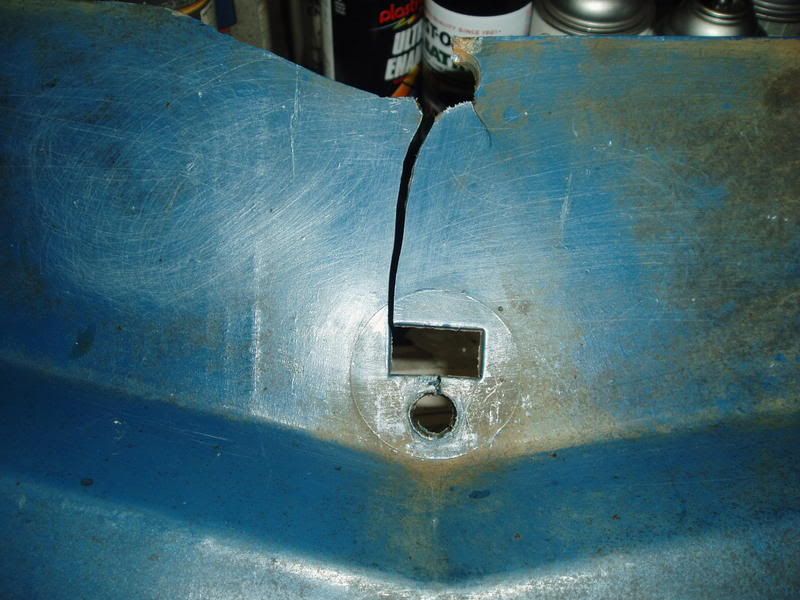 After taping and grooving:  Applying the welding rod and melting the stainless steel mesh in to the backside of the repair:  The front side after valance was flipped over and the procedure was repeated: 
|
 |
| Thread Tools | |
| Display Modes | |
|
|


 Hybrid Mode
