
Dedicated to the Promotion and Preservation of American Muscle Cars, Dealer built Supercars and COPO cars. |
|
|
|
#1
 08-04-2006, 05:16 AM
|
||||
|
||||
|
I sent out the original honeycomb wheels to be media blasted to get them ready for refinishing. The Honeycomb wheel was a rather innovative design for the time: they used a molded urethane face on a stamped steel wheel.
I ended up using the same media blasting facility as in this article. They were actually pretty close to me here in Jersey. http://www.goatsgarage.com/huny1.html They had them done in three days. Awesome job. They stripped off about four or five layers of crappy silver paint and this was the result. Now I can refinish them with that $40 a can OEM honeycomb paint. Ouch! Here they are sitting out in the 103 degree New Jersey heat. I washed them off and the water literally turned to steam as I watched. Gotta love that global warming.    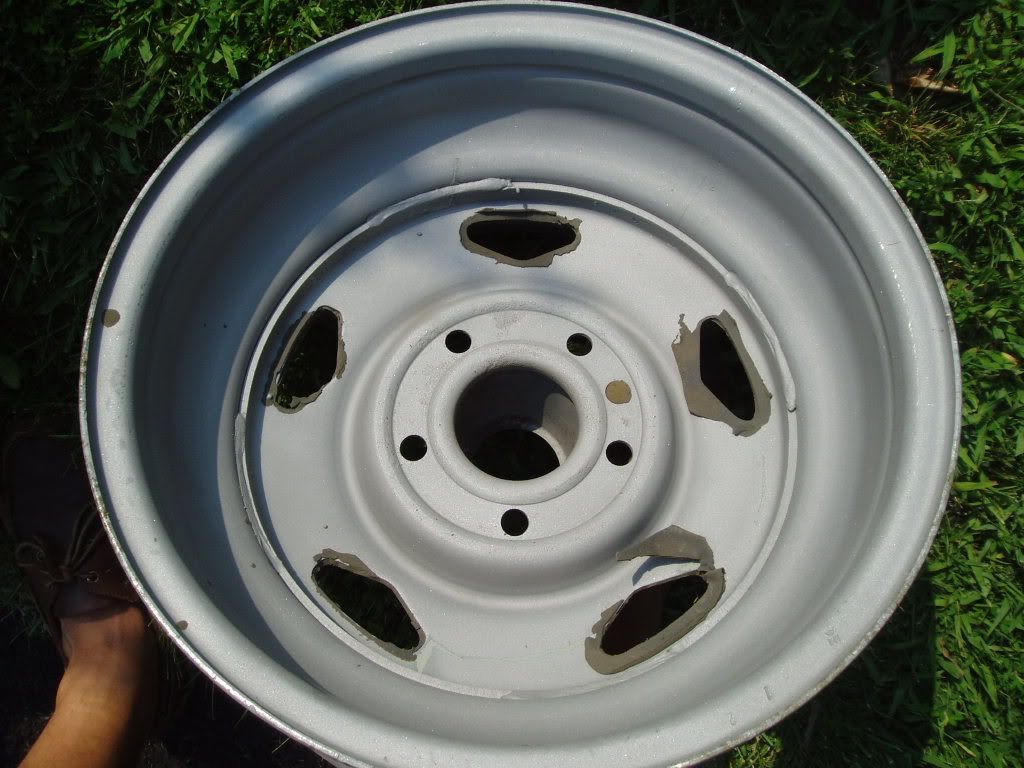 
|
|
#2
08-05-2006, 03:15 AM
|
||||
|
||||
|
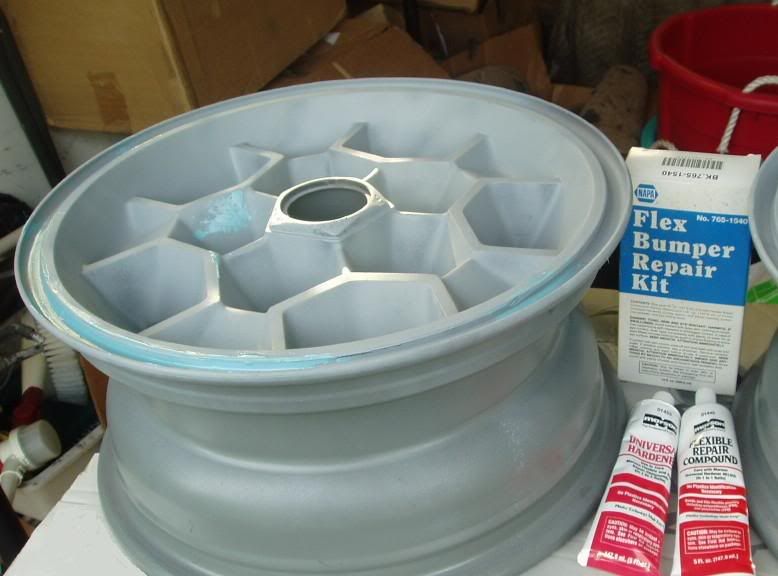
Here is a honeycomb wheel after priming with the OEM flexible primer. I sprayed the rest of the rim (sides and back) with a Rustoleum grey that was very close to the original. I searched various auto parts stores and eventually found the correct flexible bumper repair kit. I found this at a Napa store. They pulled it off of a back shelf and blew the dust off the box. It looks like 1980s vintage packaging but it worked fine. A couple of the rims had factory moding flaws and air pockets that needed to be filled. Also three of the rims had edges that were not fully molded to the rim from the factory. I ended up just gooping it on my finger and spreading it by hand on the edges, kinda like doing bathtub caulking.
|
|
#3
08-06-2006, 05:22 AM
|
||||
|
||||
|
Here's the finished product. The OEM Honeycomb wheel paint actually goes a long way. I painted all five wheels with one can! I bought three. I ended up using a second can just to get a heavy coat on the wheels but the finish didnt change much with the extra paint. Good stuff, if you follow the directions and spray it from 8 to 10 inches away, it leaves a dry textured finish with lots of metallic sparkles. After painting them in the driveway I walked inside and the wife asks me "Where the heck have you been, the disco?" I was covered in the sparkly overspray, looking like I just came back from a hard night at Studio 54, circa 1977.

|
|
#5
08-09-2006, 03:28 AM
|
||||
|
||||
|
Here are the 2 of the 5 finished wheels. I indexed the tires so the letters are all in the same spot on all four road wheels. Since the 72 Honeycombs don't use a trim ring, which would cover the wheel weights, I decided to balance the wheels on the backside only. As much as I have harped on the price of the very expensive OEM line of spraypaints, I do have to admit they are the exact, correct finsh, they make the wheels look great, and each can goes a long way.

|
|
#6
08-09-2006, 05:48 AM
|
|||
|
|||
|
SWEET!
|
|
#7
08-27-2006, 06:56 AM
|
||||
|
||||
|
I took a ride over to ENOCH's place today to see the progress on the Trans Am's body parts. We have to replace one door skin (I found a correct NOS one on ebay pretty cheap - a miracle since it is impossible to find the 70 to 73 style with the correct longer door handle opening) Anyway, here are some shots of the door. He had already prepped the edges for the new skin by beadblasting the mounting areas (the shiny silver areas). I guess this settles the question of whether the doors were loaded (minus glass and sliders) when they went into the primer dip.
 
|
 |
| Thread Tools | |
| Display Modes | |
|
|


 Hybrid Mode
