
Dedicated to the Promotion and Preservation of American Muscle Cars, Dealer built Supercars and COPO cars. |
|
|||||||
| Register | Album Gallery | Thread Gallery | FAQ | Members List | Calendar | Become a Paid Member | Search | Today's Posts | Mark Forums Read |


|
|
|
Thread Tools | Display Modes |
|
#1
 02-10-2023, 11:57 PM
|
|||
|
|||
|
I have to start somewhere with the build, so I decided to start at the beginning. I searched for the cleanest 1969 to 1972 Nova I could find. In fact, my evening, after-work "hobby" was searching all sorts of place for the right car. I eventually found the right car in Ohio, but it took me a year or so. A fellow from American Honda found the car and purchased it from the quintessential little old lady owner. When he bought it, the car had just over 12,000 original on the clock. When I bought it, it had just over 13,000 miles. In between, he stripped the car, put it on a rotisserie and detailed it. The exterior paint is now roughly 70% original: The rockers, front fender tops and hood have been lacquer blended. You'll note he lowered the car (cut coils, leaf spring spacers). Here are some photos of how when I first bought it:
And by the way, like some "restored" cars I've worked with in the past, it didn't drive or stop well...but the bones were outstanding  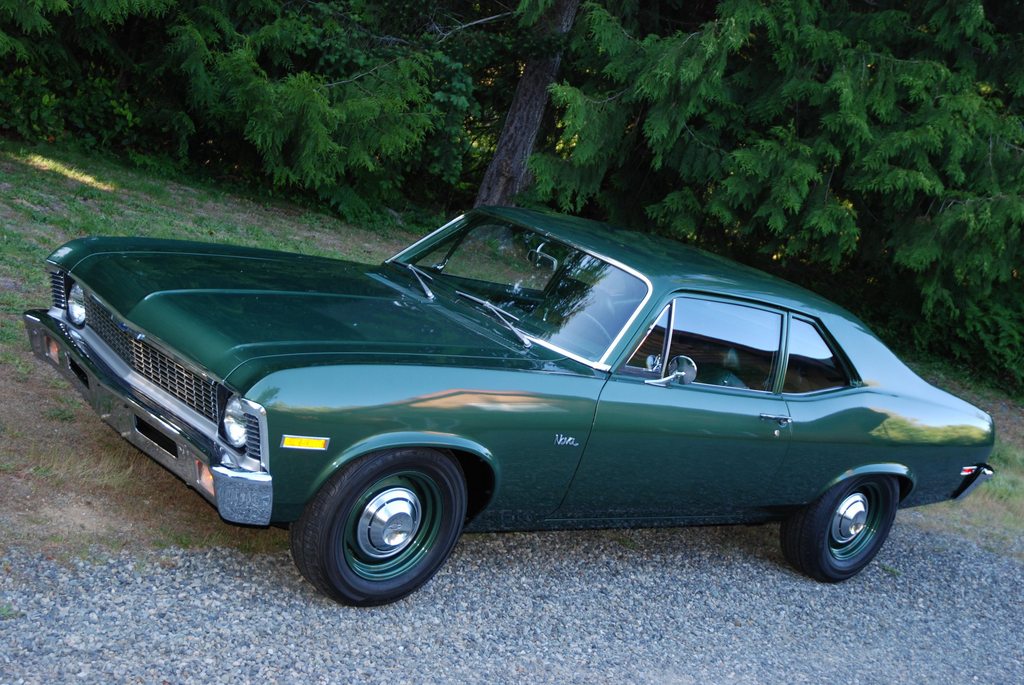 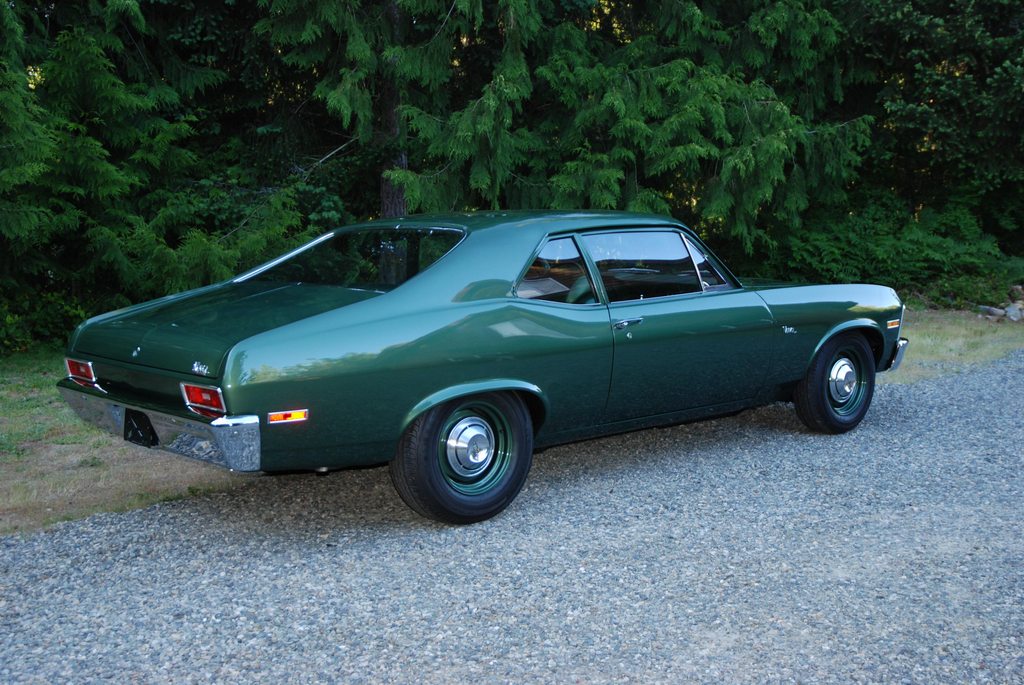 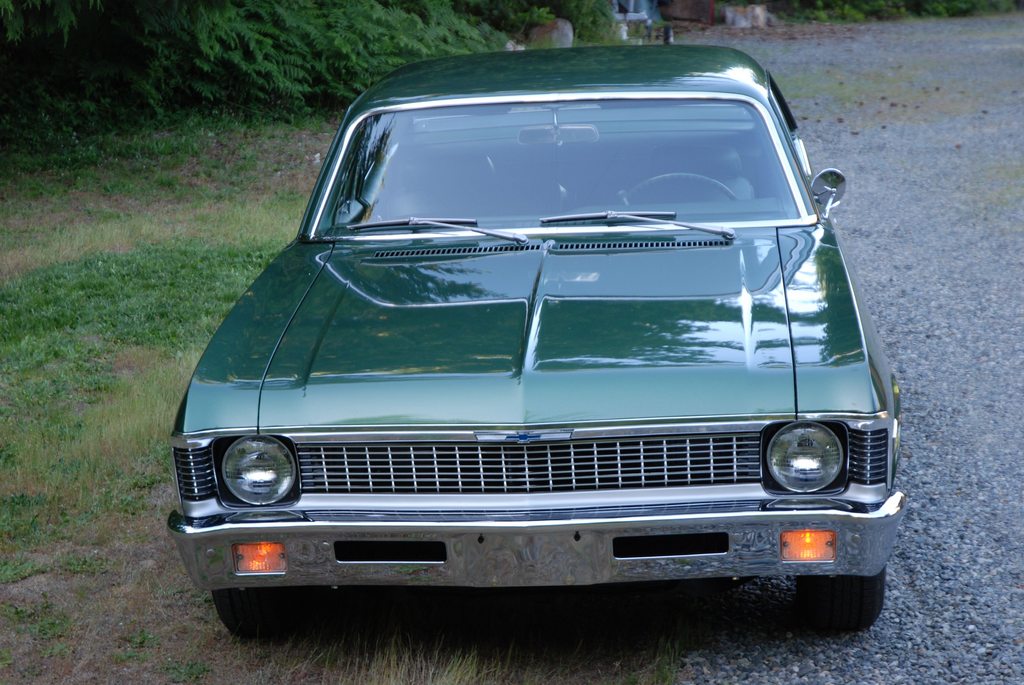 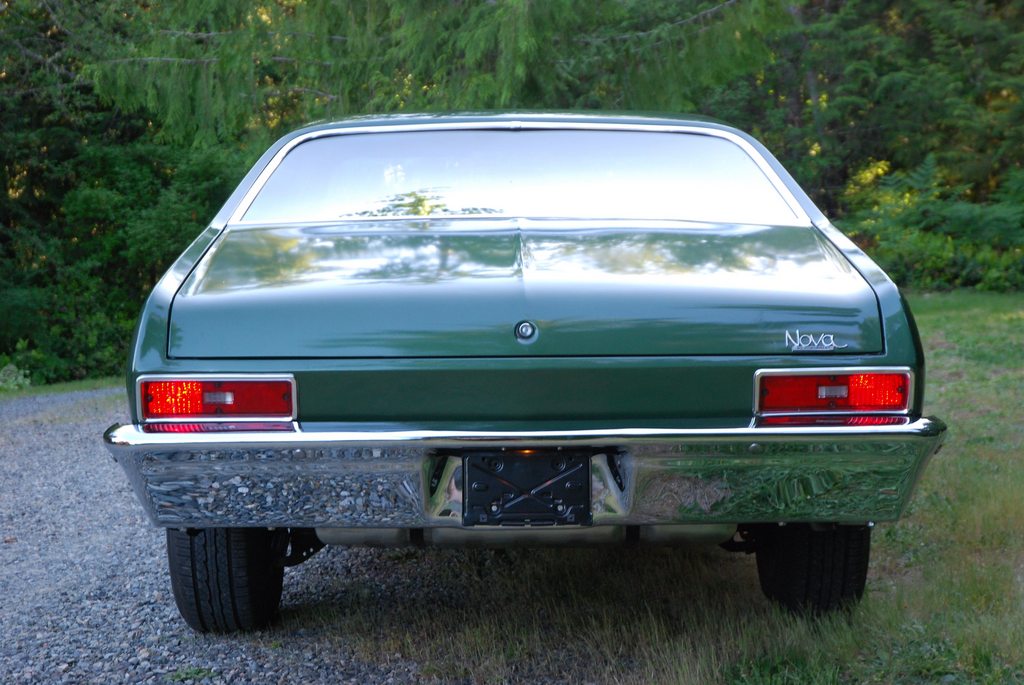  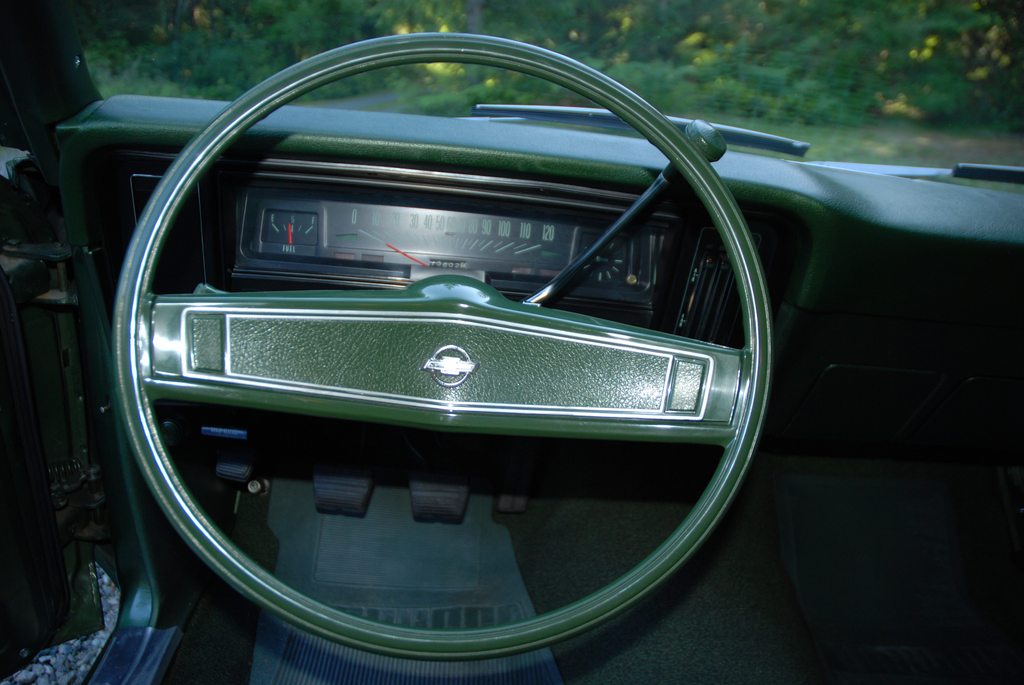 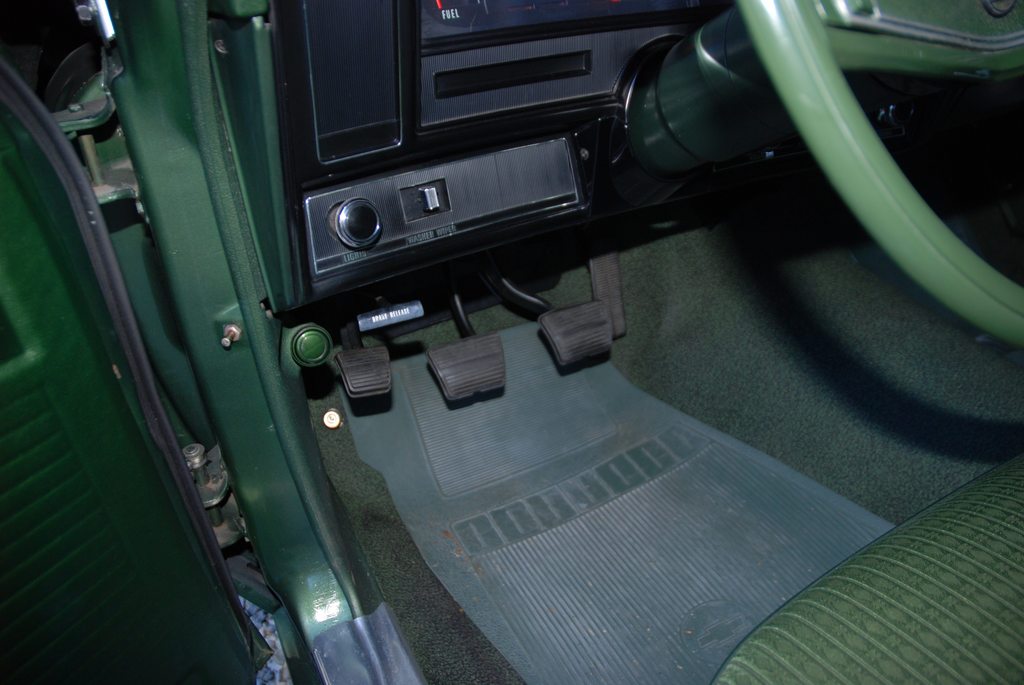    [url=https://imgur.com/KhJIYnV][img]   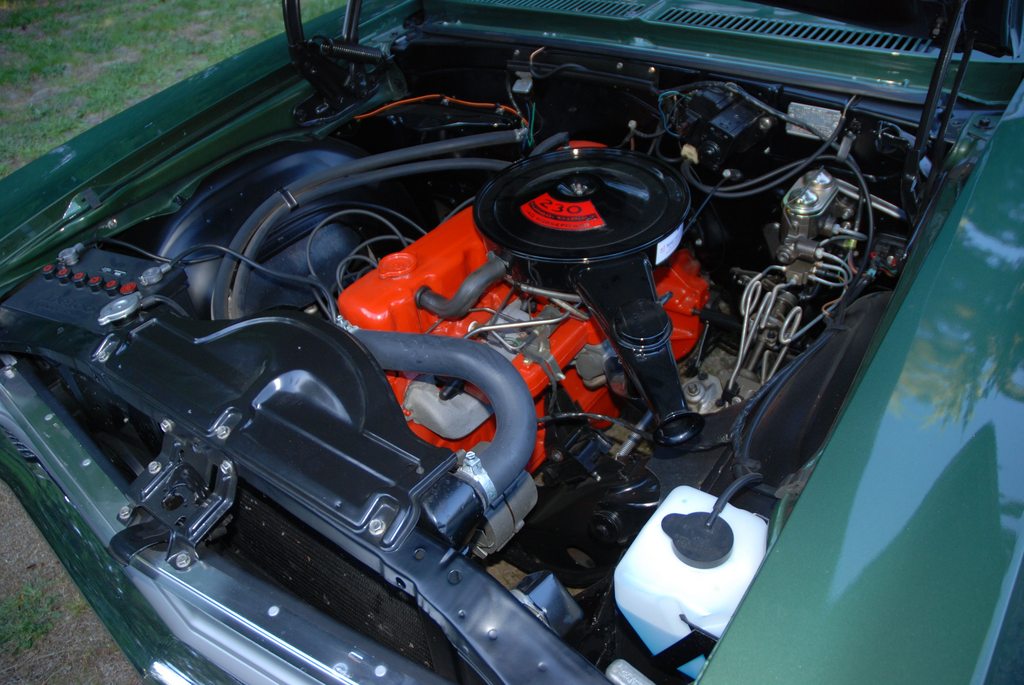 Here's a video link from my Lone Wolf Hot Rods site introducing the car: https://youtu.be/yHv1a06rgxw The only that really changed in the build plan from that video was the final transmission choice. Finding a streetable synchronized manual that would live behind the big block I built just didn't work out... I'll show build progress in the next batch of pix... 
|
| The Following 10 Users Say Thank You to Arrowsmith For This Useful Post: | ||
big gear head (02-12-2023), CamaroNOS (02-11-2023), Denis Guenzel (02-27-2023), dykstra (02-11-2023), lowmile (02-11-2023), markinnaples (02-11-2023), olredalert (02-11-2023), PeteLeathersac (02-11-2023), Stihl (03-07-2023), Tenney (02-11-2023) | ||
|
#2
02-11-2023, 12:22 AM
|
|||
|
|||
|
Quote:
|
| The Following 3 Users Say Thank You to GMC_Typhoon For This Useful Post: | ||
|
#3
02-11-2023, 01:45 PM
|
|||
|
|||
|
Wow, what a starting point. Looks amazingly clean. Around 1988 my dad bought a 1972 Nova with 16K original miles in Frost Green, 6 cyl, no carpet, AM, but completely bare bones. It drove, unlike you say about yours, amazingly well, and I drove it from Pittsburgh to Erie (about 2.5 hours each way) for my last year in college if there was good weather. I really should have kept that one, but we sold it unfortunately. I thought that one was clean until I saw yours, amazing.
__________________
1968 Camaro Ex-ISCA Show Car - Sold  On The Lookout For My Next Classic... John 10:30 Last edited by markinnaples; 02-11-2023 at 01:49 PM.
|
|
#4
02-11-2023, 03:16 PM
|
|||
|
|||
|
I'll get more photos and info over the next day or two. Honestly I paid stupid money for a six cylinder car (plenty of people thought I was absolutely nuts), but it was the cleanest example I have ever run across. Plus, while working on it, the clean factor has turned into a huge bonus. Anyway, after I pulled the original six and three speed, I went to work on the engine compartment, brake lines, etc. You'll see that next.
|
|
#5
02-11-2023, 05:02 PM
|
||||
|
||||
|
Wayne, color me as a Have-To-Know Nancy but I couldn’t help but notice you didn’t include ‘68’s in your Nova search. They’re my personal favorite! Reason?
__________________
1962 Biscayne O-21669 MKIV/M-22 1962 Bel Air Sport Coupe 409/1,000
|
|
#6
02-11-2023, 06:50 PM
|
|||
|
|||
|
Hey Mark! Pretty easy answer..I just like the dash better in the 69 and up cars😉
|
| The Following User Says Thank You to Arrowsmith For This Useful Post: | ||
markjohnson (02-12-2023) | ||
|
#7
02-11-2023, 09:59 PM
|
|||
|
|||
|
Here's what it would look like with the 4sp lever through the floor.
|
|
#8
02-13-2023, 03:39 PM
|
|||
|
|||
|
After driving the Nova for a bit and discovering it had some issues (brakes weren't stellar and the acceleration wasn't exactly awe-inspiring...L-O-L), I decided it was time to get started. This is a photo of it in my old garage on the west coast:
 This is what the bones were like from the engine compartment side. The undercarriage was and is the same -- clean and nicely painted. Everything was painted individually, including the fasteners. 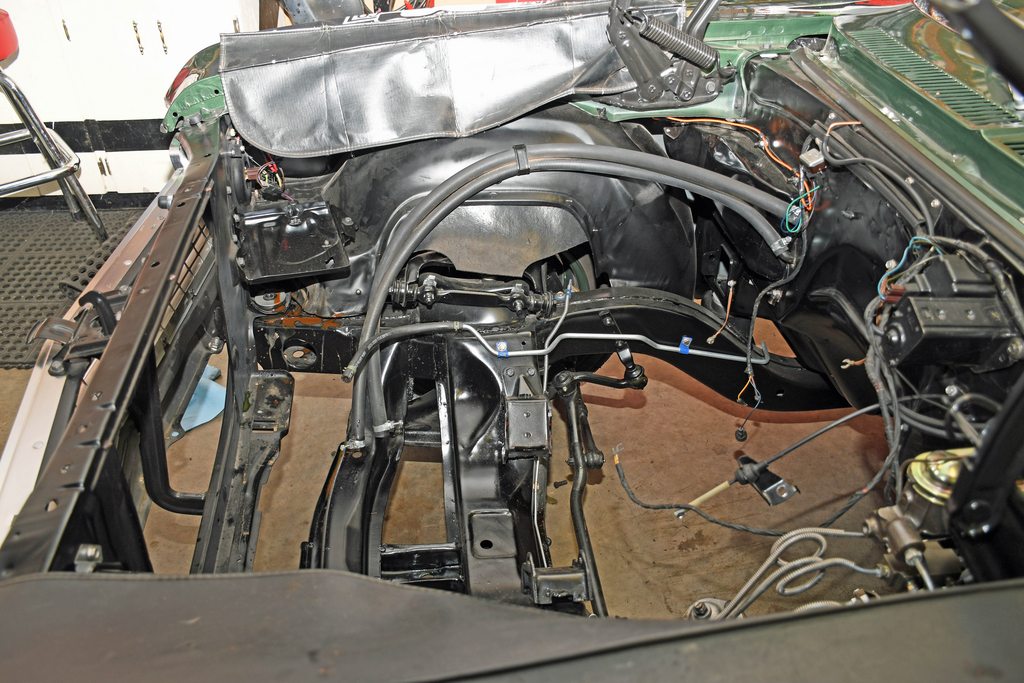 I pointed out in the original "just finished this" post that the rad support is a reproduction. It needed one extra hole drilled, but otherwise fit like a glove. In order to get the support in, much of the front end had to come off, along with the inner fenders. That gave me the opportunity to replace all of the freshly painted hardware with more correct phosphate plated hardware. Here are two photos of the DeWitts "black ice" aluminum rad I selected. It's an awesome high quality piece.   While the front end was apart, I replaced the subframe and rad support bushings with these slick pieces from Detroit Speed (I also used their optional ARP stainless fasteners):  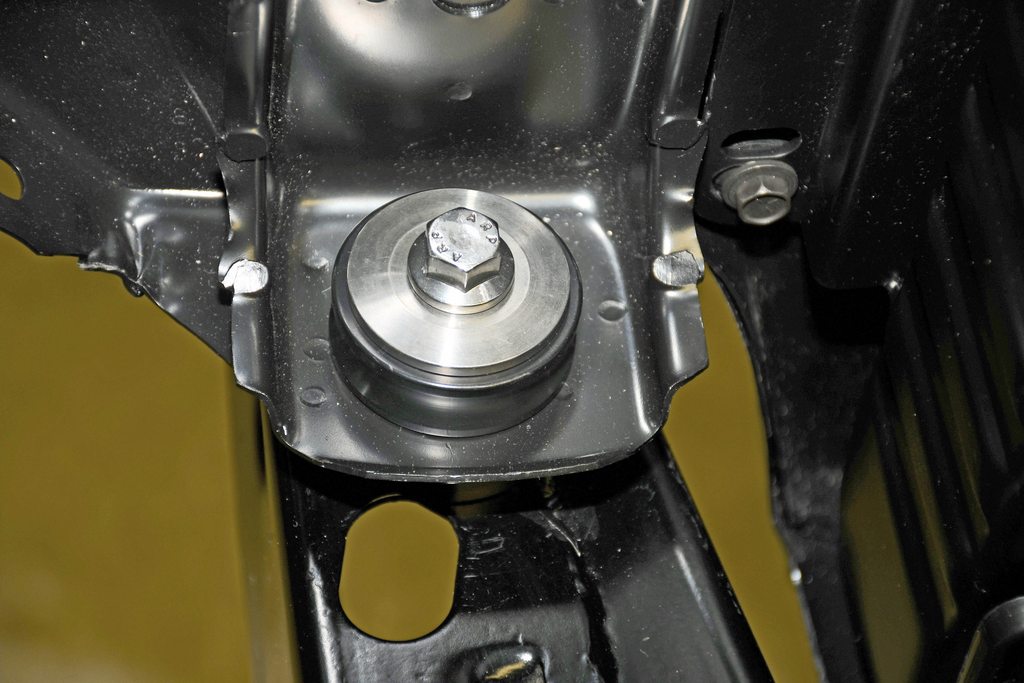 The frame mounts were swapped out for correct big block examples. I use AN (aircraft) fasteners where possible.  I removed the heater assembly and replaced it with a correct delete plate. I also used AN fasteners to mount it. The flash shows a color difference between the plate and the firewall, but in normal lighting you can't see the difference. That's a new gutter without the transmission control spark. I stripped a new wire harness back to remove all of the wiring. 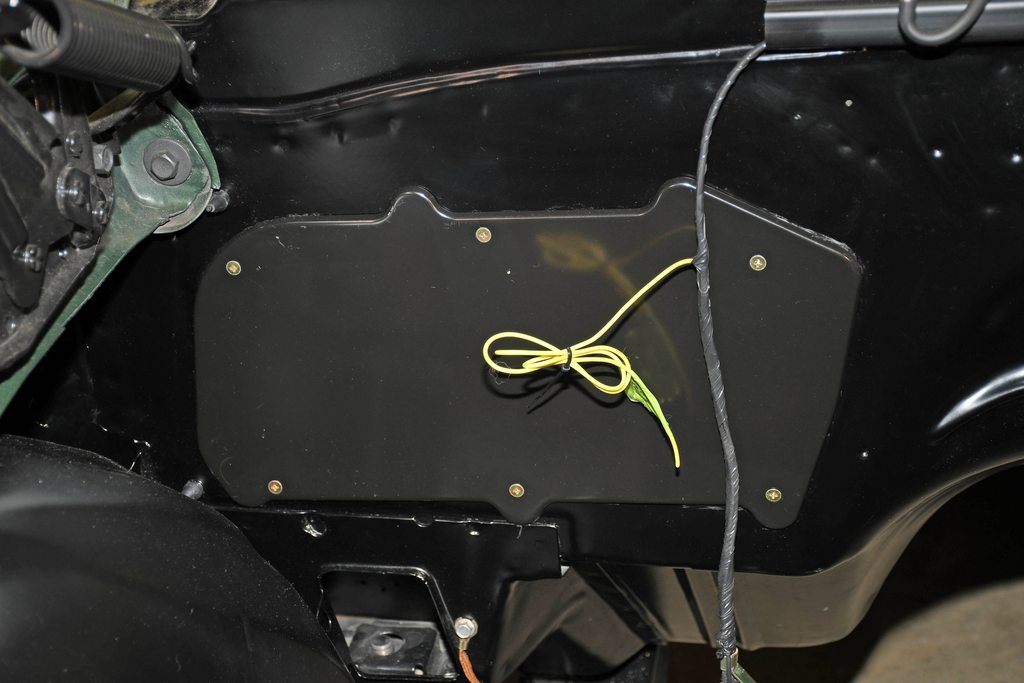 With the big block rad support, I also included a complete OE-style big block rad mount and shroud arrangement. I had to drill holes for the rubber flap clips but that's about it. Note the bump starter switch. I put them in all of my modified cars, because it makes setting the valves a whole bunch easier. 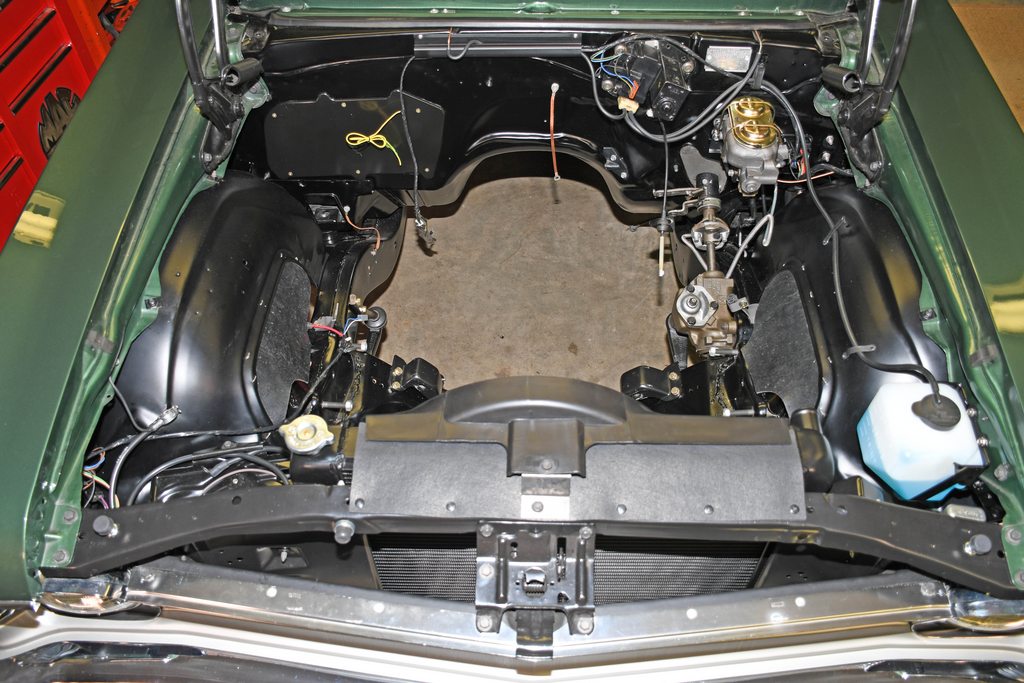 Both the ignition and forward wiring harness assemblies were replaced. I also added a set of big block battery cables and a new battery tray. You'll note the wiring harness isn't looped alongside the windshield washer hose. In past builds I've routed the harness out of the way, over the inner fender. I did the same here. I replaced the master cylinder with one for 1969 disc brake Camaro. I might have pictures of the front brakes I can show later, but I used two piece made-in-USA rotors. 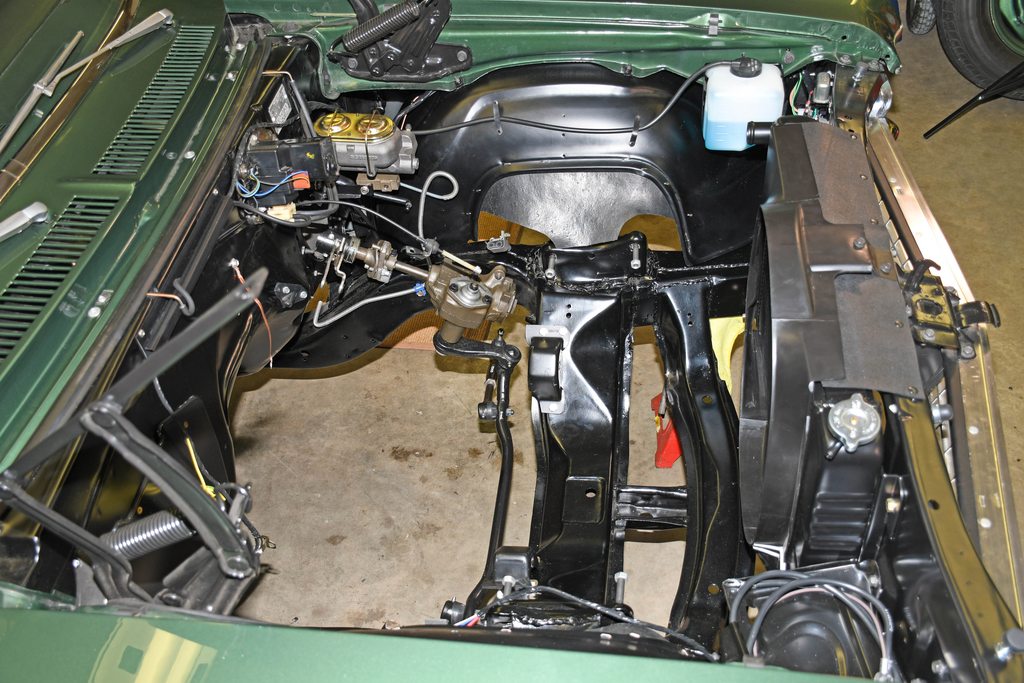 This is another look at the engine compartment. I replaced the tie rod sleeves with Hotchkiss billet jobs. The tie rod ends and the idler were replaced. The AN bolts are in "backwards" on the idler arm. I do this to save my skin when working on the car...L-O-L. It's getting closer, but still a bit away from being done...L-O-L: 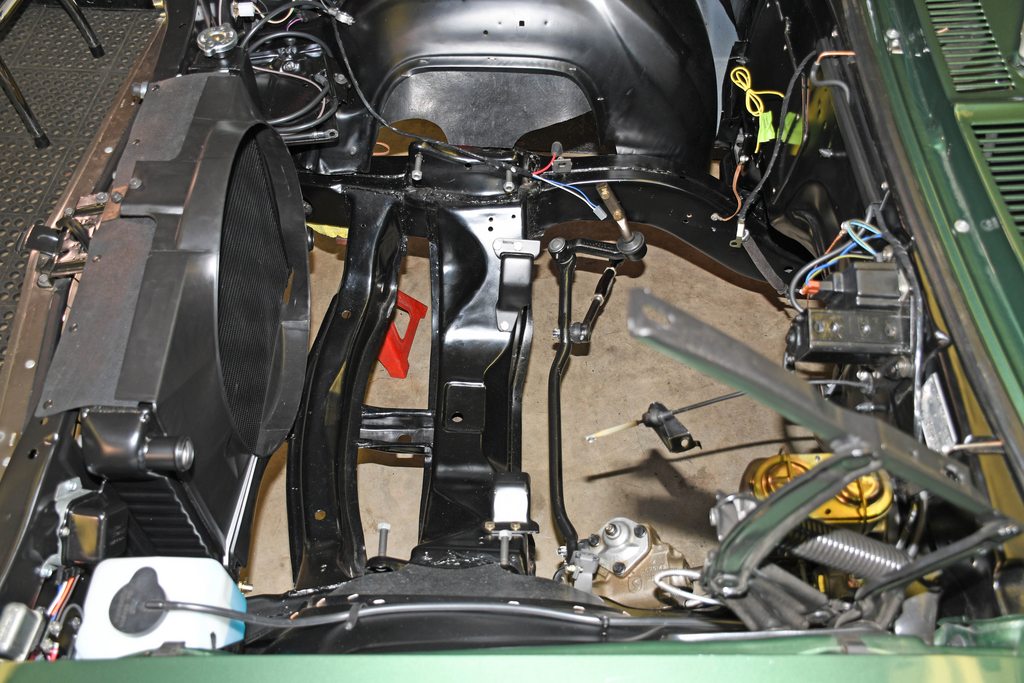 Here's a link to a 4 minute video on my progress to this point. You'll get more build details in the video: https://youtu.be/LEG7I-MOwio Til next time!
|
| The Following 3 Users Say Thank You to Arrowsmith For This Useful Post: | ||
|
#9
02-13-2023, 05:28 PM
|
|||
|
|||
|
my first girlfriend had the identical to a tee of this car when we started dating in highschool. that was in 75-76. So the car was only a few years old and was mint mint mint. same color same interior.
Nobody knew back then how desirable they would be today. Love the build of the car you have.
|
| The Following 2 Users Say Thank You to black69 For This Useful Post: | ||
Arrowsmith (02-13-2023), cheveslakr (02-13-2023) | ||
|
#10
02-13-2023, 09:12 PM
|
||||
|
||||
|
The first thing I took note of was the blocked off vent on the far left side of the dash. I had to make one for my 70 Nova when I did a heater delete.

__________________
...................... John Brown This isn't rocket surgery.....
|
| The Following User Says Thank You to John Brown For This Useful Post: | ||
Arrowsmith (02-13-2023) | ||
|
| Thread Tools | |
| Display Modes | |
|
|


 Linear Mode

