
Dedicated to the Promotion and Preservation of American Muscle Cars, Dealer built Supercars and COPO cars. |
|
|
|
#1
 04-12-2015, 03:52 PM
|
||||
|
||||
|
The boy and I decided to tackle the cracked driver's side door panel that has been annoying me since we got the car. Last year we removed the panel, glued the cracks, removed and reinstalled the window felt, and reinstalled the panel but it was still an eyesore, especially since I had to look at the damn thing every time I was driving the car. (The passenger side panel was perfect - but I did remove it and reinforce the crack-prone areas with flexible body repair material and removed and reinstalled the window felts in a "looser" position).
So we decided to replace the panel. We all know how hard an uncracked 2001-2002 ebony panel goes for, so I went for the alternative. The early cars - up to early 1997 used a different plastic material for the panel which doesn't crack when exposed to heat/cold cycles like the later panels do. The only problem is that they are grey and not ebony. So we found a really nice 1996 grey panel with a cloth insert and started the experiment. Since the panels used multiple parts that were plastic welded in place at the factory we used a heat gun to soften the melt points. The cardboard backed cloth panel then pulled right off the tabs. I actually trusted my son to wield the heat gun...lets just say he needs work on his aim...and I need to wear asbestos gloves.  Here is one of the tabs before heating. After each one was softened with the heat gun, I just pulled the panel off one tab at a time. After the entire cardboard panel was removed I reheated each tab and squeezed it with a wide flat toothed pliers to remake the tab into something that would easily engage into the ebony cardboard panel's slots.  And here is the plastic panel after the cardboard-backed upholstery panel was removed. I will tell you that the arm rest mounting points are much harder to heat as they seem to be of a harder white plastic material and not polypropylene. (this photo is actually a couple steps ahead and shows the ebony arm rest and map pocket set in place. Note the color difference).  I went ahead and removed the arm rest and the map pocket as I wanted to install as much of the original stuff from my 2001 ebony panels as possible. Most people could stop at this point and then dye the panel as is to get ready to install the ebony leather interior upholstery panels. 
|
|
#2
04-12-2015, 03:52 PM
|
||||
|
||||
|
Here is the grey donor panel after everything has been removed.
  And after I scrubbed, cleaned and redyed the panel with SEM Laundau Black interior dye. This stuff is wonderful and I have used it for all sorts of black interiors over the years. Its a great match for the ebony panel color. 
|
|
#3
04-12-2015, 03:52 PM
|
||||
|
||||
|
Here is the ebony upholstery panel from my cracked door panel:
 With the ebony arm rest and map pocket in place, now came time to plastic weld the map pocket in to place. The arm rest has to wait until the cardboard upholstery panel is in place as its mounting tabs are melted over the panel.  I used a plastic welder with a flat tip (basically just an overpriced soldering iron), to melt the tabs back into the panel and bond them together. 
|
|
#4
04-12-2015, 04:59 PM
|
|||
|
|||
|
Well done Steve. The most impressive thing to me is your wife lets you do this in the house. Is that Cards Against Humanity in the background? Good game.
Jason
|
|
#5
04-12-2015, 05:12 PM
|
||||
|
||||
|
LOL. Yes it's my daughter's game.
The wife texted photos of the process to my daughter at college showing her what we were doing in the dining room. (that's her version of a support group). The text went something like this: <span style="font-style: italic">"It's such a shame your father doesnt have a workshop to do this...oh wait he does...and a basement, too...and a garage...."</span> [img]<<GRAEMLIN_URL>>/rolleyes.gif[/img]
|
|
#7
04-13-2015, 09:29 PM
|
||||
|
||||
|
I used whatever clips were in the wife's kitchen at the time. Did I mention how understanding she is? [img]<<GRAEMLIN_URL>>/grin.gif[/img]
|
|
#8
04-13-2015, 09:42 PM
|
||||
|
||||
|
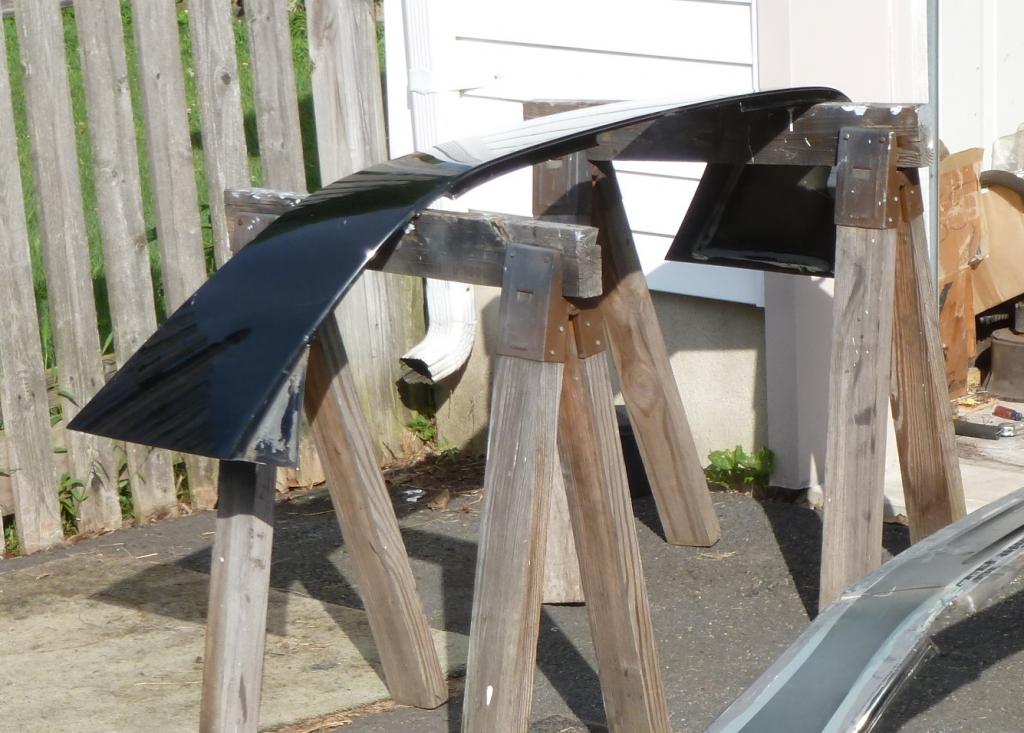
I stopped by the bodyshop today to get an estimate for replacing the "targa panel" that has the factory defects from the adhesive bleed-through. I left the replacement panel with him so he could start prepping and painting it. Here is a shot from when I spent several days last summer removing it from the sawed-off roof section of a donor car. The bodyman indicated that it will be much easier for him to remove the existing panel from the car since it does not need to be salvaged and he can use heat from the painted side to loosen the adhesive.
|
|
#9
04-16-2015, 12:05 AM
|
||||
|
||||
|
I tackled the spark plug and wire set challenge yesterday. Boy is that an insane job. Plugs 1,3,5, and 7 can be done with a minimum of effort, while lying across the front end of the car with your arms pretzeled along the side of the engine. Plugs 2, 4 and 6 require the smog tube to be disconnected from the manifold to give you some room to get your hand in. Luckily the bolts came out without breaking due to the low mileage.
Number 8 has to be done from under the car, sticking your arm straight up alongside the block. The hardest thing is using two fingers (because that's all the room you have) to pull the plug wire off the plug and coil. I could have used some of Bruce Lee's <span style="font-style: italic">"One Inch Death Punch"</span> training to get the finger strength to work in that tiny work area. And of course, GM had to sharpen all the edges of every pointy piece of metal and shielding in the general area of the plugs and wires. At the moment, my right arm looks like it lost a fight with a rabid honey badger. The original Denso PTJ16R15 12563707 plugs were still in the engine. They look like they were burning nicely but the gaps had worn to over .060 over 14 years of running. I replaced them with some regular copper ACDelcos. She idles much more smoothly now. 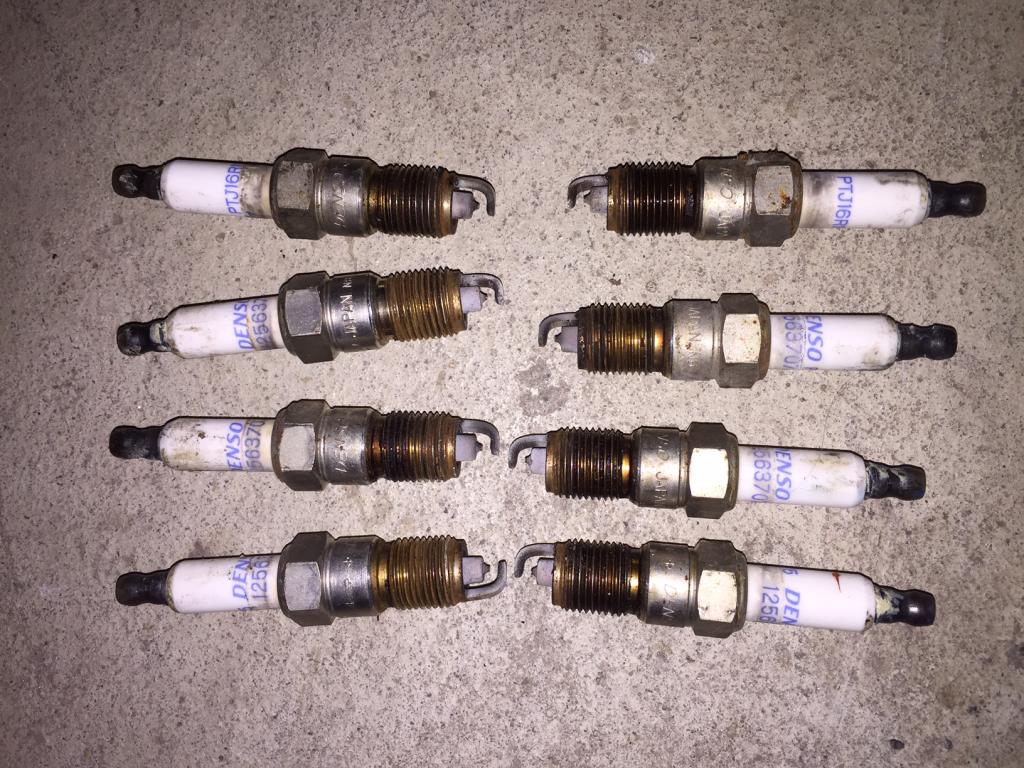
|
|
#10
04-16-2015, 12:14 AM
|
|||
|
|||
|
Did the dealer receipts show any spark plug replacements?
Jason
|
 |
| Thread Tools | |
| Display Modes | |
|
|


 Hybrid Mode
