
Dedicated to the Promotion and Preservation of American Muscle Cars, Dealer built Supercars and COPO cars. |
|
|||||||
| Register | Album Gallery | Thread Gallery | FAQ | Community | Calendar | Become a Paid Member | Today's Posts | Search |


|
|
|
Thread Tools | Display Modes |
|
#1122
 12-21-2010, 01:01 AM
|
||||
|
||||
|
This stuff is great: www.safestrustremover.com.

|
|
#1123
12-23-2010, 03:51 AM
|
||||
|
||||
|
I'm short on projects at the moment so I decided to tackle to original busted-up shaker so I have a spare eventually.
As you may recall the original was damaged in the carb fire and the edge was run over during the prior owner's rush to get the fire put out. I had my body guy strip it but when he found it was so damaged I told him to stop the work on it. The basic shaker domes are interchangeable from 71 to 76 (1970 had a thin edge version) but were modified depending upon the year it was used. From 70 to 72 they had a flapper valve that would be activated by two solenoids but starting in 73 the flapper was cancelled and a riveted cover and frame took their place in the rear opening. Here's my busted original:  Here it is with the mounting flange set on it. These were riveted to the shakers in a process that usually caused stress cracks in the fiberglass. The 70-72 mounting falnges have a two stud mounting system that attaches to the air cleaner with two wing nuts. The 73-76 units used a large ring that used a single screw to retain it to the air cleaner. 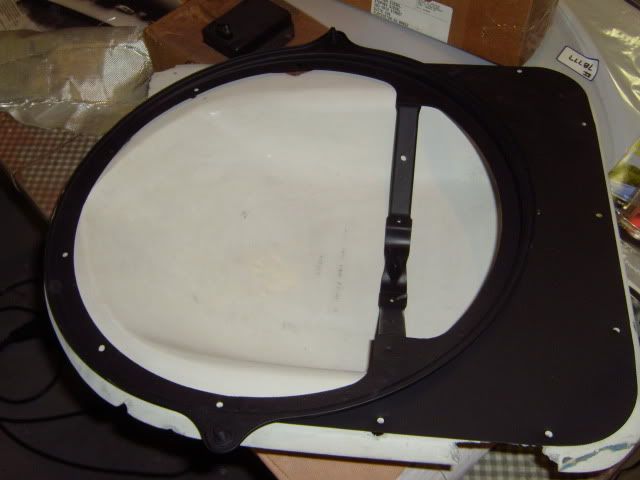
|
|
#1124
12-23-2010, 03:58 AM
|
||||
|
||||
|
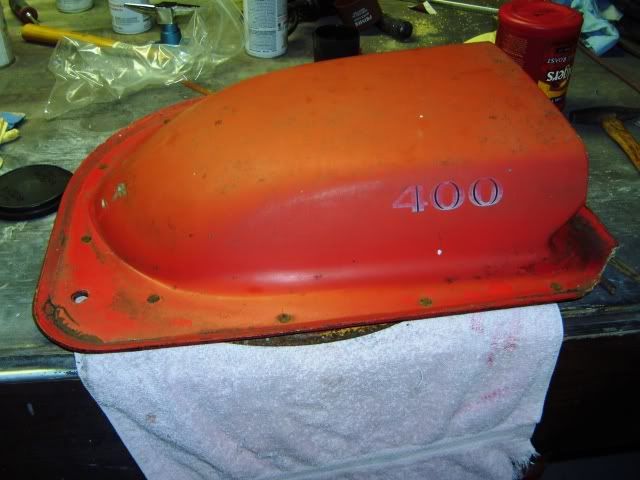
I found a 76 shaker dome on ebay for $70. I got it rather cheaply, since nobody wanted it because the metal mounting flange was unuseable as it was rusted with holes in it. The fiberglass, though was in remarkably nice shape with only one rivet stress crack and a small edge of the lip missing.
|
|
#1125
12-23-2010, 04:05 AM
|
||||
|
||||
|
Removing the rusted late model base plate flange was rather easy. There are a dozen or so rivets and I gently used a drill to cut the bottom of the rivet off, allowing the base plate to be removed.
   The remaining portion of the rivet can then be popped out of the hole with the tip of a pencil. 
|
|
#1126
12-23-2010, 04:11 AM
|
||||
|
||||
|
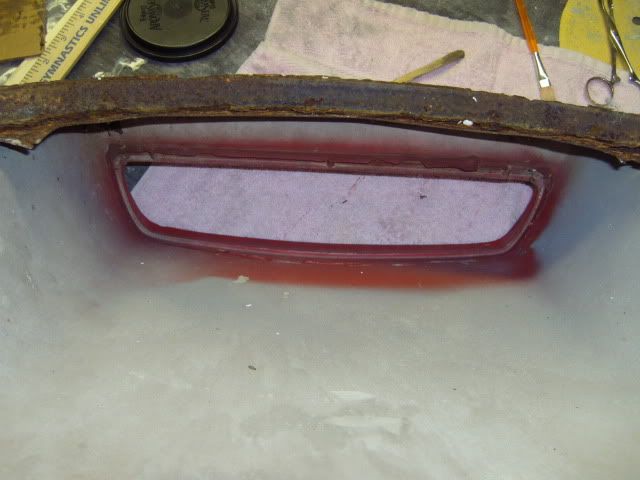
This is the flapper door assembly. Sorry I didn't take any photos but I was so busy fixing it, I forgot. The frame was a fiberglass jigsaw puzzle busted into four different pieces but I was able to reassemble and repair it with epoxy and fiberglass bondo.
  This assembly was originally glued into the shaker domes with some type of red resin epoxy that gets rather brittle with age, which is actually a benefit since it is easy to chip away in order to free either the flapper door assembly or the block off plate assembly. Here it is set into its original position in the busted shaker. 
|
|
#1127
12-23-2010, 04:19 AM
|
||||
|
||||
|
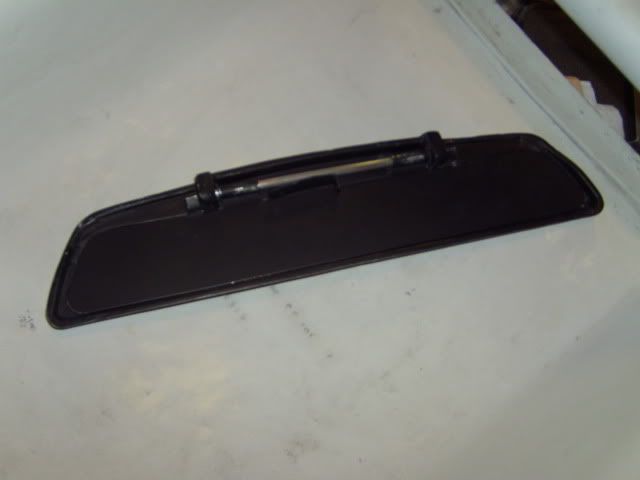
Luckily the prior owner of the 76 shaker dome had already relieved it of the block off plate and frame, leaving only some excess red resin epoxy to remove.
 That's it at the moment. Next step is to strip the paint off the red shaker and do the repairs of the rivet crack and the missing edge.
|
|
#1128
12-27-2010, 04:18 AM
|
||||
|
||||
|
I used some paint stripper and got the majority of the original red paint off the dome. Went pretty quick. I then washed and sanded it down with a handheld Black and Decker mouse sander.
 You can see the missing edge that needs to be reconstructed on the lower left. Also, anywhere I thought it looked like a stress crack was forming from a rivet hole, I grooved that area out with a Dremel tool. 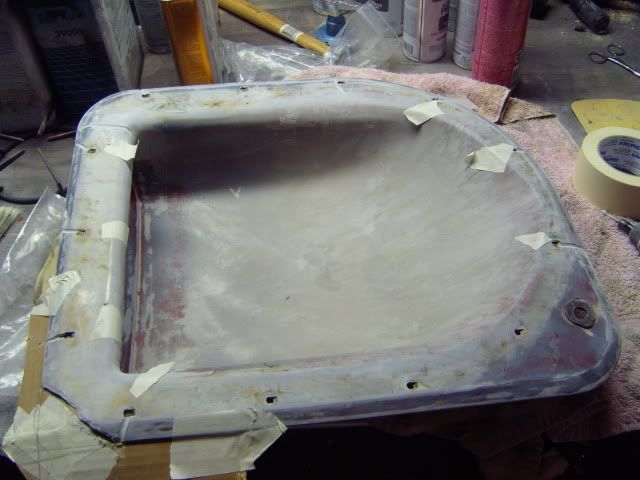
|
|
#1129
12-27-2010, 04:22 AM
|
||||
|
||||
|
To map out the area for the reconstruction, I taped some cardboard underneath and then estimated the outer dimensions.
 I then used a plastic bag under the supporting cardboard to prevent the fiberglass filler from sticking to the cardboard. After mixing the fiberglass Bondo, I applied it "liberally" to all the grooved areas and the edge area. 
|
|
#1130
12-27-2010, 04:27 AM
|
||||
|
||||
|
Here's what the repair looked like from the top side, after pulling the plastic bag and cardboard off. You can see one of the rivet hole stress cracks on the upper right rivet hole.
 And after some preliminary trimming and sanding. Once I got the underside flat, I used the busted shaker as a stencil, placing the two, flange to flange and traced the correct curve with a pencil onto the new shaker dome's underside. 
|
|
|
|


 Linear Mode

